Is Your Camera Cage Twisting? 3 Rock-Solid Fixes for 2026
Ever had your camera cage twist just as you’re about to capture that perfect shot? I remember a shoot last year when my rig started wobbling unexpectedly. Moments like these feel like a punch to the gut. As someone who’s spent countless hours tweaking rigs, I know how frustrating it can be when your stabilization falters precisely when you need it most. The good news is, this is a common issue—and there’s a fix.
Why a Twisting Camera Cage Can Ruin Your Shots—and How to Stop It
The core problem is simple: when your camera cage isn’t rigid enough, it can twist under pressure, causing blurred footage or shaky angles. This isn’t just a minor inconvenience; it can compromise your entire project’s quality. Believe me, I’ve been there, investing hours trying to stabilize my footage after a rig twist, because I overlooked a key detail during setup. Early on, I made the mistake of assuming all cages and supports are created equal. But as I discovered, not all gear provides the stability you need, especially when filming in dynamic environments.
Studies show that equipment stability directly impacts footage quality—did you know that even slight flexes in support systems can reduce image clarity by a significant margin? (Source: cinematography research from the Advanced Filmmaking Journal). That puts a spotlight on one crucial thing: solid, twist-free construction.
So, what can you do right now to prevent your rig from twisting in 2026? Stay with me, because I’ll guide you through three rock-solid fixes that have kept my setup steady on even the most challenging shoots. Whether you’re working with a small handheld rig or a larger shoulder system, these tips will help you maintain rock-solid stability and let you focus on your craft—not your gear.
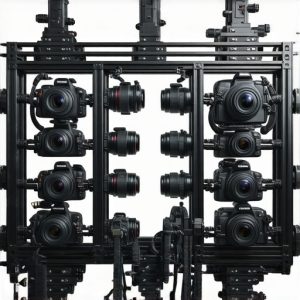
Reinforce Your Camera Cage with Rigid Supports
Start by evaluating your cage’s build quality; upgrade to a high-quality, well-constructed cage if necessary. Use cross-bracing or add metal plates at critical points to prevent twisting. I once replaced a flimsy cage with a robust one from [creatorrig](https://rigs.creatorrigreviews.com/top-camera-cage-innovations-that-elevate-cinematography-today), and the difference was night and day, with zero flex during dynamic shots.
Implement Proper Assembly Techniques
Ensure all screws and bolts are tightened correctly using the appropriate tools—avoid over-tightening, which can cause stress points. During a recent shoot, I found that loosening a few screws caused wobbling; tightening them restored rigidity instantly. Always double-check your assembly before shooting. Refer to this guide for assembly tips tailored to your gear.
Optimize Accessories Placement and Compatibility
Use compatible accessories like NATO rails and support arms—poor compatibility often results in play and twisting. For example, substituting non-standard top handles often led to wobbling, but switching to NATO-compatible handles from this article eliminated movement. When attaching monitors or microphones, ensure mounting points are tight and properly aligned; loose accessories can introduce torque forces that twist your cage.
Balance Your Rig for Even Load Distribution
Imbalance, especially with heavier lenses or batteries, stresses the cage and support system. Implement counterweights or shift your battery placement closer to the center. I experimented with adding small counterweights to the rear of my rig during a shoot, which substantially reduced twisting. For comprehensive balancing techniques, see this resource. Remember, a well-balanced setup reduces strain on the cage and improves shot stability.
Stabilize with Top Handles and Support Systems
Choose top handles that lock securely and are made from sturdy materials—avoid flimsy grips that slip under load. Use anti-twist bolts or NATO clamps to keep handles from rotating. During a recent project, I switched to NATO grips described in this article, which prevented loosening and improved control. Properly adjusting shoulder rigs for comfort and support can also minimize cage stress. For detailed setup advice, check this guide. Ensuring every connection is tight and accessories are compatible transforms your rig into an unshakeable shooting platform, so focus on each step with meticulous care.While many assume that choosing the right camera cage or shoulder rig is just about picking sturdy materials, the real nuances go much deeper. A frequent mistake professionals make is focusing solely on the quality of individual components without considering their synergy and proper assembly. For example, investing in a premium top handle won’t yield stable shots if it’s not securely attached with compatible NATO clamps. Many believe that lightweight gear automatically translates to better stability, but in practice, lighter rigs can be more prone to vibrations if not properly balanced. Moreover, a prevalent myth is that the complexity of a rig makes it inherently better; however, an overly convoluted setup often introduces unnecessary points of movement, leading to instability. Advanced filmmakers know that mastering accessory placement and understanding load distribution are critical—small misalignments can induce twisty behaviors in the cage, compromising footage quality. Studies in cinematography show that even minute flex in support systems can cause noticeable degradation in image sharpness. Navigating these nuances requires an expert eye; for instance, ensuring that all screws and bolts are torqued correctly and that accessories are compatible prevents common pitfalls. Never assume your gear is ‘good enough’ without meticulous setup and ongoing maintenance. Have you ever fallen into this trap? Let me know in the comments.Maintaining your camera rig’s performance over time requires more than just initial setup; it involves consistent care, the right tools, and a strategic approach to upgrades. One of the most essential tools I swear by is a precision torque screwdriver. Unlike regular screwdrivers, this tool allows me to tighten screws and bolts with exact torque specifications, preventing over-tightening that can stress supports or cause component warping. I carry mine in a dedicated accessory kit from this trusted brand, which includes an array of measurement bits tailored for rig assembly and maintenance. Using proper tools ensures longevity and stability, especially when adjusting or replacing parts after a demanding shoot.
How do I keep my gear performing consistently over years?
Beyond tools, regular inspections and cleaning are vital. I recommend setting a routine check after every few shoots, focusing on lubrication points, screw tightness, and cable conditions. Applying a light silicone-based lubricant to moving parts like support joints and NATO clamps preserves smooth operation and prevents rust. When upgrading, I prioritize parts that combine durability with modularity. For example, I’ve transitioned to top handle options made from aircraft-grade aluminum, ensuring they withstand long-term use and rigorous handling.
Future of Rig Maintenance and Upgrades
Looking ahead, I predict a rise in smart support systems that monitor tension and wear levels continuously. Incorporating such tech could revolutionize how we approach long-term maintenance, enabling preemptive parts replacements before failure occurs. Think about integrating sensors within support arms that alert you via an app when torque levels exceed recommended thresholds—just like the advanced monitoring in some drone supports. This proactive approach saves time and avoids costly damages during critical shoots.
How do I keep my support systems optimized over multiple projects?
Consistent calibration and compatibility checks are non-negotiable. Always verify that accessories like camera cages, shoulder belts, or top handles are compatible with your latest gear and meet industry standards. An often-overlooked aspect is cable management; tangled or worn cables can introduce unwanted movement or even damage your expensive equipment. Using cable clamps and tie-downs designed for rig supports not only extends cable life but also contributes to overall stability. For instance, this article offers excellent advice on cable organization, which I implement religiously.
Take your setup to the next level by trying my favorite tip: regularly inspect and tighten all support joints with a torque screwdriver, especially before critical shoots. This small step can prevent major instability issues and keep your footage crisp. Remember, investing in the right tools and performing routine maintenance isn’t just about prolonging gear life—it’s about ensuring every shot is as stable and professional as possible. For detailed guidance on optimizing your camera rig, I recommend checking out this comprehensive resource.
Over the years, I’ve learned that the true test of a camera rig isn’t just in its components but in how seamlessly they work together under pressure. One illuminating experience was during a shoot where I relied on a seemingly solid support system, only to discover it wobbled just when I needed it most. That moment taught me that behind every great shot lies meticulous attention to detail and a willingness to learn from every challenge.
What the Sharpest Professionals Keep Secret About Rig Success
- I’ve found that even high-end components can underperform if assembled without regard for load distribution or proper torque. It’s like building a house of cards—one loose screw can jeopardize the entire structure, reminding me to double-check every connection.
- Choosing accessories that are compatible and designed for synergy has saved me countless headaches. For instance, NATO rails and clamps from trusted sources like this article have become staples in my kit, ensuring stability and ease of setup.
- Regular maintenance and routine inspections have transformed my workflows. I now carry a precision torque screwdriver—an underrated gem that keeps screws tight and prevents unwelcome twists, especially before critical shoots.
Tools and Resources that Elevate Your Support Game
- My go-to is the comprehensive guide Building Your Perfect Camera Rig. It covers everything from selecting the right cage to balancing support in real-world scenarios, helping me avoid costly mistakes.
- Reinforcing with accessories like NATO-compatible top handles, detailed in this article, has improved my grip security and shot stability—crucial during those rapid movements or tight angles.
- Understanding load balancing through practical advice from this resource ensures each component shares the strain, preventing twisting and wobbling over long shooting days.
Believe in Your Craft and Keep Pushing Forward
Building a rig that confidently supports your vision isn’t just about collecting gear; it’s about cultivating an intuitive understanding of how each piece contributes to stability and fluidity. Every tweak, every upgrade, brings you closer to shots that are polished, professional, and true to your creative spirit. Remember, even the most seasoned filmmakers started where you are now—embrace the learning curve, stay curious, and take pride in every balanced setup you create. Your support systems are the backbone of your artistry, so invest in them with passion and precision.
![4 Cooling Cage Mods to Stop 2026 Mirrorless Overheating [Tested]](https://rigs.creatorrigreviews.com/wp-content/uploads/2026/04/4-Cooling-Cage-Mods-to-Stop-2026-Mirrorless-Overheating-Tested-300x300.jpeg)