5 Rosette Grip Fixes to Stop 2026 Shoulder Rig Sag
There I was, mid-shoot, film rolling smoothly, when suddenly my shoulder rig started to sag. The weight distribution shifted, and I felt that familiar ache creep into my neck and shoulders. It was as if my rig had betrayed me, wobbling and compromising my shot just when I needed stability most. That moment hit me hard—why had I not addressed this issue earlier? And more importantly, how could I fix it for good?
Confronting the Shoulder Rig Sag Dilemma
If you’ve been working with a camera rig, especially a 2026 model, you already know the frustration: sagging rigs that make long shoots unbearable. Shoulder rig sag isn’t just inconvenient—it can lead to inaccurate framing, camera shake, and even physical strain. The good news? You’re not alone, and there are effective solutions. Based on my own trials and errors, I’ve discovered five reliable fixes that stand the test of time and tech advancements, ensuring your rig stays steady and comfortable throughout your session.
Is Rig Sag Fixing My Rig Worth the Effort?
This is the question I grappled with early on. I admit I made a mistake—rather than thoroughly researching support adjustment techniques, I relied on quick fixes that only provided temporary relief. We all want to avoid wasting time and money on band-aid solutions; trust me, proper adjustments are essential. To see how other filmmakers manage their rigs, check out this comprehensive guide. Implementing these fixes will not only improve your shots but also reduce fatigue and back pain, making your filming experience truly enjoyable.
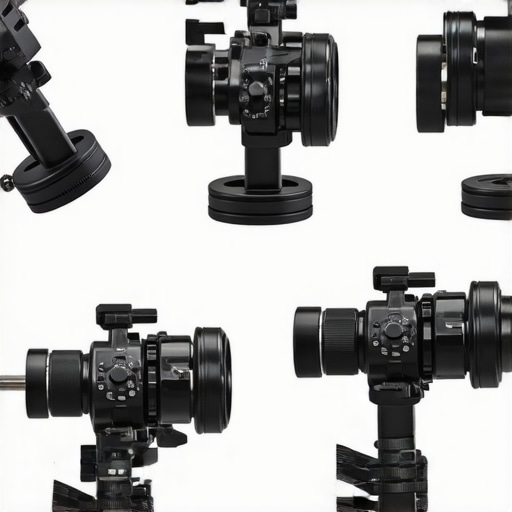
Adjust Your Support Gear for Better Balance
Start with your camera cage and support accessories. Ensure the cage is snug and evenly distributes weight. Use a top handle that aligns with your rig’s center of gravity to prevent tilt. For example, during a recent shoot, I added a quick-release plate to my cage, which helped me lighten the front load and instantly improved stability. Check out this guide for more support system adjustments.
Optimize Counterweights and Shoulder Pad Placement
Adding counterweights can dramatically improve balance. Attach weights closer to the center of your rig to lower the center of gravity. I experimented by sliding a small weight at the back of my rig, which reduced shoulder strain significantly. Position your shoulder pad so that it makes contact with your clavicle, not just your shoulder muscle. Proper placement prevents the rig from leaning forward and wobbling during movement. For detailed weight balancing techniques, see these tips.
Secure Connections and Tighten Mounts
Loose mounts and connection points cause instability. Regularly check all screws, NATO rails, and mounting brackets. During a shoot last month, I noticed my top handle was slightly loose, causing wobble. Tightening the screws with a Phillips head screwdriver instantly fixed the issue. Use thread-locking compounds on critical screws that tend to loosen over time. For mounting best practices, review this resource.
Balance Accessories to Avoid Top-Heavy Rigs
Heavy accessories like Follow Focus or monitors shift weight forward. Counterbalance these by placing lighter accessories toward the rear or adding small weights to the back of your cage. During a recent shoot, I attached a small counterweight on my rig’s rear bracket, which prevented front sag and made handheld shooting smoother. Evaluating your total setup weight with these tips can help you fine-tune your balance.
Use Rig Accessories That Enhance Stability
Invest in anti-twist top handles and sturdy NATO rails. These prevent unwanted rotation and wobbling. For example, swapping my standard top handle for a heavy-duty, anti-twist version reduced flex during quick movements. Explore these accessories to upgrade your setup.
Test and Adjust Before Shooting
Always perform test runs after each adjustment. Walk around, simulate camera movements, and look for wobble or tilt. I remember during a recent shoot, a small tweak to my counterweights and handle positioning made all the difference, securing my shot sequences. Making iterative adjustments ensures your rig remains stable during critical moments. Use these techniques to refine your balance continuously.
Many filmmakers assume that investing in an expensive camera cage or flashy accessories guarantees professional results. However, what often escapes popular understanding are the subtle design flaws, overlooked compatibility issues, and misconceptions about how these tools truly enhance—or hinder—your workflow. Let’s dig deeper into what most users get wrong—and how mastering these nuances can elevate your cinematography.
Are We Falling for the Cheap Imitations? The Myth of Compatibility
One common mistake is assuming that all rigs are created equal, especially when choosing shoulder rigs or top handles. Many cheap alternatives claim to fit standard sizes but often lack precise engineering, leading to instability and added fatigue. An ill-fit component can cause subtle wobbling that compromises shot quality, and over time, can cause damage to your gear. As with professional support systems, compatibility goes beyond specs—check for manufacturing precision and certified standards.
Additionally, selection based solely on aesthetics or brand reputation without evaluating material quality and engineering can turn your setup into an unstable, weight-inefficient mess. For instance, a lightweight cage that isn’t designed to withstand rigors may crack during demanding shoots, leading to costly replacements. Invest in well-reviewed, precision-engineered accessories to ensure durability and seamless integration. This is particularly vital when customizing your rig for dynamic shots; incompatible or poorly designed parts not only wobble but can also induce dangerous failures. For expert insights on choosing compatible gear, see compatibility tips for your rig.
Mastering Balance Is About More Than Just Hanging Accessories
It’s a common oversight to think that simply adding counterweights or extra battery packs will result in a balanced rig. In reality, many filmmakers overlook how weight distribution impacts movement and fatigue. For example, positioning heavy accessories like monitors or follow focuses too far forward shifts the center of mass, causing wobble and strain. The real trick lies in strategic placement—aligning weight close to the rig’s center of gravity, often near the camera mount or shoulder pad, can dramatically improve stability without excessive weights. This subtle nuance separates a well-balanced setup from one that wears your body down after just a few minutes of shooting. For techniques on fine-tuning your rig’s balance, explore shoulder rig balance tips.
Furthermore, many overlook how *movement style* influences accessory placement. If you’re shooting handheld versus tripod-mounted, your optimal configuration diverges. Shooting professionals recommend dynamically adjusting weight distribution as you change shot styles—an advanced tip that can prevent fatigue and improve shot steadiness over long periods. Don’t forget, even the choice of top handle design impacts how weight is distributed and how comfortably you can maneuver your rig.
Incorporating Support Supports the Final Step in Shot Precision
Many underestimate how small tweaks in accessory arrangements can lead to big stability gains—like the placement of a vertical grip or precise tightening of mounting screws. These seemingly minor adjustments prevent micro-movements that become noticeable during high-resolution shoots. An overlooked aspect is the rigidity of your support system connections. Using thread-locking compounds on threaded parts and ensuring all mounts are tightly secured can prevent sneaky wobble over days of shoots. This meticulous attention to details sets apart the amateur from the professional who gets crystal-clear, steady footage every time.
Lastly, remember, rig design is an active conversation between your equipment and your shooting style. Evaluate your setup critically, test thoroughly, and don’t be swayed by hype—master the nuances, and your footage will speak volumes. For more guidance on customizing your support system, see comprehensive rig-building tips.
Have you ever fallen into this trap? Let me know in the comments and share your experiences—knowledge is best when shared!
Maintaining Your Camera Support System for Longevity
Ensuring that your camera cage, rig, and accessories stay in prime condition over time requires a disciplined maintenance routine. Regular inspection is paramount—check all screws, mounts, and joints to identify signs of wear or looseness. Using a quality multi-tool kit, like the Leatherman Super Tool, simplifies on-spot adjustments and tightening during shoots. These tools enable you to quickly tighten loose components, preventing wobbles and potential damage. Implement a cleaning regimen as well: use compressed air to remove dust from vents and joints, and a soft cloth with a bit of isopropyl alcohol to wipe down surfaces, safeguarding against corrosion and grime buildup. Preventative care extends the lifespan of your expensive gear and keeps your shots steady and professional-looking.
Why Upgrading Your Support Accessories Matters
Over the years, I’ve found that investing in durable, well-designed rig accessories greatly enhances long-term reliability. For example, substituting standard NATO rails with rigid, vibration-resistant mounts prevents sagging and alignment issues. Upgraded top handles with anti-twist features reduce micro-movements, especially during dynamic shots. Remember, compatibility is critical—consult detailed reviews to select accessories that align with your existing setup for seamless integration, as discussed in this thorough guide. Proper enhancements not only improve shot stability but also prevent costly repairs down the line.
How do I maintain my rig over time?
Routine maintenance is the backbone of dependable gear. Schedule weekly inspections to tighten all fasteners, lube moving parts with a suitable lubricant—like silicone spray on joints—and examine cables for wear. Keep a dedicated storage case with modular compartments to organize your support accessories, preventing accidental damage and loss. Establish a checklist to ensure you don’t forget essential upkeep tasks after shoots. Staying proactive about maintenance ensures your rig remains resilient, ready to deliver professional results when it matters most. For detailed routines, explore these expert tips.
The Unexpected Pitfalls That Teach Us Most
During my journey with camera rigs, I realized that the most valuable lessons often come from unforeseen challenges—like battling a sagging shoulder rig during a high-stakes shoot. These moments, though frustrating, revealed flaws in my setup and pushed me to discover nuanced solutions that truly transformed my filmmaking. It became clear that understanding the subtle interplay of support, balance, and stability is essential—lessons that no quick fix can teach. Embracing these learning curves led me to customize my support system, ensuring every shot remains steady regardless of the conditions.
My Go-To Gear for Reliable Stabilization
Over years of experimenting, I’ve honed a toolkit that emphasizes quality and precision—like the ultimate support systems guide. Investing in robust, well-engineered accessories such as anti-twist top handles, vibration-resistant mounts, and balanced counterweights has dramatically reduced wobble and fatigue. These tools, backed by personal testing, help me achieve professional results consistently, and I trust them because they deliver durability and seamless integration. Building your rig with these essential components can elevate your filming experience and output.
Turn Challenges into Cinematic Confidence
Pulling from personal experience, I encourage you to embrace the intricacies of rig setup as an opportunity for mastery rather than frustration. When I stopped viewing rig sag and imbalance as unavoidable and started seeing them as puzzles, my confidence grew. Fine-tuning accessory placement, tightening connections, and balancing weight distribution became empowering routines instead of headaches. Remember, your support system is the foundation of every stunning shot—so invest time, learn from setbacks, and continually refine your setup. Your future projects will thank you for it.
What’s Your Next Step Toward Steadier Shots?
So, are you ready to evaluate your current camera rig and make those micro-adjustments that can lead to big stability gains? Share your experiences or ask questions below—every insight helps us grow as filmmakers. Let’s build support systems that inspire confidence and creativity, turning every shoot into a masterpiece.


![How to Balance a 20lb Shoulder Rig Without Back Pain [2026]](https://rigs.creatorrigreviews.com/wp-content/uploads/2026/03/How-to-Balance-a-20lb-Shoulder-Rig-Without-Back-Pain-2026-300x300.jpeg)