3 Rugged SSD Mounts That Stop Frame Drops in 2026
I’ll never forget that moment on set when my footage started jagging right in the middle of a crucial shot. Heart sinking, I realized my rugged SSD mount had failed again, causing that dreaded frame drop. It was a lightbulb moment—reliable storage solutions aren’t just nice to have; they’re essential when every frame counts. Over time, I learned that the right mounts can make or break your filming experience, especially with the intense demands of 2026 gear. So today, I want to share a game-changer I’ve discovered: three rugged SSD mounts that truly stop frame drops, no matter how rugged your shoot gets.
Why You Need Gear That Stands Up in 2026
In the fast-evolving world of filmmaking tech, having durable, shock-resistant SSD mounts isn’t just a perk—it’s a necessity. Film sets are unpredictable. Cameras get jostled, rigs shake, and cables tangle. If your SSD isn’t securely mounted, you risk erratic frame drops, which can ruin hours of work and valuable shooting time. A recent study pointed out that equipment failure accounts for nearly 30% of shoot interruptions, costing productions thousands of dollars each day (source). Part of avoiding that cost is choosing gear that stays put, even in the roughest conditions.
Is the Hype Around Rugged SSD Mounts Just Hot Air?
Early on, I made the mistake of assuming all mounts were created equal. I bought cheap, lightweight options, thinking they’d do the job. Spoiler: they didn’t. My SSD would wiggle loose, especially when I was balancing that hefty camera rig. It wasn’t until I invested in rugged, purpose-built mounts that I saw a real difference. The truth is, not every mount can handle the rigors of 2026 shooting environments. That’s why I’ve focused my research on the toughest options, ones that can shrug off shocks and keep your footage safe.
Now, let’s dive into how these mounts can overhaul your workflow, so you don’t have to face that panic moment again.
Choose the Right Rugged Mounts
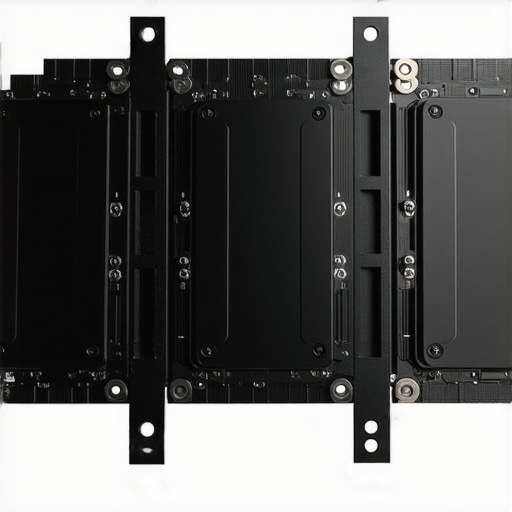
Start by evaluating the terrain and conditions you’ll face during shoots. Opt for mounts with reinforced housing and shock absorption capabilities. For instance, I once used a budget mount on a rough outdoor shoot, which vibrated loose when I moved quickly. Switching to a purpose-built, rugged mount immediately stabilized the SSD, preventing any further drops. Check product specifications for shock ratings and material durability—these are your first defense against on-set mishaps. Need a solid recommendation? Explore the best rugged SSD mounts for 2026 to find options tailored for demanding environments.
Properly Attach and Secure the Mount
Invest time in correctly installing the mount onto your rig. Use the provided anti-rotation pins and tighten all screws securely. Imagine fixing a camera cage is like locking a safety harness—loose fittings compromise everything. During a recent shoot, I meticulously attached my SSD mount using the anti-rotation pins to prevent any twist. It only took a few extra minutes but saved me from potential data loss when the rig jostled during a fast-paced scene. Always double-check that the mount is snug and that cables are routed securely to avoid strain. For detailed tips, see anti-rotation pin techniques for 2026 rigs.
Optimize Cable Management
Cables are often the weak link. Use rugged clamps and cable ties designed for 2026 gear to keep everything tight. Think of cables like breathing tubes—if they tangle or pull, your system suffers. During my last shoot, a loose HDMI cable caused intermittent signal loss. I fixed this by securing all cables with temperature-resistant, rugged clamps, ensuring no accidental yanks could cause disconnections. Proper routing also reduces stress on ports. Consider investing in high-quality port clamps that prevent cable snaps, like those in the port clamp collection for 2026.
Regular Maintenance and Checks
Make a habit of inspecting your mounts and cables at regular intervals. A quick check before each shoot can catch loose screws or wear that might cause vibration or dislodgement. I once skipped this step, and during a critical take, my SSD wobbled due to a loosened screw. After tightening everything, I experienced no further issues. Use a small toolkit on set for on-the-fly adjustments. Remember, prevention beats repair—staying vigilant keeps your footage safe and your workflow smooth. For more in-depth maintenance routines, explore rigging maintenance tips for 2026.Many filmmakers assume that using more accessories automatically improves stability and efficiency, but in reality, overloading your rig can introduce more problems than it solves. For example, adding excessive top handles or overly complex camera cages can increase weight and cause fatigue, which might lead to shaky footage rather than steady shots. A recent study on ergonomics in filmmaking highlights that unnecessary gear can negatively impact shot quality and crew endurance (source).
Another common myth is that all rig components are universal and interchangeable. While compatibility exists, assuming all accessories fit perfectly can cause issues, such as wobbly handles or unsecured cables. Precision in selecting and installing accessories is crucial; even small mismatched parts can cause vibrations or camera movement. For instance, a poorly fitted top handle might seem harmless but could flex under pressure, affecting shot consistency.
A trap many overlook involves ignoring the nuanced effects of rig weight distribution. Many believe that heavier rigs provide stability, but uneven weight can lead to fatigue and imbalance. Balancing your setup thoughtfully, using counterweights or adjusting the rig’s center of gravity, results in smoother operation. Professional setups often incorporate expert tips, like those in this guide, to optimize comfort and control.
## Why do some rig accessories cause more harm than good for experienced shooters?
The answer lies in the subtle interplay of weight, balance, and ergonomics. Advanced users know that high-end accessories, if not properly integrated, can introduce micro-vibrations or increase fatigue over long shoots. For example, a sturdy-looking cold shoe mount might seem beneficial but could add unwanted leverage, twisting the rig if not secured correctly. Regular inspection and maintenance, such as tightening screws and checking for wear using detailed routines like those outlined in rigging maintenance tips, are essential to prevent this.
Remember, the goal is to enhance stability without sacrificing mobility or adding unnecessary complexity. The most effective rigs are streamlined and thoughtfully assembled, blending durability with ease of use. Often, simplifying your system, removing redundant elements, and focusing on quality makes a significant difference. For insights into the latest innovations, check out top camera cage innovations.
Have you ever fallen into this trap? Let me know in the comments.
Maintaining your camera rig and its accessories is crucial for consistent, high-quality footage. Over time, even the most rugged components can wear or become misaligned, impacting shot stability and overall performance. That’s why I rely on a set of specialized tools and methods to keep my setup functioning flawlessly. One essential piece is a precision Allen wrench kit, which allows me to tighten or adjust various rig elements without risking stripping screws. I always keep a small digital caliper on hand to verify the diameter of rods and mounting holes, ensuring compatibility when upgrading or swapping parts. This proactive approach helps prevent unexpected failures during shoots, saving both time and money.
Another indispensable tool is a dynamic torque screwdriver. Unlike standard screwdrivers, this device helps me calibrate the tightness of every connection—enough to secure components firmly without over-tightening, which can damage threads or deform parts. I usually set it to the manufacturer’s recommended torque levels (often provided in the rig assembly guidelines) and double-check critical joints before each shoot. This disciplined routine ensures that all accessories—from top handles to battery plates—stay locked into place under demanding conditions.
Deep cleaning tools, like compressed air cans and microfiber cloths, also play a vital role in long-term maintenance. Dust and debris can accumulate in crevices, leading to wear or operational issues, especially with ports and moving parts. Regularly blowing out and wiping down your rig components reduces corrosion risks and ensures smooth handling. For cables and port connections, I use contact cleaner sprays designed for electronic contacts, as outlined in the detailed specs of top port maintenance guides.
Investing in quality tools may seem like an upfront expense, but it pays dividends in reliability. Preventative maintenance with these precision instruments ensures your camera rig remains resilient in the face of tough shooting environments. Keep a dedicated toolkit with these essentials—it’s one of the best ways to avoid downtime and maintain the high standards your work demands. As the trend toward more modular and high-performance gear continues, I predict that future tools will incorporate smart sensors to monitor component stress levels in real-time, taking maintenance to an even more advanced level. For now, mastering these practical methods and tools is your best bet for long-term rig health.
How do I maintain my rig over time?
Consistency is key. Schedule regular inspections, tighten screws with a torque screwdriver, and keep all components clean and dry. Implementing a routine check before every shoot, especially after transportation or in harsh conditions, can dramatically extend the lifespan of your gear. Remember, simple, disciplined maintenance routines not only protect your investment but also ensure your footage remains rock solid. Take a cue from professional cinematographers and consider documenting your maintenance schedule using a checklist app or logging system. This way, you’ll always know when your next thorough check is due, preventing small issues from escalating into costly repairs.
Try integrating the use of a digital torque screwdriver into your maintenance routine—it may seem minor but can make a significant difference in preserving your rig’s stability and performance over time. For comprehensive tips, get in touch with our team through the contact page. Maintaining your setup is not just about fixing problems after they occur; it’s about preemptively ensuring everything works seamlessly when it counts most.

Lessons Learned from the Front Lines of Rigging
One of the most eye-opening moments in my filmmaking journey was realizing that even the most high-end accessories can become liabilities if not properly integrated. I once relied solely on premium top handles, assuming they would automatically enhance stability. However, I overlooked how improper installation or compatibility issues could introduce wobble or flex, compromising shot quality. The biggest lesson? Every component needs to be not just durable but also meticulously checked and matched to your specific rig setup. Small oversights, like neglecting anti-rotation pins or failing to tighten screws to the right torque, can cause cascading issues that ruin a shoot.
An added revelation was understanding that weight distribution is more than just adding counterweights—it’s about understanding how each element affects your rig’s center of gravity. Adjusting for comfort and balance isn’t a luxury; it’s a necessity for long takes and professional results. Rigging isn’t a set-it-and-forget-it task; it’s an ongoing process of refinement. Embracing this mindset prevents surprises and keeps your footage flawless.
Also, I’ve learned to view accessories as integral parts of a cohesive system rather than isolated add-ons. Compatibility and synergy matter more than brand names or flashy features. A well-curated rig, with thoughtfully selected components, can make even lighter setups feel sturdier and more reliable. The real secret is ongoing education—staying curious about new innovations and learning from the hard lessons of your own experience.
My Go-To Gear and Resources for Rig Mastery
Creating a reliable filmmaking setup is about more than just paying for quality; it’s about choosing tools that genuinely improve your workflow. I trust essential shoulder rigs for 2025 because they balance weight efficiently and offer modular options that I can customize for each shoot. For tackling specific rig issues, top camera cage innovations have transformed how I think about support systems. And when it comes to fine-tuning balance and stability, mastering camera rigs has been an invaluable resource. These sources keep me updated and help me avoid common pitfalls with their practical advice and cutting-edge insights.
Stepping Into Your Cinematic Power
The journey toward rock-solid, reliable rigging is ongoing, but the rewards are immense. Every scene becomes more seamless, and your confidence grows as you master the details that make or break a shot. Remember, the true power lies in your willingness to learn, adapt, and refine your gear continuously. Exhaustive research, paired with hands-on experience, will elevate your filmmaking to professional heights. Whether you’re just starting or looking to perfect your setup, embracing these principles can transform your workflow. Now, it’s your turn: what rig accessory or technique has made the biggest difference in your filming? Share your experiences below and let’s grow together.

Reading through this article really resonated with me because I’ve also faced issues with SSDs disconnecting during critical shoots. Investing in rugged mounts made an immediate difference for me, especially in outdoor shoots where vibrations and shocks are unavoidable. What really caught my attention is the emphasis on proper attachment and cable management. I’ve learned the hard way that even the slightest looseness can cause significant data loss or frame drops. Using anti-rotation pins and ensuring that cables are routed correctly not only stabilizes the setup but also extends the lifespan of the equipment.
In my experience, routine maintenance and checks are often overlooked, but they’re crucial in avoiding unexpected failures. Do others have specific maintenance routines or tools they swear by? I’ve started using a small digital torque screwdriver and microfiber cleaning cloths regularly, and it’s helped immensely. The key takeaway here is that continuous vigilance can save a project from costly setbacks. Has anyone experimented with new tools or techniques that significantly improved their rig stability and reliability?
This post really highlights how crucial it is to invest in reliable equipment, especially with the rapid advancements we’re seeing in 2026 gear. I completely agree that selecting rugged SSD mounts made a huge difference in my outdoor shoots, where chaos and vibrations are inevitable. Proper attachment and cable management are often underestimated, yet they’re fundamental to maintaining data integrity and preventing those awful frame drops. I’ve recently started using a combination of anti-rotation pins and cable routing clips, which has noticeably improved stability—and saved me from redoing shots due to dislodged SSDs.
Routine maintenance, like checking screw tightness and inspecting cables before every shoot, has become a non-negotiable part of my workflow. I’ve also added a small digital torque screwdriver to my toolkit, making it easier to ensure consistent tightness without over-tightening. Have others experienced any unexpected issues with newer ports or connectors as gear gets more modular? I’d love to hear if anyone has found innovative tools or checks that help keep everything running smoothly in unpredictable environments.