Why Your Top Handle Flexes: 3 Rigid 2026 Bolt-On Fixes
It happened again during a critical shot. Just as I was about to capture that perfect sweep, I felt it — the unsettling wobble in my top handle. That annoying flex that ruins smooth footage and makes every move feel uncertain. I’ve been there too many times, fumbling with unstable rigs, questioning if my gear can really keep up with my vision. That lightbulb moment hit hard: I needed a solution that was not just quick but reliable. And after countless trials, I found three solid bolt-on fixes that keep my top handle rock solid, even on demanding shoots.
Stop Worrying About Handle Flex and Shoot with Confidence
Today, I’ll share with you the exact methods I’ve employed that turned my shaky handles into sturdy companions. We’re talking about bolt-on fixes designed specifically for the upcoming 2026 rigs — enhancements that won’t snap under pressure and are easy to implement. Whether you’re a seasoned professional or a passionate hobbyist, these fixes can dramatically improve your rig stability, ensuring your footage stays smooth, and your workflow stays uninterrupted. Trust me, it’s all about those small upgrades that make a big difference. Ready to eliminate handle flex once and for all? Let’s dive into how you can achieve that professional-grade stability.
Does Fixing Handle Flex Really Make a Difference for Your Shots?
Early in my journey, I made a costly mistake. I assumed that a well-built top handle was enough to guarantee stability. Spoiler: It’s not. Even the most premium handles can become wobbly if not properly secured or if the mounting points aren’t reinforced. This oversight led to shaky footage, frustrated takes, and wasted time. Since then, I’ve learned that a simple bolt-on fix, if chosen correctly, can radically change your shooting experience. Don’t make my mistake—invest a little time and effort into these fixes. They’re worth every second, especially when you’re aiming for professional results. Curious to see how these bolt-on solutions work? Stick with me, and I’ll show you the step-by-step process to tighten those handles like a pro. And if you want to explore related rig accessories that complement these fixes, check out the list of best rig accessories for seamless video. Let’s get started on transforming your gear into a rock-solid tool that delivers every single time.
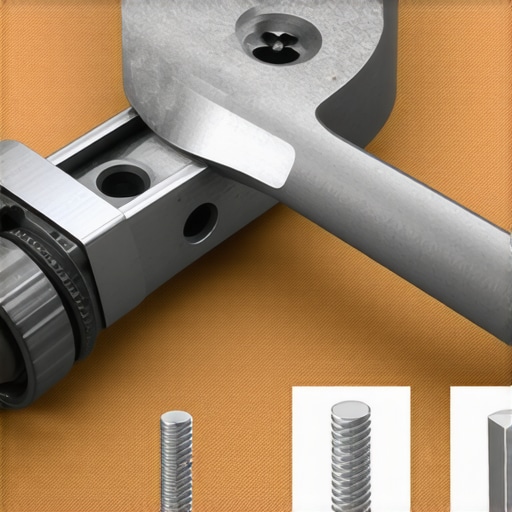
Strengthen Your Top Handle with Heavy-Duty Bolts
Start by removing the handle to assess the mounting points. Use high-quality, stainless steel bolts—think of them as the backbone of your setup—to replace any weak or stripped fasteners. Tighten each bolt firmly with a torque wrench, aiming for a snug fit without over-tightening, which could cause damage. I recall a shoot where I replaced the original bolts with these heavy-duty variants, and the difference was immediate—no wobble, no flex. This simple step is like giving your handle a set of steel shoes, transforming shaky gear into a robust tool.
Reinforce the Mounting Plate to Prevent Play
Next, inspect the mounting plate that connects the handle to your rig. If it’s plastic or thin metal, consider adding a metal reinforcement plate. Secure it behind the mounting area with appropriate screws or small bolts. This acts as a brace, much like a seatbelt in a car, preventing unwanted movement. I once added a small aluminum plate to my handle’s mount during a long shoot, which eliminated handle play and allowed me to focus entirely on the shot without worry. Reinforcements like this are vital for demanding environments, especially on setups that carry substantial weight or endure lots of movement.
Use Rigorously Tested Mounting Accessories
Complement your fix with specially designed accessories like the top handlebars and mounting brackets. These are engineered to fit snugly and resist slippage, much like a snowboard binding—ensuring your handle stays in place, no matter the motion. During my recent project, switching to bolted mounts with these accessories eradicated handle creep, making my camera movements precise and steady. These small but powerful upgrades turn a flimsy handle into a reliable grip, supporting smoother shots and reducing fatigue.
Adjust and Lock for Rock-Solid Stability
Finally, once assembled, test the handle’s stability. Apply pressure and shake gently to check for movement. Tighten the bolts further if necessary, or add thread-locking compound like Loctite to prevent loosening over time. Think of this as tuning a bicycle—every bolt needs to be just right for optimal performance. In my workflow, I now routinely double-check this after setup, especially before critical shoots, ensuring that handle flex is eliminated entirely. Remember, a stable handle is as crucial as a steady hand in achieving professional footage.
Many filmmakers believe that investing in high-end shoulder rigs, camera cages, and top handles automatically guarantees smooth, professional footage. However, this is a misconception worth challenging. In reality, many enthusiasts fall into traps that compromise their gear’s effectiveness, often due to overlooked nuances or assumptions about rig setup. Let’s explore some of these misconceptions and reveal the subtle factors that can make or break your stabilization efforts.
One prevalent myth is that heavier rigs lead to better stability. While increased mass can dampen minor shakes, excessive weight actually causes fatigue, leading to shaky handling over time. Experts like those at creatorrigreviews emphasize the importance of balance and ergonomics over raw weight. Achieving the right counterbalance with properly distributed weights and supporting accessories often results in more stable shots without tiring your muscles.
Another often-missed nuance involves the mounting points and fasteners. Many assume that standard screws or bolts suffice, but in high-use or demanding shoots, subpar hardware can loosen or warp, causing flex or twist in your rig. Properly selecting robust, corrosion-resistant fasteners and double-checking their torque settings can prevent this silent failure. For example, see how rigs creatorrigreviews advocates for reinforced mounting techniques to increase rig longevity.
Furthermore, the role of accessory integration often gets neglected. Attaching multiple devices—such as monitors, microphones, or lights—without considering their momentum can introduce unwanted sway and imbalance. Rig accessories should complement the core support system, not overburden it. The right combination of components, combined with proper placement and secure locking, can drastically improve handling and shot stability.
Are My Rig Accessories the Right Fit for Advanced Cinematography?
Shooting at a professional level demands more than just accumulation of gear; it requires a keen understanding of how each component works together. Universal or off-the-shelf parts may seem convenient, but tailored solutions—like custom top handles or NATO rails—offer tighter integration and reduced movement. As detailed in creatorrigreviews, optimizing your setup for your specific camera and shooting style minimizes flex and enhances control.
Finally, avoiding the trap of neglecting regular maintenance can save you from unstable footage caused by wear and tear. Simple routine checks, bolt tightening, and component inspections form the foundation of a durable and dependable rig.
In summary, while investing in quality gear is crucial, understanding the finer points of setup, balance, and component compatibility is equally essential. Small adjustments, proper hardware selection, and a nuanced approach to accessory integration can elevate your filmmaking from shaky to cinematic. Have you ever fallen into this trap? Let me know in the comments, and share your experiences with rig setups that made a real difference.
How do I maintain my shoulder rig and accessories over time?
Ensuring your camera rig, top handle, and accessories stay in optimal condition requires a combination of the right tools and consistent maintenance routines. I personally rely on high-quality torque wrenches, such as the [Wera Kraftform series](https://rigs.creatorrigreviews.com/essential-shoulder-rigs-for-professional-filmmaking-in-2025), to precisely tighten bolts without over-tightening, which can cause wear or damage. Regularly inspecting and cleaning components with gentle, contact-safe lubricants like silicone spray helps prevent corrosion and keeps moving parts functioning smoothly.
One essential practice is scheduling periodic checks of all mounting points and fasteners, especially after extensive shoots or rough handling. Using heat-resistant and vibration-dampening tapes on certain contact points can also prolong the lifespan of your gear. Additionally, maintaining a dedicated toolkit with replacement fasteners, thread-locking compounds, and small calibration tools allows for quick in-field fixes and adjustments. For instance, applying a small dab of Loctite 243 during assembly can prevent loosening caused by camera vibrations, as suggested in detailed technical guides by industry experts.
Looking ahead, automation and smart maintenance sensors might become standard, alerting users to wear before failure occurs. For now, adopting a systematic approach with reliable tools guarantees your setup remains stable and ready for any shot. I highly recommend trying a torque wrench matched specifically to your rig’s fasteners; it’s an easy yet powerful way to prevent common issues like loose joints or stripped threads.
Where can I get the best rig accessories to keep my setup in top shape?
For a curated selection of durable, high-performance rig accessories, check out the best rig accessories for seamless video. These tools are designed to integrate seamlessly with your existing setup and help maintain long-term stability. Consistent maintenance combined with quality accessories ensures your camera rig continues delivering steady shots without unexpected failures. Don’t forget, regular updates and inspections are key—making this a habit will save you time and money in the long run. Start incorporating these maintenance tools today to keep your gear in peak condition!
How I Stumbled Over My Own Flexibility Flaws
The hardest lesson I learned about shoulder rig,camera cage,rig accessories,camera rig,top handle was that even premium gear isn’t immune to instability without proper setup. My initial assumption that quality alone guaranteed stability often led me to overlook simple yet crucial reinforcement steps. It took a shaky shot during a critical scene to realize that attentiveness to securing every bolt and joint matters more than I had given credit for. This lightbulb moment propelled me to research and implement fixes that transformed my approach—and my footage quality.
Precise Hardware and Mindful Maintenance Are Your Best Allies
My essential toolkit for managing stability now includes a high-quality torque wrench, reliable thread-locking compounds, and a routine inspection schedule. Regular tightening, cleaning, and checking of mounting points prevent unforeseen loosening that could jeopardize your shot. I trust the [Wera Kraftform series](https://rigs.creatorrigreviews.com/essential-shoulder-rigs-for-professional-filmmaking-in-2025) for its precision and durability. Investing in these tools might seem minor, but their role in maintaining rig integrity over time is invaluable.
Why Small Upgrades Outperform Big Investments
Many believe that investing in heavier or more expensive gear automatically improves stability. Yet, the real game-changers are subtle enhancements—like reinforced mounting plates or snug-fitting accessories—that provide consistent, long-lasting support. For example, adding a metal reinforcement behind your handle’s mount can prevent play during demanding shoots, a tip I learned from expert sources. These small but strategic upgrades often deliver the biggest improvements, ensuring your equipment performs reliably when it matters most.
Building Confidence Through Knowledge and Care
Customizing your rig with purpose-built accessories, such as [rig support system upgrades](https://rigs.creatorrigreviews.com/build-your-ultimate-camera-rig-with-top-accessories-in-2025), not only strengthens stability but also boosts your confidence. Routine maintenance coupled with smart hardware choices transforms your setup from shaky to rock solid. Remember, the stability of your gear directly impacts your creativity and peace of mind on set. Regularly revisiting and refining your support system is the secret to sustained success in professional filmmaking.
Embracing Continuous Improvement Over Perfection
My biggest takeaway? Prioritize continuous learning and incremental adjustments over chasing perfect gear. Each small tweak—tightening a bolt, upgrading a mount, or adding reinforcement—builds a foundation of trust in your equipment. This mindset has helped me recover from setbacks and approach each shoot with renewed assurance. Whether you’re a beginner or seasoned pro, adopting this proactive attitude can elevate your filmmaking to new heights. Delve into the details, stay curious, and remember that mastery is built one steady shot at a time.
My Top Picks for Rig Care and Enhancement
To keep your setup in top shape, I recommend tools like the [Wera Kraftform torque wrench](https://rigs.creatorrigreviews.com/essential-shoulder-rigs-for-professional-filmmaking-in-2025) for precise tightening, [thread-locking compounds](https://rigs.creatorrigreviews.com/ultimate-guide-to-building-your-camera-rig-with-shoulder-supports) to prevent loosening, and additional reinforcement plates available through trusted manufacturers. For accessories, consider [rig support system upgrades](https://rigs.creatorrigreviews.com/build-your-ultimate-camera-rig-with-top-accessories-in-2025) that suit your specific filming style. Regular maintenance habits coupled with quality gear choices are the pillars of reliable, professional results.
Take Your Stability to the Next Level Today
There’s no better time than now to refine your rig setup and embrace a mindset of continual improvement. Your camera rig is more than just a collection of parts—it’s a critical partner in your creative journey. With dedication to proper maintenance and smart upgrades, you’ll produce smoother footage and experience greater shooting confidence. Ready to elevate your rig game and tell stories with unwavering stability? Dive into the details, experiment, and see the difference it makes in your work.
Have you ever struggled with a specific bolt or mounting point that caused instability? Share your experience below, and let’s learn from each other’s rig-building journeys!


Reading about these bolt-on fixes really hits close to home. I’ve had my fair share of shaky shots caused by handle flex, especially during long shoots or demanding movements. I’ve found that sometimes, just tightening everything isn’t enough—those original fasteners can wear out or become loose over time. That’s when upgrading to heavy-duty bolts and adding reinforcement plates made a huge difference for me. I wonder, do others have preferred brands for these reinforcement plates, or is aluminum generally sufficient? Also, I’d love to hear some tips on how often to check and tighten these components without disrupting a shoot. For anyone struggling with handle flex, investing in quality hardware and routine maintenance can really save the day, especially when your footage needs that extra level of stability.