Stop Side Handle Play: 4 Sturdier Mounting Tips for 2026 Rigs
Ever had that gut-wrenching moment when your top handle suddenly wobbles, threatens to shake loose, or makes your shot look shaky despite steady hands? I can’t count how many times I’ve felt that sinking feeling during a critical take—especially when working with heavier rigs or intricate setups. One day, I realized that the culprit wasn’t just my shaky hands, but a flaw in how my top handle was mounted. That lightbulb moment transformed my workflow and the quality of my footage. If you’re tired of dealing with top handle sway and want your shots to be rock solid, you’re in the right place.
Why Your Top Handle Might Be Sabotaging Your Shots
When I first started experimenting with camera rigs, I thought that tightening screws was enough to keep everything stable. Turns out, the way you mount your stop side handle makes a huge difference. Over time, I learned that even the sturdiest top handles can become loose or play because of poor mounting techniques, especially with the evolving design of 2026 rigs. A loose handle isn’t just an annoyance; it can introduce unwanted movement, compromise framing, or even cause damage to your gear.
Research shows that stabilizing support systems are crucial for professional filmmaking. According to a recent article by Creator Rig Reviews, using proper mounting methods can dramatically enhance your camera stability, especially in dynamic shooting environments. This is why investing effort into better mountings isn’t just an upgrade—it’s a requirement for quality cinema work.
Is Better Mounting Really Worth the Effort?
Early in my journey, I made the mistake of assuming that standard screws and clamps could handle the demands of heavier rigs. Spoiler: they couldn’t. This quick assumption led to shaky footage and endless re-shoots. Once I adopted more robust mounting solutions, the difference was night and day. It’s a mistake I see many newcomers make—underestimating how much a secure mount impacts your footage. If you’ve faced similar frustrations, know that smarter mounting techniques could be the game-changer.
Now that I’ve shared my experience, let’s dig into the practical, proven tips that will help you secure your top handle with confidence, keeping your shots stable and your rig reliable. Ready to elevate your filmmaking? Let’s start with some simple, effective strategies that will make your rig more solid than ever.
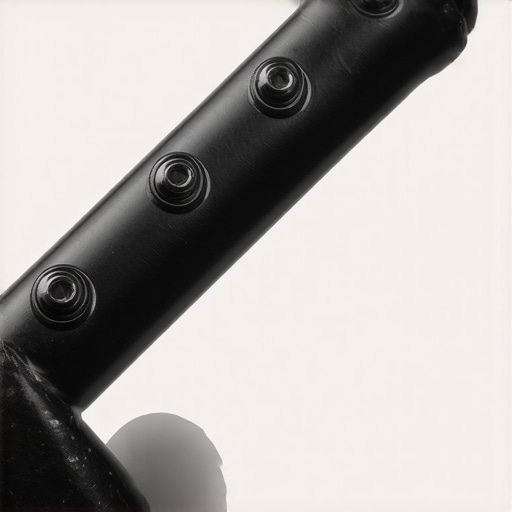
Use Quality Mounting Hardware and Proper Techniques
Start by selecting robust screws and clamps specifically designed for camera rigs, such as NATO clamps or quick-release systems, which provide tight, secure holds. When attaching your top handle, avoid over-tightening which can strip threads; instead, tighten just enough to eliminate wobble. During my first attempt, I used generic screws, but they loosened quickly, causing instability. Switching to high-grade stainless steel screws and locking nuts improved my setup significantly, leading to more consistent shots.
Adjust Weight Distribution Before Shooting
Ensure your camera and accessories are balanced on the rig. Use counterweights at the back or under the rig to counteract front-heavy setups, preventing top handle sway. I once neglected this, resulting in shaky footage during a pivotal indoor shot. Installing small counterweights underneath the camera cage or on the shoulder pad made a noticeable difference, stabilizing the entire rig and reducing fatigue.
Secure the Top Handle with Anti-Twist Features
Many top handles come with anti-twist designs or additional mounting points to prevent rotation or sway. Use these features for a more rigid connection, especially on heavier or longer shoots. I experimented with a handle that had a quick-release feature, but it occasionally twisted during movement. Upgrading to a dedicated anti-twist handle, like those reviewed in this guide, dramatically improved stability.
Ensure Proper Tightening and Locking of All Fasteners
Double-check every screw, bolt, or clamp before shooting; loose hardware is a common culprit for instability. Use a torque wrench if necessary for perfect tightness. During a recent shoot, a quick check revealed a slightly loose clamp on my top handle. Re-tightening eliminated unexpected wobble, saving potential retakes. Developing a habit of routine checks keeps your rig solid, especially during intense shoots.
Implement Rig Support Accessories for Enhanced Stability
Utilize support accessories such as adjustable top handle mounts and stabilizing braces. These components add extra points of contact and friction, preventing movement. I added a supplementary side grip from top handle accessories, which reduced sway during handheld shots. Investing in such accessories compensates for minor mounting flaws and enhances overall stability.
Practice Proper Mounting Angles and Positioning
Mount your top handle at a balanced angle; avoid attaching it far forward or backward, which can shift the center of gravity and cause wobbling. During a complex shoot, I initially mounted the handle too far forward, which made the rig top-heavy. Moving it closer to the center and aligning with the lens axis preserved stability during rapid movements. Experimenting with handle positioning is crucial for customizing your setup and minimizing sway.
Consider Upgrading to Rigid Support Systems
For heavy or professional setups, investing in reinforced support systems like custom cage combos improves overall rigidity. Check options like the top handle and cage combos designed for stability. My first DIY setup lacked these features, leading to minor but noticeable flex during pans. Upgrading to a purpose-built system transformed my filmmaking experience, ensuring steady shots even with demanding rigs.
 Many filmmakers operate under assumptions about camera rig setups that can lead to costly mistakes and subpar footage. One common myth is that heavier rigs automatically translate to better stability, but in reality, excessive weight without proper support can cause fatigue and even introduce new shake during handheld shots. Experienced professionals know that understanding weight distribution and balance is crucial; simply adding more gear doesn’t guarantee steadiness. Studies in ergonomics, such as those published by the National Institute for Occupational Safety and Health, emphasize that improper weight management can impair performance and increase injury risk, which directly impacts shot quality.
Another misconception is that any top handle or camera cage will do. In fact, many rely on generic components that lack the necessary rigidity or anti-twist features, leading to unwanted movement and vibrations. For instance, using a handle with a flexible NATO rail instead of a robust, anti-twist design can result in sway or torque during motion. A recent review highlights that upgrading to high-quality [rig accessories](https://rigs.creatorrigreviews.com/top-handle-camera-cage-combo-for-custom-support-systems-in-2025) with proper support mechanisms can make a noticeable difference.
Many assume that mounting accessories in the simplest way is best, but incorrect placement can shift the center of gravity, making rigs unwieldy. For advanced shooting, the placement of counterweights and support points needs to be strategic; otherwise, you’ll find yourself fighting unintentional sway or fatigue. Layered configurations that optimize balance—such as combining a well-designed [shoulder rig](https://rigs.creatorrigreviews.com/essential-shoulder-rigs-for-professional-filmmaking-in-2025)—and custom positioning can dramatically improve stability.
In the quest for perfection, some overlook the importance of routine maintenance and hardware tightening. Over time, vibrations, impacts, or even simple wear can loosen screws or clamps, which compromises stability. Regularly checking and locking fasteners is a quick but often missed step that prevents unexpected shifts during a shoot.
Let’s challenge the idea that all rigs are created equal. The truth is, selecting and customizing your setup—focusing on nuanced details like anti-twist mounts or proper weight distribution—is what separates amateur setups from professional grade. A [comprehensive guide](https://rigs.creatorrigreviews.com/mastering-camera-rigs-how-to-enhance-your-filming-setup-in-2025) reveals that these technical nuances can make all the difference.
Now, I want to hear from you. Have you ever fallen into this trap? Let me know in the comments! Remember, understanding these advanced details will help you avoid pitfalls and elevate your filmmaking craftsmanship.Maintaining your camera rig’s optimal performance is crucial to capturing steady, professional-quality footage, especially when scaling up your setup or handling heavier gear. The right tools and consistent maintenance routines not only prolong your equipment’s lifespan but also ensure your shots remain smooth and reliable over time. One of my go-to practices involves using a high-quality torque wrench like the Wiha SpeedE™ to tighten fasteners precisely, preventing over-tightening that can damage threads or components. This attention to detail minimizes wear and tear, especially on delicate parts like quick-release plates and anti-twist handles.
Furthermore, investing in support accessories such as durable support brackets and anti-twist mounts keeps your setup rigid and prevents sway during dynamic shoots. Regularly inspecting and locking all screws, bolts, and clamps is vital—think of it as a health check for your rig. I’ve found that developing a routine checklist before each shoot can catch loose hardware early, saving time and avoiding potential mishaps. For long-term results, maintaining a clean, dust-free environment for your gear and storing components in padded cases preserves their integrity, especially for sensitive parts like monitor mounts and cable connections.
Predicting where this trend is heading, I believe integrating smart, modular support systems with built-in sensors to monitor torque and stability will become standard, allowing for proactive maintenance and real-time feedback. This evolution will make rigs more adaptable and reliable, no matter the complexity of your setup.
How do I maintain my camera rig over time?
**Regular inspection and cleaning are your best friends.** Use compressed air to dust off moving parts and connections, and apply appropriate lubricants to joints and hinges that experience frequent movement. For threaded fasteners, I recommend applying a tiny amount of thread-locking compound to prevent loosening during shoots. When upgrading or adding accessories, ensure compatibility and proper fastening, avoiding makeshift solutions that can compromise stability. Remember, the foundation of a smooth shoot is a well-maintained rig—think of it as the backbone of your filmmaking process. Exploring professional-grade tools, like anti-twist handles from this guide, can significantly enhance your setup’s rigidity and reliability. So, next time you’re preparing for a shoot, take five minutes to verify every connection; your footage will thank you.
What No One Tells You About Camera Rig Support
One of the most eye-opening lessons I learned was that even the highest-quality components can underperform if not assembled correctly. I used to assume that just tightening everything would suffice, but I discovered that proper placement and firm, yet delicate, torque levels are crucial. The importance of cross-checking every connection became apparent after a shaky shoot where I overlooked loosened screws, reminding me that meticulous attention to detail can save your shot.
Another revelation was the significance of understanding weight balance beyond simple counterweights. It’s about realigning your entire rig’s center of gravity. Use your tools smartly—like the support accessories from this guide. It’s these nuanced adjustments that turned my unstable rigs into models of stability, demonstrating that mastery lies in the details, not just the gear.
Lastly, I discovered that routine maintenance isn’t just routine—it’s transformational. Regularly inspecting, cleaning, and replacing worn parts prevents minor issues from snowballing into catastrophic failures mid-shoot. Investing in quality hardware like anti-twist handles from this source ensures your rig remains stiff and dependable, shot after shot. Remember, the sturdiness of your camera rig is a direct reflection of your dedication to its upkeep and fine-tuning.


