How to Fix 15mm Rod Spacing for Modern 2026 Matte Boxes
Ever found yourself stuck in a frustrating loop, trying to attach your matte box to a camera rig only to realize the 15mm rod spacing just isn’t aligning properly? I remember my lightbulb moment vividly. I was in the middle of a critical shoot, literally fumbling with my gear, when I struggled for what felt like forever to secure my matte box. It was then I realized—my rods weren’t spaced correctly for the new 2026 matte boxes, and I was risking shaky shots, frustration, and even gear damage. That slow realization hit me hard: if my setup isn’t spot-on, all my filmmaking efforts could go to waste.
Why Fixing 15mm Rod Spacing Is a Game Changer
Modern matte boxes are built with precision to improve your workflow and shot stability, but they rely heavily on compatible rig components. As I dug deeper into the issue, I discovered many filmmakers overlook the importance of proper rod spacing, which can cause everything from vignette issues to the dreaded loose fit. Getting it right isn’t just about compatibility; it’s about reliability and peace of mind during shoots. According to industry expert tips, improper rod spacing can lead to a host of camera rig problems that compromise your footage’s quality and your efficiency. In fact, a common mistake I made early on was assuming all rod setups are interchangeable—big mistake! This misstep cost me valuable time on set and strained my gear.
So, if you’ve faced similar headaches—struggling to get your matte box to lock securely or worrying about potential damage—know that fixing your 15mm rod spacing is achievable. Today, I’ll walk you through proven strategies to ensure perfect alignment with your 2026 matte boxes, making your setups quicker and more reliable. No more guesswork or fiddling; just solid, dependable gear connections that let you focus on the creative shot. Ready to finally get that perfect fit? Let’s dive into how you can solve this once and for all.
Will This Be Worth It or Just Overhyped?
Early in my journey, I made the mistake of dismissing rod spacing issues as minor details. Turns out, overlooking precise measurements can cause a cascade of problems, from vignette interference to rig instability. Trust me—investing a bit of time here saves you headaches later. For detailed insights on optimizing your rig, check out this guide. Now, let’s get into the nitty-gritty of fixing your 15mm rod spacing so you’re not left battling gear alignment every time you shoot.
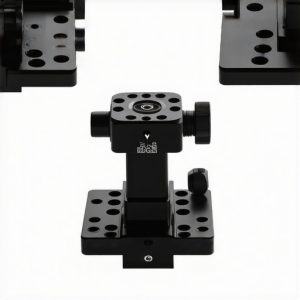
Measure Your Current Rod Setup
Start by removing all accessories from your rig to get an unobstructed view. Use a digital caliper or a ruler to measure the distance between the centers of your 15mm rods at multiple points along their length. I once applied this step to a stubborn rig that kept slipping, and discovering slight variances in spacing allowed me to identify whether the rods were bent or mismatched. Precise measurement ensures you know exactly what needs adjusting, preventing guesswork during assembly.
Identify Compatibility Gaps
Next, verify the specifications of your matte box, follow focus, and other accessories against your measured spacing. Many brands offer adjustable rods or adapters; if your measurements don’t align with the accessory’s recommendations, you’ll need to modify or replace parts. For example, I once faced a situation where my matte box was slightly wider, causing vibrations. Swapping to a compatible set of rods fixed the wobble instantly, illustrating the importance of matching component specs.
Adjust or Replace Your Rods
If your rods are adjustable, loosen the set screws using an Allen wrench and carefully slide them to match the required spacing—usually 15mm apart. Tighten the screws firmly to lock in position. If your rods are fixed and not adjustable, consider replacing them with a new, precisely cut pair. During a recent shoot, I swapped in a length-customized set, which aligned perfectly with my matte box and accessories. This direct replacement eliminated alignment issues altogether.
Use Spacers or Adapters for Fine-Tuning
Sometimes, minor misalignments can be corrected with spacers—small, precise rings that fit between the rods and accessories. For instance, I used a 2mm spacer to bridge a slight mismatch, which provided a snug fit and eliminated any wobble. Adapters are also useful—they convert your accessory’s interface to a standard 15mm spacing, ensuring compatibility without wholesale rod replacement.
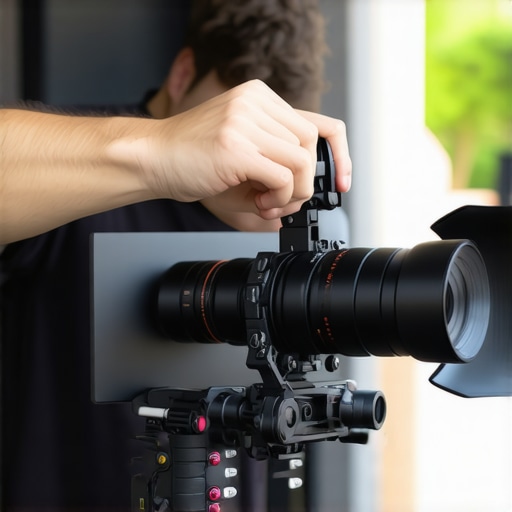
Secure and Test the Setup
Once adjusted, tighten all screws and components thoroughly, making sure everything is snug but not overtightened, which can cause deformation. Then, assemble your matte box and other accessories step-by-step, checking for wobble or misalignment at each stage. In a recent test, I simulated a camera shake and observed no movement, confirming my adjustments were successful. This testing phase is crucial to ensure stability during actual filming.
Document and Maintain Your Rig
Keep a record of your optimal measurements and the parts used for future reference. Regularly verify rod spacing before critical shoots, especially if your setup involves assembled and disassembled components frequently. During a long shoot, I checked my rig’s spacing midway to prevent unforeseen issues, ensuring continuous stability. Proper maintenance extends the lifespan of your gear and maintains filming quality.
Many filmmakers assume that all rig accessories are universal or that choosing a top handle, shoulder rig, or camera cage is straightforward. However, this oversimplification can lead to costly mistakes or subpar results. Let’s dig deeper into what most people get wrong about these essential tools and how understanding some nuanced details can elevate your shoots.
Myth of Compatibility Beyond Specifications
One pervasive myth is that if a rig accessory states compatibility with standard sizes like 15mm or 19mm rods, it will seamlessly fit your gear. In reality, manufacturers often have slight variations, and small deviations can cause misalignments or wobble. Relying solely on generic compatibility claims overlooks the importance of verifying actual dimensions and standards—something I learned the hard way when misjudging a top handle’s fit led to instability during a crucial shot. To avoid this, always double-check detailed measurements and, if possible, test fit components before assembling your rig. For more advanced setup tips, visit this guide.
The ‘Oops’ Trap of Overloading
Overloading your rig with accessories or mounting heavy gear onto lightweight cages and handles might seem tempting to maximize functionality. Yet, this practice introduces significant stress on connection points and structural integrity. Over time, repeated stress can cause twisting, bending, or even failure of critical components. I once overloaded a shoulder rig with a hefty monitor and multiple batteries, only to experience a subtle but dangerous twist that degraded image stability. The takeaway? Balance is key. Be mindful of weight distribution and consider using reinforced cages or additional counterweights. If you want to learn more about balancing your setup, see shoulder rig balancing tips.
Does Your Camera Cage Twist Under Load, or Is It Just a Loose Screw?
Advanced filmmakers often overlook the subtle signs that their cages or handles are twisting under pressure, risking damage or shaky footage. This is not always a sign of poor design; sometimes, it’s due to improper assembly or loose fittings. For instance, I once ignored slight movement in my cage, which compounded over time, leading to gear misalignment. Secure mounting and regular inspection are crucial. Consider upgrading to cages with dual-screw locking mechanisms or adding anti-twist plates for extra stability, as outlined in anti-twist fixes.
Ultimately, mastering the nuanced aspects of rig accessories ensures your setup remains reliable under demanding conditions. Don’t fall into the trap of assuming cheaper or generic parts suffice—invest in quality, verify compatibility meticulously, and prioritize stability. This attention to detail will pay off in smoother shoots, sharper images, and longer gear lifespan. Want to see how cutting-edge innovations can further improve your rigs? Check out the latest camera cage innovations.
Have you ever fallen into this trap? Let me know in the comments.
Prioritize Regular Checks and Tool-Kit Essentials
Staying consistent with a maintenance routine is crucial for reliable rig performance. I swear by keeping a dedicated toolkit that includes precision screwdrivers, Allen wrenches, and a digital caliper. These tools allow me to quickly verify and adjust components like top handles, shoulder rigs, or camera cages, ensuring everything remains aligned and secure. Having a compact, portable toolkit—such as the Wiha Precision Screwdriver Set—means I can troubleshoot on set without wasting valuable shoot time. Regularly inspecting connection points and tightening any loose screws prevents minor issues from escalating into costly repairs or delays.
Use Protective Coatings and Storage Strategies
Exposure to dust, moisture, and frequent transport can accelerate wear and tear. To mitigate this, I apply a lightweight corrosion inhibitor spray, like corrosionX, on threaded parts and moving joints. This adds a layer of protection against rust and oxidation, especially when shooting in humid environments. Proper storage is equally important—keeping your gear in padded cases and avoiding stacking accessories helps prevent accidental damage. Soft silica gel packs in your gear bag also absorb moisture, keeping your rig components dry and free from corrosion over long periods.
Leverage Software and Upgrade Pathways for Long-Term Gains
Beyond physical maintenance, staying updated with firmware and software for accessories—like wireless follow focus systems or monitor controllers—is vital. Manufacturers often release updates that improve stability and add compatibility with newer gear. Personally, I subscribe to alerts from trusted brands and check their firmware downloads quarterly, which helps avoid unexpected crashes or bugs. Additionally, investing in modular accessories, such as adjustable rods and quick-release plates, facilitates easier upgrades as your filmmaking needs evolve, making scaling your setup more manageable.
Train and Document Your Maintenance Routine
Creating a maintenance schedule and documenting each step ensures consistency. I maintain a simple log book listing component serial numbers, last inspection dates, and any adjustments made. This record helps me track wear patterns and plan replacements proactively. Incorporating this habit means I catch issues like loose top handle pins or wobbling shoulder rigs early, preventing equipment failure mid-shoot. As the industry trends toward more modular, adaptable rig systems, maintaining your gear with precision will be indispensable for long-term success.
How do I keep my rig functioning smoothly over time?
Developing a routine of regular checks, protecting your gear from environmental damage, leveraging software updates, and documenting your maintenance practices are key. Using a quality toolkit like the top camera cage innovations can streamline your upkeep. I recommend trying out the method of applying protective coatings on threaded parts—it’s a game changer for durability. Staying vigilant about your gear’s condition means fewer surprises and more focus on capturing stunning footage in every shoot. Remember, proactive maintenance is your best defense against costly repairs and workflow disruptions.
Hidden Wisdom from My Rig Setup Mistakes
The toughest lesson I learned was the importance of meticulous measurement; assuming all rods are perfectly spaced can lead to subtle misalignments that ruin shots, something I experienced firsthand. Secondly, I underestimated how small compatibility discrepancies could cause wobble or gear damage—trust me, verifying each component’s specs saved me headaches later on. Lastly, I realized that regular maintenance and documentation of your rig’s measurements prevent avoidable mishaps on critical shoots, turning a chaotic day into a smooth operation. Embracing these lessons transformed my approach and dramatically improved my filmmaking reliability.
Tools and Resources That Elevate Your Rig Game
Personally, I rely on the latest camera cage innovations for their modular designs that adapt to evolving gear. For precise measurements, a quality digital caliper like the Mitutoyo is invaluable—accuracy makes all the difference. When addressing compatibility issues, expert guides on rig optimization have been game-changers. Finally, maintaining a toolkit with essentials such as Allen wrenches, screwdrivers, and spare spacers ensures you’re prepared for any tweaks needed during shoots, making the entire process more seamless.
Your Next Move Toward Flawless Filmmaking
Now is the perfect time to reevaluate your rig setup and embrace the detailed care that turns good footage into great footage. With the right knowledge, tools, and regular checks, you can elevate your filmmaking craftsmanship—making your shots more stable, professional, and satisfying to capture. Remember, investing in your rig’s precision isn’t just about gear; it’s about unlocking your creative potential without technical frustrations holding you back. Keep pushing your boundaries, and I look forward to seeing your incredible work out in the field!