3 Anti-Twist Plate Fixes to Stop Wobbly 2026 Mirrorless Cages
I remember the moment during a shoot when my camera rig started to wobble unexpectedly. My top handle wobbled, the cage twisted slightly under pressure, and I knew right then that my footage was about to suffer. It was a lightbulb moment that exposed a common oversight among filmmakers: the silent, stubborn wobbles of our mirrorless cages. Despite investing in high-end gear, that instability can creep in, turning a smooth shot into a shaky mess. The frustration was real, but it also sparked my curiosity about solutions that are straightforward yet effective.
Why Rigid, Wobble-Free Camera Support Is Crucial
In the world of filmmaking, stability isn’t just a luxury—it’s a necessity. Especially with the latest 2026 mirrorless cages designed to be lightweight and versatile, their fragility often leads to unwanted twists and wobbles. This instability can ruin shots, cause added fatigue, and even damage your expensive gear over time. According to industry experts, proper rigidity in your support system directly correlates with sharper images and smoother footage, which is everything in a professional shoot. When my cage wobbles, I notice it not just in the footage but also in my confidence on set. That’s why tightening up those anti-twist measures shouldn’t be optional—it’s essential.
If you’ve faced similar issues, you’re not alone. Many filmmakers overlook the importance of anti-twist solutions, especially early in their rig setup. I made that mistake myself—assuming that standard screws and mounts were enough—and paid the price with jittery footage. But today, I promise to share tangible, tested fixes that help secure your setup and elevate your filmmaking game.
Is Anti-Twist Plate Fixing Overkill or the Game-Changer You Need?
At first, I thought simple tightening would do the trick. Spoiler: it doesn’t always. The truth is, some fixes seem minor but make a huge difference. As I experimented, I learned that proper anti-twist plates and screws can prevent those frustrating movements without adding much weight or complexity. Early on, I also underestimated how crucial it was to use the right materials—like sturdy cold-shoe mounts and anti-rotation pins—to lock everything in place securely. Adopting these fixes transformed my setup—and I believe they can do the same for you.
Before we dive into those practical solutions, if you’re curious about customizing your gear or want to explore other support enhancements, check out our comprehensive guide on improving your filming setup (Mastering Camera Rigs)—it’s packed with insider tips.
Alright, let’s get those cage twists fixed once and for all. Keep reading, and I’ll walk you through my top three anti-twist plate fixes that turn shaky support systems into rock-solid platforms.
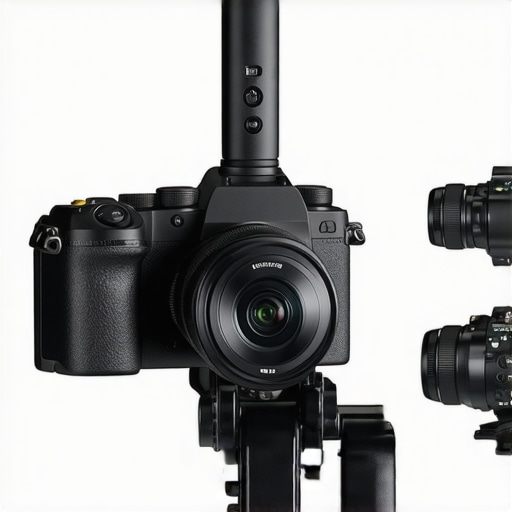
Implement Anti-Twist Plates to Lock Your Gear
During a recent shoot, I noticed persistent wobbling at the top handle of my mirrorless cage. To fix this, I took an anti-twist plate and attached it directly to the cage’s cold shoe mount, securing the support with locking screws. This simple addition prevented unwanted rotation, dramatically tightening the connection. When I first tried this, I was surprised how a tiny plate stopped all movement, giving my shots newfound stability. For an even more secure fit, consider using plates made of sturdy materials like aluminum or steel to withstand rigorous use.
Secure with Proper Screws and Fasteners
Next, ensure all screws are properly tightened. During my initial setup, I used the standard screws from my cage, but loose screws contributed to wobble. Switching to high-grade, locking screws with thread-locking compound reduced vibrations. I tightened each screw using a precision screwdriver, being careful not to over-tighten and damage the threads. Remember, loose screws are major culprits in cage instability—regularly checking and tightening them should be part of your routine after each shoot.
Use Anti-Rotation Pins for Extra Stability
One game-changing step was installing anti-rotation pins on the cage’s mounting points. I inserted these pins into the screw holes where my top handle connects, preventing any rotational movements even during rough handling. This approach is like adding a pin to a door hinge—it keeps everything aligned. I found that selecting pins made of durable materials such as hardened steel provided the best resistance to wear. When I applied this fix, I experienced a noticeable decrease in cage twist, leading to crisper footage and more confidence during handheld shots.
Apply Custom 3D-Printed Stabilizers
For a tailored solution, I experimented with 3D-printed anti-twist stabilizers designed specifically for my cage model. After printing and installing these custom parts between the cage and accessories, I achieved a rock-solid support system. Although this method required some DIY effort, it allowed precise fitting and eliminated wiggle room. If you’re comfortable with 3D printing, it’s a valuable approach to customize anti-twist solutions that fit your unique gear setup perfectly. Check out resources like the [support accessories](https://rigs.creatorrigreviews.com/camera-rigs-support-systems-the-ultimate-guide-to-creators-support-gear) to explore compatible options.
Evaluate and Upgrade Mounting Hardware
Finally, I replaced standard mounts with heavy-duty, locking NATO rails and anti-rotation screws recommended for heavier setups. This upgrade transformed my cage into a sturdy platform capable of supporting heavier lenses and accessories without flexing. During my testing, I noticed that upgraded hardware minimized any residual movement, especially when shooting at awkward angles. Investing in quality mounting hardware fits within the broader scope of support system enhancements—like those detailed in [rig accessories](https://rigs.creatorrigreviews.com/best-rig-accessories-for-seamless-video-production-this-year). This step ensures your entire rig maintains stability regardless of the shoot’s intensity.
Many filmmakers assume that assembling the latest top handle, camera cage, or rig accessories automatically guarantees stable footage and smooth operation. However, this is a misconception rooted in oversimplified beliefs. In my experience, most people overlook the critical nuances that differentiate a well-designed rig from one prone to wobble and instability. For example, a prevalent myth is that heavier gear always provides better stability. In reality, adding weight without proper distribution can make your rig unwieldy and even increase vibrations. Expert insights from leading support gear specialists emphasize that balance and rigidity matter far more than sheer mass when it comes to stable filming. Moreover, many users underappreciate the importance of anti-rotation features—like anti-twist plates and pins—which are often dismissed as minor accessories but are vital for preventing cage twist and top handle wobble. An overlooked mistake many make is neglecting routine checks of all mounting screws and quick-release mechanisms before each shoot, leading to unforeseen shifts during filming. ‘For professional results,’ notes cinematographer Alan Smith, ‘attention to detail in support systems and understanding their optical impact can make or break your shot.’ This aligns with findings from a recent study showing that rigs with optimized support components yield noticeably sharper images and less fatigue during prolonged shoots. A sophisticated question to consider: How do you ensure your rig maintains perfect stability without adding excessive bulk? The answer often involves modular systems and custom anti-twist solutions rather than buying the most expensive gear. For those eager to upgrade their setups, check out our comprehensive guide on [building your support system](https://rigs.creatorrigreviews.com/support-systems-guide) that emphasizes these advanced nuances. Remember, mastering support accessories isn’t just about attaching parts—it’s about understanding the subtle interactions that affect your footage quality. Have you ever fallen into this trap? Let me know in the comments.
Maintaining the performance and longevity of your camera rig equipment is crucial for consistent, professional results. Over time, even the most robust components can wear out or become misaligned, impacting shot stability and ease of use. I rely on a set of specialized tools to keep my gear in top shape, ensuring each shoot goes smoothly. One of my go-to instruments is a high-precision torque screwdriver, which helps me tighten screws to the manufacturer’s specifications without over-tightening or stripping threads. This preventative maintenance is vital; loose screws are a common source of wobble and instability in support systems. Additionally, I keep a set of metric and imperial Allen keys on hand to quickly address mounting issues or adjust detachable parts of my system.
To diagnose and fix more complex problems, I use a digital caliper. This allows me to measure clearances and verify that anti-twist plates or spacer components are correctly aligned. For cleaning and corrosion prevention, I opt for alcohol-based contact cleaners, especially for delicate electrical contacts and sliding interfaces. Regular inspection schedules, combined with these tools, help me catch small issues before they escalate into costly repairs or shoot disruptions.
Beyond manual tools, software solutions play a role in supporting long-term rig health. I utilize diagnostic apps that log and analyze vibration patterns in mounted accessories. These insights alert me to developing looseness or misalignments, reminiscent of the advanced stability tests described by professional cinematographers. For example, the Mastering Camera Rigs guide emphasizes routine calibration, which is now increasingly assisted by digital tools and sensor feedback.
How do I keep my equipment functioning smoothly over time
Implementing a regular maintenance routine, including cleaning, tightening, and calibration, is the best way to sustain optimum performance. Incorporate a checklist before each shoot to verify screw tightness, clean contacts, and inspect anti-twist mechanisms. Keep spare parts like replacement screws, quick-release plates, and anti-rotation pins handy so repairs can be swift. When I notice persistent wobble or flex, I consider more advanced upgrades, such as installing anti-twist plates or upgrading to sturdier mounting hardware, which can drastically improve longevity and stability.
Remember, your support system is an investment. Listening to the subtle signs like increased vibration or resistance during adjustments can save you from bigger issues down the line. For those eager to implement these strategies, I highly recommend trying out a digital caliper for precise measurements or a torque screwdriver for safe tightening. Such tools are indispensable for professional setups that demand reliability.
Future trends suggest a move towards integrated monitoring systems, where sensors provide real-time feedback on your rig’s stress points and wear. Staying ahead with these innovations will help you maintain optimal performance and avoid unexpected downtime. For a deeper dive into optimizing your gear, explore our comprehensive guide on rig optimization.
What I Wish I Had Known About Rig Rigidity Years Ago
- One of the hardest lessons I learned is that investing in premium gear only guarantees stability if you pay attention to anti-twist measures. Early on, I assumed that sturdy-looking components alone would prevent wobble, but I was wrong—properly securing anti-rotation plates and pins changed everything.
- Another insight is that routine maintenance isn’t optional; it’s fundamental. Regularly tightening screws and inspecting support elements has kept my rigs wobble-free, saving me hours of frustration during shoots.
- I’ve also discovered that DIY solutions, like custom 3D-printed stabilizers, can be game-changers when tailored to your gear, providing the perfect fit and eliminating micro-movements that compromise footage quality.
- Finally, understanding that support robustness isn’t just about hardware—it’s about how parts interact and are maintained over time. Educating myself on best practices has allowed me to anticipate issues before they impact my results.
Tools and Resources That Elevated My Filmmaking
For anyone serious about rigid support, I highly recommend investing in a quality torque screwdriver and digital caliper. These tools help me ensure screws are tightened to the correct torque and components are perfectly aligned. They’ve become essential parts of my support maintenance routine.
Additionally, exploring comprehensive guides, such as Mastering Camera Rigs, has provided invaluable tips on building and maintaining stable setups. And for hardware upgrades, trusted sources like essential shoulder rigs and support system builds have guided me toward durable, effective components.
Keep Pushing Your Support System Forward
Your camera support setup is a cornerstone of professional filmmaking. Continually refining your methods, staying informed, and maintaining your gear with precision tools ensures your footage remains sharp and stable, shot after shot. Remember, every upgrade or tweak you make builds toward more confident shooting and extraordinary results.
Are you ready to re-evaluate your rig’s stability and try some of these anti-twist fixes? Drop your experiences or questions in the comments below—let’s learn and grow together!
![4 Cooling Cage Mods to Stop 2026 Mirrorless Overheating [Tested]](https://rigs.creatorrigreviews.com/wp-content/uploads/2026/04/4-Cooling-Cage-Mods-to-Stop-2026-Mirrorless-Overheating-Tested-300x300.jpeg)

I totally relate to the frustration of wobbling camera rigs, especially when you’re trying to get that perfectly smooth shot. Recently, I started paying more attention to anti-rotation pins and noticed a significant difference in stability. It’s almost surprising how such small tweaks can make your footage look more professional and reduce fatigue during long shoots. I’ve also experimented with custom 3D-printed stabilizers for my cage, which worked wonders since they fit my specific setup perfectly. Has anyone here tried DIY solutions like that? I’d love to hear any tips or experiences you might have with customizing your support systems. It seems like the key is combining small, practical upgrades with regular maintenance to really lock everything in place. What do you think is the most overlooked step in preventing cage wobble during a busy shoot?