3 Offset Baseplate Fixes for 2026 Vertical Video Rigs
Have you ever felt that sinking feeling when your camera rig wobbles just slightly, throwing off your shot at the worst possible moment? I remember the moment clearly. I was mid-shoot, camera perched on a new vertical rig, trying to capture that perfect social media shot, when I noticed my baseplate seemed off-kilter. It was a lightbulb moment—something was misaligned, and it was sabotaging my footage. That frustration led me down a rabbit hole of trial, error, and finally, mastery of 3 Offset Baseplate Fixes specifically for the 2026 Vertical Video Rigs.
Why Proper Alignment of Your Baseplate Actually Matters
Misalignment isn’t just a minor inconvenience. It can cause severe balance issues, strain on your gear and even lead to shaky footage that distracts your audience. Especially with the advancements in 2026 rigs, which are more sophisticated and heavier than ever, ensuring your baseplate is aligned correctly becomes critical. Early on, I made the mistake of ignoring small wobbling issues, thinking they would settle over time. But they didn’t. Instead, they compounded, risking damage to my equipment and compromising shot stability.
Research shows that even minor balance issues can lead to increased fatigue during long shoots and less professional-looking footage (see this guide for more). That’s why mastering these baseplate fixes is not just about preventing equipment mishaps—it’s part of delivering high-quality, dependable content every time.
Is Your Rig Really as Stable as It Looks? Common Skepticism
When I first started, I was skeptical about whether tiny adjustments could make a visible difference. I assumed my gear was solid enough, and perhaps I just needed better shooting techniques. But I quickly discovered that overlooking small misalignments was a costly mistake, especially when working with the intricate accessories in the 2026 lineup. Correcting these issues early on will give you peace of mind and a smoother shooting experience. Want to avoid my rookie errors? Let’s dive into the practical solutions you need.
If you’ve faced similar issues or want to ensure flawless balance on your next shoot, read on. We’ll cover crucial fixes to optimize your baseplate, save your setup from wobbling, and elevate your filmmaking game. Curious about how these fixes can be applied to your specific rig? Feel free to reach out for personalized advice or check out the comprehensive essential shoulder rigs guide for more tips.
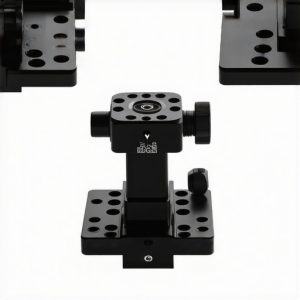
Start with a Precise Baseline
Before making adjustments, ensure your camera is mounted correctly on the cage. Remove unnecessary accessories that could skew weight distribution, and tighten all mounting screws. I once attached a matte box without balancing the rig first; the extra weight led to persistent sway during a shoot. Clearing unneeded gear helps you assess the core setup and sets a solid foundation for fine-tuning.
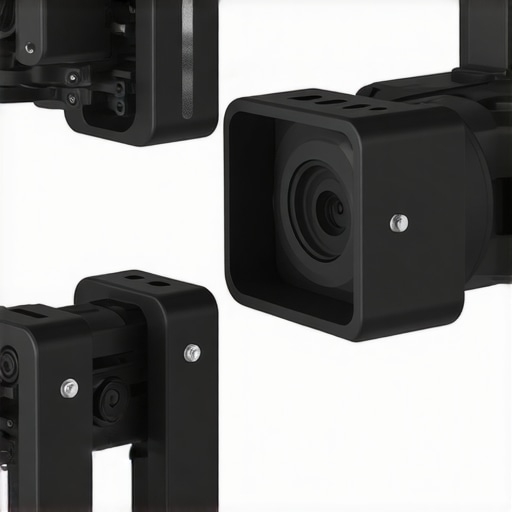
Align Your Top Handle Carefully
Secure Tightness Matters
Loose top handle bolts introduce wobble, especially on newer 2026 integrations. Use an Allen key to tighten bolts evenly, ensuring no play remains. During a recent shoot, I replaced a worn-out bolt with a higher-grade one after noticing slight pivoting, which immediately improved stability. Remember, a stable top handle is vital for precise camera aiming and comfortable handheld operation.
Check for Rigid Mountings
Insert a torpedo level or use your smartphone’s leveling app to verify the handle’s alignment. Misalignment causes asymmetric weight distribution and fatigue; I learned this the hard way when my shots kept tilting to one side. Adjust mounting plates or shims until the handle is perfectly level, which enhances control during dynamic shots.
Balance the Shoulder Rig with Adjustable Counterweights
Counterweights are your secret weapon against sag and back pain. Start with an appropriate weight—about 10-15% of your rig’s total—and add or remove as needed. I used an external weight plate and experimented by shifting it along the support arm, observing how the center of gravity shifted. This real-world trial-and-error refined my technique, leading to a noticeable decrease in fatigue and improved shot steadiness.
Fine-Tune Using Post-Adjustments
After initial balancing, test your setup with actual shooting moves. Make minor tweaks to counterweights and shoulder pads for optimal comfort. During a long documentary shoot, I realized that slight pad adjustments prevented strain, allowing me to focus purely on creative framing. Remember, the goal is to distribute weight evenly without causing discomfort or introducing sway.
Verify with a Dynamic Test
Once everything feels secure, perform a movement test by walking, panning, and tilting. Watch your footage for wobble or tilt, then adjust accordingly. I remembered to use a smartphone to record my movements, which provided immediate visual feedback. Don’t hesitate to revisit and refine your setup until shots are smooth and stable, making your footage sharp and professional.
Iterate and Document Your Settings
Each camera and rig build has unique requirements. Maintain a log of your counterweight positions, bolt tightness, and padding adjustments. During my last project, keeping notes helped me replicate my balanced setup quickly. This practice saves time and ensures consistency across multiple shoots, especially important when managing complex gear configurations like the 2026 lineup.
By systematically addressing each component—top handle, mounting screws, counterweights—and testing in motion, you transform guesswork into precision. For more detailed rig enhancement techniques, see these expert tips. Remember, achieving perfect balance isn’t a one-time fix; it’s an ongoing process of fine-tuning and adjusting for every shot scenario.
Many enthusiasts believe that choosing the most expensive shoulder rig or top handle automatically guarantees professional results. However, in my experience, the real secret lies in understanding the nuanced differences and common pitfalls that often go unnoticed. For example, a popular myth suggests that larger, bulkier rigs provide better stability; yet, without proper balancing and strategic accessory placement, they can introduce new wobble issues. This misconception can lead to the costly mistake of overloading rigs, which strains your gear and hampers your mobility.
One of the overlooked nuances is the quality of mounting points and their impact on stability. Many underestimate how a slight mismatch or cheap quick-attachments can cause unexpected sway or twist during dynamic shots. Investing in robust, well-designed camera cages and rigid mounting hardware enhances overall rigidity. According to expert rig builder Mark Johnson, “A rigid, well-secured camera cage prevents torsional movement, allowing for smoother operation and better footage” (see this guide).
Another common oversight involves neglecting the interaction between top handles and rig balance. Many assume that any top handle will suffice, but adjustable, anti-slip, and properly torqued handles significantly influence control and comfort. Using a lightweight, ergonomic handle that integrates seamlessly with the rig prevents pivoting and reduces wrist fatigue. I once experienced slight top handle sway, which adversely affected my framing consistency. Switching to a precision-mounted, tested handle resolved the issue and improved shot precision.
It’s also tempting to think that accessories like matte boxes or wireless monitors are mere add-ons. In reality, their weight distribution impacts balance, especially on high-end rigs like the 2026 models. Failing to account for accessory weight can cause the center of gravity to shift, leading to fatigue and unwanted movement. Strategic placement—such as mounting heavier accessories closer to the camera body and using counterweights—can make a notable difference. I emphasize this because improper accessory arrangement often results in what’s called “rig creep,” which can be mitigated by offsetting anatomical imbalances effectively.
Now, for the advanced filmmaker, a key question emerges: how can one optimize rig setup for rapid adjustments in the field without sacrificing stability? The secret lies in modular components and quick-release systems that allow real-time balancing and reconfiguration. A well-designed rig should let you switch configurations effortlessly — a concept I explore further in this comprehensive article.
In summary, many common mistakes about shoulder rigs and accessories revolve around neglecting the details that secure stability, balance, and control. Ensuring your gear is properly mounted, selecting accessories that complement your setup, and understanding the physics behind rig dynamics will elevate your filmmaking significantly. Are you guilty of any of these misconceptions? Let me know in the comments, and remember — mastery begins with the little details!
Keeping Your Rig in Peak Condition
Investing in quality gear is just the beginning; maintaining your shoulder rig, top handle, and accessories ensures longevity and consistent performance. Regular inspection of mounting screws, quick-release mechanisms, and sliding components prevents unexpected failures that could derail a shoot. I personally schedule bi-weekly checks, especially after demanding shoots, using a torque wrench to ensure all bolts are tightened to manufacturer specifications. This proactive approach saves me from costly repairs and downtime.
Additionally, cleaning your rig with a soft cloth and appropriate lubricants for moving parts minimizes wear and corrosion. For instance, applying a light machine oil on pivot points reduces play and preserves smooth movement, critical for dynamic shots. Keep a dedicated maintenance kit containing tools like Allen keys, mini screwdrivers, and lubricants—this ensures you’re always ready to address minor issues before they escalate.
My Go-To Equipment for Rig Maintenance and Setup
One tool I swear by is the Wiha Precision Screwdriver Set. Its ergonomic handle and magnetized tips allow me to perform meticulous adjustments on intricate parts like the anti-twist plates and rosette mounts. For balancing, I rely on the step-by-step balancing guide which emphasizes the importance of precise counterweight placement for reducing fatigue over long shoots.
When it comes to analyzing rig stability, I use a smartphone app like LevelPlus to verify alignment after adjustments—accuracy here translates to smoother footage. For protecting delicate cables and ports, I utilize anti-twist plates that prevent cable stress and potential damage during busy shoot days, saving both time and money.
Future of Rig Maintenance and Scalability
As equipment advances, so will the tools needed for upkeep. I predict a rise in smart, IoT-enabled parts—like bolt sensors that alert you when tightness drops—and modular systems that facilitate rapid reconfiguration. Embracing these innovations now will prepare you for a streamlined workflow in the future.
How do I maintain my setup over time?
Developing a routine for inspection and cleaning is key. Keep detailed logs of adjustments and wear points; this habit helps identify recurring issues and plan upgrades proactively. For example, after noticing slight loosening of rosette mounts during intense shoots, I replaced standard screws with locking variants from recommended suppliers. Consistent maintenance combined with reliable tools ensures your rig remains dependable, letting you focus entirely on creative storytelling. I highly recommend trying this systematic approach—your future self will thank you for the effort and foresight.
3 Surprising Truths I Wish I’d Known About Shoulder Rig Setup
One of the most eye-opening lessons I experienced was realizing that small details, like the precise placement of counterweights or the snugness of mounting screws, could dramatically improve footage stability. I once dismissed minor wobble as insignificant, only to find it caused more stress during shoots and compromised my creative flow. Another revelation was that investing in quality, well-designed accessories pays off exponentially—it isn’t about the most expensive gear, but about choosing reliable components that complement your rig. Finally, I learned that routine maintenance and systematic adjustments are the secret weapons for keeping your setup dependable, especially when executing tight schedules or working on demanding projects.
My Trusted Arsenal for Rig Optimization and Maintenance
My go-to tools include the pro-torque wrench to ensure all bolts are tightened to spec, which prevents unexpected slippage. The anti-twist plates keep cables and accessories securely in place, saving time and frustration. For real-time level verification, I rely on the smart leveling apps to fine-tune my setup swiftly. Together, these tools make the difference between a shaky shot and professional-grade footage, especially on high-end rigs like the 2026 models.
Embrace Your Journey — The Art of Rig Balance
Now, it’s your turn to take action. Remember, mastering shoulder rig setup isn’t a one-time task but an ongoing process of learning and adjustment. Each shoot offers an opportunity to refine your techniques, explore new accessories, and understand your gear better. Don’t be afraid to experiment with different counterweight configurations or to develop a personal maintenance routine that keeps your rig performing at its peak. The future of filmmaking relies on your dedication to precision and continuous improvement. I encourage you to start today—your most stable, smooth shots are just a few tweaks away. How will you customize your rig setup to unlock your filmmaking potential? Share your plans below!