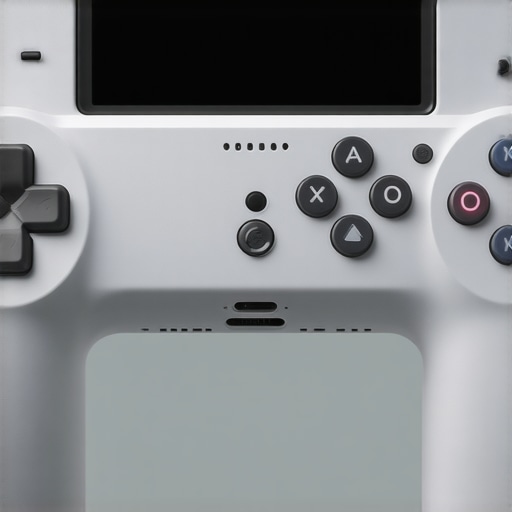
4 Tactical Side Handle Placements for Stable 2026 Handhelds
I’ll never forget the moment I filmed a crucial shot, only to realize my handheld rig was wobbling uncontrollably, despite what I thought were secure grip setups. Frustration simmered as I watched the footage shake and shimmer—an amateur mistake I paid dearly for. It was then I discovered the importance of strategic side handle placement, especially on the new 2026 handhelds. That lightbulb moment changed my entire approach to rigging, transforming shaky footage into smooth, professional results.
Why Proper Side Handle Placement Can Make or Break Your Shot Stability
If you’re like me, you’ve probably dealt with unsteady footage or fatigue from holding your rig the wrong way. The secret isn’t just in the camera itself but in the tactical placement of those side handles. Moving handles to optimum positions means better control, reduced fatigue, and shot stability that makes your work stand out. In this post, I’ll walk you through the top four handle placements that have helped me conquer this challenge and elevate my filmmaking. Curious about how to prevent that annoying wobble? Keep reading, because I’ve been there—more than once.
Is All Handle Placement Worth the Hype
I remember early on making the mistake of assuming all handles are equal. I simply attached whatever was available without considering the ergonomics or leverage points. Big mistake. An imbalance in handle positioning can cause not only shaky footage but also long-term strain. Trust me, optimizing handle placement is a game-changer, but only if done thoughtfully. So, let’s get into the first placement tactic that can make your handheld shots rock-solid.
Adjust Your Grip Positions for Prime Control
Start by unscrewing your side handles and testing different placements along the rig’s rails. Picture your rig as a steering wheel: the closer to the center, the more precise your control, but further out gives better leverage. I once attached handle A near the top center, which initially felt promising, but during a shoot, I realized I couldn’t counteract quick movements without adjusting handles outward for more torque—similar to how turning a wheel becomes easier with better grip leverage. Secure handles at the position that allows for a natural, comfortable grip, minimizing wrist strain and enhancing stability. Use the NATO rail system for quick adjustments, ensuring they lock tightly to prevent wobbling.

Lock Handles Firmly to Prevent Sway
Once you’ve found the ideal placement, tighten all locking screws thoroughly. Loose handles are the primary cause of wobble; think of it as loose car steering: it oscillates and diminishes control. When tightening, use an Allen wrench for precision, and don’t overtighten, which could strip threads. I learned this during a shoot when a loose handle briefly slipped, causing my shot to wobble. By double-checking handle tightness with a torque wrench, I maintained consistent stability, leading to crisp footage. Always test handle firmness after tightening before shooting, especially on heavy or prolonged takes.
Optimize Handle Ergonomics for Comfort and Stability
Handle placement isn’t just about position—it’s also about angle. Slight adjustments can dramatically reduce fatigue. Imagine holding a paintbrush: a comfortable grip beats a strained one. Position handles so they sit naturally in your palms, with elbows bent at a 90-degree angle. For longer shoots, consider adding grip extensions or ergonomic pads. I once mounted foam grips on my side handles, which prevented hand cramping during a 12-hour day. This simple addition allowed me to maintain control without fatigue, directly improving shot steadiness. Experiment with angle tweaks, and always ensure handles aren’t twisted or asymmetrical, as uneven grip points cause unintended movements.
Use Proper Handle Height to Match Your Body
Adjust handle height relative to your torso. Handles too low force you into awkward wrist positions; too high, and your arms strain. Prone to this mistake, I once set handles at chest level, which felt natural at first, but during rapid movements, I noticed my arms tense, leading to shaky footage. Moving handles to shoulder height improved my control, making it feel like steering a bike rather than a clumsy steer. Use adjustable NATO rails to set handles at a comfortable height, and regularly revisit the position during breaks to prevent creeping back to less optimal settings.
Maintain Handle Stability with Proper Mounting Techniques
Secure handle mounts using anti-slip pads or silicone wraps. Think of it like mountain biking: grips with too much slip result in crashes. I applied silicone grip tape around the handle base, which prevented slipping, especially in humid conditions. Tighten mounting screws in an ‘X’ pattern to evenly distribute pressure, preventing wobble caused by uneven tightening. For heavier rigs, consider adding counterweights as outlined in this guide. Proper mount security not only stabilizes handles but also extends their lifespan, ensuring consistent performance shot after shot.
Many videographers assume that once they’ve purchased a camera cage or rig accessories, their setup is foolproof. However, even seasoned filmmakers often overlook nuanced details that can compromise shot quality or cause wear and tear over time. Let’s dig deeper into common misconceptions and advanced mistakes that can trip up even experienced users.
One prevalent myth is that more accessories automatically result in better footage. In reality, overloading your rig can introduce unwanted flex and instability. For example, adding multiple monitors or excessive mounting plates without considering the overall weight distribution can cause subtle flexing, leading to jittery shots. Professional rigs are designed with specific load capacities, so exceeding these limits can cause long-term damage and compromise shot stability. Always consult expert guides, like Mastering Camera Rigs, to understand weight limits and proper setup.
Another mistake is underestimating the importance of precise alignment when attaching accessories. Improperly mounted top handles or side grips that are slightly twisted can lead to asymmetric weight distribution, causing your rig to sway or introduce micro-shakes. This subtle misalignment often goes unnoticed but significantly impacts image stability. An excellent approach is to regularly check all mountings with a spirit level or calibration tools, ensuring everything is perfectly aligned. Also, consider using sturdy NATO rail grips for secure, repeatable handle placements that maintain consistency during shooting sessions.
Advanced users should beware of the trap of neglecting cable management. Loose or improperly routed cables not only risk disconnects but can also exert unwanted tension on mounting points, subtly shifting accessories during shoots. Over time, this can cause loosening of screws or even damage to the cage itself. To prevent this, invest in high-quality cable clamps and strategically route cables away from moving parts, as highlighted in cable management tips. Proper cable routing ensures your setup remains rigid and responsive across demanding shots.
Now, for the nuanced question: How can you detect early signs of wear in your rig’s mounting points before they lead to catastrophic failure? The answer lies in regular inspection using magnifying glasses or specialized tools that can spot tiny cracks or loosening screws. Over-tightening screws might seem counterintuitive, but it can strip threads or cause deformation, weakening the connection. Instead, use calibrated torque wrenches and follow manufacturer torque specifications. This proactive approach, backed by industry best practices, extends your rig’s lifespan and guarantees consistent performance.
Have you ever fallen into this trap? Let me know in the comments. Remember, paying attention to these hidden nuances can make a significant difference in your filmmaking quality and gear longevity.
Invest in Quality Maintenance Tools for Longevity
To keep your camera rig functioning flawlessly, I rely heavily on precise tools like a quality torque wrench. This isn’t just for tightening screws; it’s a critical component in preventing over-tightening, which can damage threads over time. I personally use a calibrated torque wrench set to manufacturer specifications, ensuring every screw is secured without risking wear or deformation. Investing in this level of precision helps me maintain consistent performance and extends the lifespan of my equipment.
Alongside torque wrenches, I keep a small set of high-quality Allen keys and screwdrivers designed for camera gear. These tools allow for quick adjustments on set, reducing downtime and preventing stripped screws that could compromise the rig’s stability. Remember, always use tools that fit perfectly to avoid slippage or damage.
Use the Right Cleaning and Protective Products
Regular cleaning is essential for preventing grit or dust from affecting moving parts or locking mechanisms. I incorporate alcohol wipes and microfiber cloths to gently clean handles, rails, and mounting points after each shoot. For dust and moisture protection, I apply silicone spray on hinges and movable joints—this improves smooth operation and guards against corrosion. Be cautious to use sprays specifically designed for camera gear to avoid damage.
Implement Long-Term Storage Strategies
Proper storage is often overlooked but vital. I store my rig components in padded, dust-proof cases with silica gel packs to absorb moisture. This protects delicate parts from environmental fluctuations that could cause rust or mold over time. Additionally, I regularly inspect the storage environment—keeping humidity low and temperature stable is key to long-term preservation.
Predicting Future Maintenance Trends
As camera technology advances, I foresee a rise in sensor and electronic component longevity. Smart rigs equipped with monitoring sensors could soon alert users to wear or potential failure points, much like how 3D printers currently track machine health. Embracing these innovations now will position you ahead in maintaining your gear efficiently and reducing unexpected failures.
How do I maintain my camera rig over time?
I adhere to a routine of daily visual inspection, using a magnifying glass to check for tiny cracks or loose screws, followed by cleaning and lubrication where necessary. Once a month, I perform a thorough teardown and inspection of all moving parts, applying appropriate lubricants like silicone sprays to ensure smooth operation. Also, I schedule regular professional checkups, especially before long shoots or after transporting my gear over long distances. This proactive approach helps catch issues early before they escalate, saving time and money in the long run. For detailed guidance, I recommend exploring expert tips on mastering camera rig maintenance. Give one of these maintenance routines a try today—your gear’s performance and your peace of mind will thank you.
The Hidden Cost of Overconfidence in Rig Setup
I once believed troubleshooting any camera rig issue would be straightforward, but experience proved otherwise. A seemingly minor oversight, like ignoring handle ergonomics, can snowball into shaky footage and strained wrists. The real revelation was that precision in handle placement and tightness is not just about comfort but about creating a stable foundation that endures the rigors of dynamic shooting conditions. Recognizing this early on saved me countless retakes and long-term gear wear.
Secrets That Breaking the Rules Revealed
It turns out, the most crucial handle positions are often counterintuitive. For example, placing side handles closer to the center enhances control during rapid movements, yet many filmmakers instinctively mount them further out. I learned this the hard way during a fast-paced scene, realizing that a simple repositioning drastically improved shot steadiness. Such lessons underscore the importance of experimenting beyond default setups and trusting your instincts informed by hands-on tests, not just manufacturer recommendations.
Tools That Became My Rig’s Sentries
Investing in a quality torque wrench and modular adjustable handles changed my maintenance routine. These tools provide the precision needed to prevent over-tightening or loosening, which can subtly degrade stability over time. My personal favorite is the calibrated torque wrench, which ensures screws are secured just right—too tight can strip threads, too loose invites wobble. Combining this with high-quality cable clamps and anti-slip pads creates a rig that’s both flexible and resilient, capable of handling the unpredictable nature of on-set filming.
What I Wish I’d Known When I Started
- Handle positioning is an art, not a one-size-fits-all: Adjust handle angles and heights to match your body and shooting style, not just the rig’s default.
- Check everything before shooting: A quick visual and tactile inspection can prevent hours of post-shoot stabilization work.
- Know your gear’s limits: Overloading with accessories can introduce flex, so choose quality, lightweight options from reliable sources.
- Regular maintenance is key: Routine inspections and cleaning extend your rig’s lifespan and maintain performance.
My biggest lightbulb moment was realizing how small adjustments—like handle tightness or placement—can have an outsized impact on footage quality. It’s these nuanced details that separate amateur shoots from professional productions. If you’re committed to elevating your filmmaking, don’t overlook the power of meticulous rig setup and maintenance.
Gear Up for Success with Rescue Strategies
Having faced rig sway and wobble firsthand, I now keep a toolkit that includes a calibrated torque wrench, silicone anti-slip pads, and lightweight counterweights. Combining these elements allows me to quickly troubleshoot and fine-tune my rig, even mid-shoot. These preparations mean fewer surprises and smoother shoots, affirming that quality rigging is ongoing, not just a one-off task. Remember, your gear is an extension of your vision—treat it with the care it deserves, and you’ll see the results in every frame.


