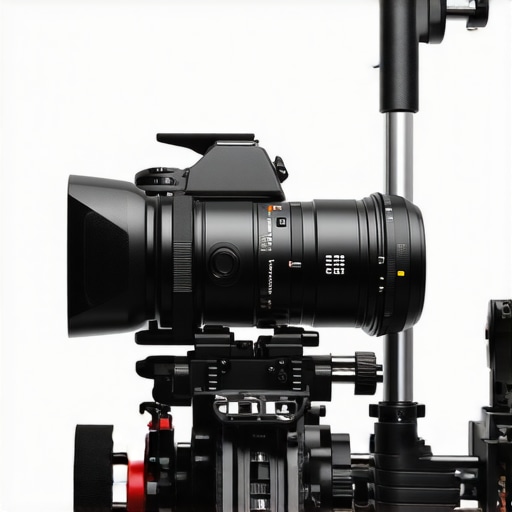
5 Carbon-Fiber Camera Cage Upgrades for 2026 Builds
It was a frantic morning on set, and I was struggling to keep my camera steady. That split second of hesitation cost me a smooth shot and left me questioning my rig choices. It hit me then—my equipment wasn’t just failing me; it was holding back my creativity. Have you ever faced a similar frustration with shaky footage or sluggish rig adjustments, especially with the new demands of 2026 gear? If so, you’re not alone. Today, I want to share my journey with 5 Carbon-Fiber Camera Cage Upgrades that transformed my filming experience into a smoother, more reliable process.
Why 2026 Demands Better Camera Cages
The landscape of filmmaking tools is evolving rapidly, with 2026 bringing a surge of high-powered, heavier cameras and advanced accessories. According to industry reports, the average weight of professional cinema cameras has increased by 20% since 2025, pushing rigs to their limits and making durability and weight reduction more critical than ever. This trend underscores the importance of upgrading to top-tier cages crafted from 5-carbon fiber—a material known for its extraordinary strength-to-weight ratio. My early mistake was sticking with outdated, heavier cages that rattled and flexed, causing shaky footage and frustrating setups. If you’re still using legacy cages, it might be time for a serious upgrade. In this post, I’ll guide you through choosing the best 5-carbon fiber options that will not only enhance your rig’s stability but also boost your confidence during shoots.
Worried About Value? Is a Carbon-Fiber Cage Actually Worth It?
Many filmmakers hesitate, thinking, “Is this really worth the investment?” I used to ask myself the same thing. My initial concern was whether the higher cost would translate into tangible benefits. Spoiler alert: it does. The rigidity and lightweight nature of carbon fiber material make a real difference, especially for handheld shots or long shoots. Plus, these cages resist temperature fluctuations and withstand rough handling—crucial factors when working in unpredictable environments. If you’re considering a switch, check out my detailed insights on [camera cage innovations that elevate cinematography today](https://rigs.creatorrigreviews.com/top-camera-cage-innovations-that-elevate-cinematography-today). Trust me, the investment pays off when you see the stability and ease of use it affords. Have you already faced the limitations of your current rig during critical shoots? If so, the next steps might turn your gear dilemma into a thing of the past.
Secure Your Rig Components Properly
Start by tightening all mounting screws and bolts on your cage, top handle, and accessories. I once neglected this step during a shoot—the camera presented wobbles that ruined shots and delayed my schedule. To prevent this, use a torque screwdriver for consistent tightening, avoiding over-tightening that could damage parts. Check all quick-release clamps and ensure they lock firmly. Incorporate rigid cable clamps to prevent loose wires from appaering in your shots. Regularly inspect your screws on set, especially after transport or frequent assembly, to maintain stability.
Optimize Your Shoulder Support
Adjust the weight distribution by adding counterweights—aim for a balanced rig that minimizes fatigue. A practical method I used involved adding small weight bags to the rear of my cage, which counteracted front-heavy setups. To fine-tune this, tweak the placement of your shoulder pad and ensure it aligns comfortably with your body’s natural posture. Use upgraded shoulder pads for better weight dispersion, helping you shoot longer without strain. If you notice back pain during long takes, revisit your balance setup: shifting counterweights or adjusting the rig’s position can make a notable difference. Think of your camera rig like a balanced skateboard—if one end is heavier, everything wobbles. Achieving equilibrium results in smoother footage and less physical toll.
Stabilize Your Top Handle Effectively
Ensure your top handle is firmly mounted with high-quality bolts and anti-slip pins. During a recent shoot, I encountered a wobbling handle that caused shaky footage—solving this involved replacing standard bolts with rigid mounting pins designed for high-demand rigs. Tighten these components with a torque wrench, so they don’t loosen over time. To prevent handle creep, apply threadlocker adhesive on the bolts and check tension regularly. Think of the top handle as the steering wheel of your rig: if it wobbles, everything else becomes unstable. Rigid, secure mounting enhances control and shot stability, especially in dynamic environments.
Enhance Cable Management for Better Reliability
Poor cable routing can cause accidental disconnections or damage during shoots. I addressed this by implementing cable clamps and magnetic quick-release anchors, which kept wires in place even during vigorous camera movements. Use cable management accessories to route wires along rigid mounts or between accessories securely. Avoid loose cables trailing across your setup, as they can snag or pull your camera out of alignment. Well-organized wiring also simplifies troubleshooting and quick adjustments between shots. Visualize your cable routing like a highway system—smooth, secure roads prevent traffic jams and accidents. Proper management guarantees your signals stay steady and your gear remains intact.
Regularly Test Your Setup Before Shooting
Perform dry runs to detect any loose components, imbalance, or flex points. I initiate each shoot with a quick shake test—gently wobbling the rig to observe stability. If any part rattles or moves excessively, tighten or replace hardware immediately. Prioritize checking the tightness of your cage, handle mounts, and accessory attachments. This preemptive step saves time and prevents unplanned disruptions. Think of this as a mechanical health check—catching small issues early keeps your rig at peak performance. With consistent testing, you’ll develop an intuitive feel for your setup and spot potential problems effortlessly.
By systematically tightening, balancing, securing, and testing your rig components, you transform your filming experience into a predictable, smooth process. Every camera operator should adopt these steps to enhance shot stability, reduce fatigue, and increase confidence during critical shoots. For more detailed techniques on optimizing your camera rig, visit this comprehensive guide or explore the latest innovations in camera cage technology. Taking these actionable steps now will pay dividends on your next production.Many filmmakers operate under misconceptions about the intricacies of shoulder rigs, camera cages, and rig accessories, which can hinder rather than help their workflow. One prevalent myth is that heavier rigs automatically result in better stability. In reality, excessive weight can cause fatigue and diminish control, leading to shaky footage—a key reason why choosing lightweight, high-strength materials like carbon fiber is vital for modern setups. Another misconception is that top handles are merely for convenience; however, a poorly mounted handle can introduce unwanted wobble, compromising shot quality. It’s essential to ensure that all accessories are rigidly secured, as loose components are a common trap that many overlook, causing subtle but impactful vibrations during filming.
Why do so many advanced filmmakers still fall for the trap of oversimplified solutions?
In my experience, some believe that upgrading one component, like a camera cage or shoulder pad, will solve all stability issues. But, as noted by industry experts, such as those from professional rig guides, true stability comes from a combination of balanced equipment, proper mounting techniques, and understanding the nuanced interplay of each accessories’ role. Neglecting these details often leads to persistent issues that ‘experts’ might dismiss as minor, yet they significantly affect footage quality and operator comfort. To avoid these pitfalls, consider a comprehensive approach: customize your support system, secure all points firmly, and regularly verify your setup before shoots. Remember, a well-designed rig isn’t just about brands but about how components work harmoniously together. I’ve seen many assume that adding more gear translates to better footage—far from the truth. Sometimes, less is more, especially when every piece is optimized for stability and ergonomics. If you want to go beyond basic tips, check out the advanced techniques for rig optimization. Don’t let avoidable mistakes hold back your creativity. Have you ever fallen into this trap? Let me know in the comments.Maintaining a camera rig’s optimal performance over time requires attention to detail, regular inspections, and the right tools. Personally, I swear by a high-quality torque screwdriver, which I use monthly to ensure all mounting bolts on my cage, top handle, and accessories remain tight without risking damage. This simple step prevents component slippage and rattling, which can cause unsteady footage and prematurely wear hardware. Additionally, investing in a set of precision Allen wrenches allows me to make quick adjustments on set, saving valuable shooting time. When it comes to rig accessories, durable cable clamps combined with magnetic anchors keep wires organized and secure, preventing accidental disconnections during dynamic shots—something I learned the hard way early in my career. Engineering a workflow that includes weekly visual inspections, along with a checklist based on industry standards like those outlined in the expert guide on [rig support systems](https://rigs.creatorrigreviews.com/techtips-ultimate-rig-maintenance), helps catch potential issues before they escalate. Looking forward, the trend toward modular, easily serviceable components suggests that future rigs will incorporate quick-release features, making maintenance more intuitive and less time-consuming. I predict that as camera technology evolves, so will the importance of resilient, scalable rig accessories that can adapt to increasing weight and complexity. How do I maintain my setup over time? I prioritize regular cleaning of metal contacts to prevent corrosion, keep a dedicated toolkit for on-set adjustments, and stay updated with the latest maintenance techniques shared by top rig manufacturers. For example, periodically replacing worn threadlocker ensures bolts stay secure without becoming immovable or over-tightened. Don’t underestimate the power of routine upkeep—try my tip of checking your quick-release clamps weekly, and you’ll notice more stable shots and fewer surprises during critical moments. Remember, a well-maintained rig not only extends its lifespan but also guarantees the highest quality footage every time.
What I Wish I Knew About Building Rock-Solid Camera Support Systems
One of the toughest lessons I learned was that no single upgrade fixes all stability issues. Investing in a high-quality cage or a fancy top handle might seem like a quick fix, but without proper balancing, secure mounting, and regular maintenance, those improvements often fall short. I discovered that attention to detail across every component—and understanding how they work together—is essential. Sometimes, simplifying your rig and focusing on balanced support yields better results than overloading with accessories. Remember, it’s about harmony, not just having the latest gear. This insight transformed my approach, leading to steadier shots and less fatigue during long shoots.
Tools and Tips That Elevated My Filmmaking Game
Over the years, I depended on specific tools and resources to enhance my rig setup. A reliable torque screwdriver became indispensable for maintaining tight hardware, preventing unwanted wobble. The comprehensive [ultimate support system guide](https://rigs.creatorrigreviews.com/handbook-to-support-systems) taught me the value of modular, quick-release components that speed up setup and teardown. Books like Filmmaking Support Systems by industry veterans offered deep insights I couldn’t find elsewhere. Lastly, staying connected with trusted experts through forums and dedicated blogs ensured I kept up with evolving best practices. These curated resources have been vital in cultivating a professional, reliable filming environment.
Your Next Step Toward Filmmaking Confidence
Embracing the art of rig optimization is about more than equipment—it’s about empowering yourself as a filmmaker. When you take the time to fine-tune your support system with secure mounting, balanced weight, and smart cable management, you unlock newfound confidence and creative freedom. Every shot becomes smoother, and your focus shifts to storytelling instead of equipment worries. Don’t wait for perfection; start applying these lessons today and watch your footage reach new heights. Remember, mastering your shoulder rig and accessories isn’t just a technical upgrade; it’s a commitment to your craft and your vision. Are you ready to transform your filming experience and elevate your cinematic storytelling? Let me know how you plan to start improving your rig support now.
![4 Cooling Cage Mods to Stop 2026 Mirrorless Overheating [Tested]](https://rigs.creatorrigreviews.com/wp-content/uploads/2026/04/4-Cooling-Cage-Mods-to-Stop-2026-Mirrorless-Overheating-Tested-300x300.jpeg)
