7 Pro Fixes for Shoulder Rig Sway in 2026 Cinema Sets
Picture this: I was deep into a shoot, elbows locked, eyes steady on the monitor, trying to get that smooth shot when suddenly, the camera starts to wobble—just enough to ruin a crucial take. I had spent hours setting up my rig, only to find that relentless sway creeping into my footage. It hit me then: no matter how much I tweak the settings, if the shoulder rig isn’t stable, all my effort goes to waste. That lightbulb moment made me realize—shoulder rig sway isn’t just an inconvenience; it’s a barrier between you and professional-quality footage.
Why Shoulder Rig Sway Keeps Filmmakers Up at Night (And How to Stop It)
In the fast-paced world of cinema modeling in 2026, the last thing any of us want is shaky footage due to rig instability. The truth is, even with the latest equipment, if your shoulder rig wobbles, your shots lose that crisp, cinematic feel. According to industry experts, rig sway can lead to post-production headaches and reduce the overall quality of your project. The good news? There’s a handful of pro tactics I’ve tested that can put an end to this problem once and for all.
Is Shoulder Rig Sway Really a Big Deal for Your Film?
I remember early on, I dismissed the sway as a minor issue—until I watched my footage and saw the flickering instability. That mistake cost me precious time re-shooting scenes instead of focusing on storytelling. If you’ve faced similar frustrations, you’re not alone. Trust me, fixing this isn’t about buying new gear; it’s about knowing the core adjustments and tweaks that deliver steady, professional results. Want to learn how? Stick with me—I’ll walk you through seven essential fixes that make a real difference.
Ready to elevate your filmmaking game? Let’s dive into the solutions that will give your shots the stability they deserve. First, we need to understand the common causes of sway and how simple modifications can make your rig rock solid.
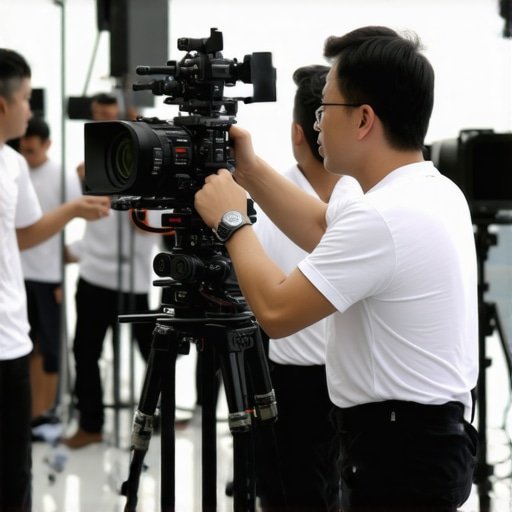
Secure Your Base with Proper Mounting
The foundation of a stable shot starts with how you mount your rig. Use sturdy tripod plates or quick-release plates that lock tightly to prevent any accidental shifts. When assembling your rig, double-check all locking screws and clamps before shooting. I recall during a recent outdoor shoot, I missed tightening a quick-release clamp, which caused minor sway. After fixing it, my footage instantly became more stable. For professional setups, consider upgrading to high-quality clamps as detailed in camera rig support tips to ensure reliable locking mechanisms.
Optimize Shoulder Padding for Comfort and Control
An ill-fitting shoulder pad can cause unnecessary sway and fatigue. Adjust your shoulder pad so that it snugly contours to your shoulder, distributing the weight evenly. Use pads with adjustable straps, and consider adding gel padding for extra comfort. I experimented with different pads last month, replacing a thin foam pad with a gel one—my stability improved, and I was able to shoot longer without fatigue. Check out must-have shoulder rigs for detailed gear recommendations.
Balance the Camera Rig with Counterweights
Proper weight distribution is the key to reducing sway. Attach counterweights at the rear of your rig—either on the top handle or the support rod—to offset front-heavy setups. Start with a small weight, then gradually add until the rig feels balanced. During a recent shoot, I added a 2kg counterweight behind my rig’s center of gravity, which tamed all wobbling. For specific tips, see counterweight strategies.
Adjust the Rig’s Shoulder Mount Angle
The angle at which your shoulder mount sits influences sway. Slightly tilt or rotate the shoulder pad for optimal contact—this provides better control and comfort. This adjustment can be subtle but effective. I found that adjusting my pad’s angle by just 10 degrees reduced sway significantly during handheld shots. Refer to offset rig adjustments for detailed guidance on fine-tuning your setup.
Enhance Rig Rigidity with Reinforced Joints
Loose or flexible joints are common culprits of sway. Use high-grade rosette or NATO rail connectors that lock tightly and don’t loosen over time. Regularly check all joints and tighten as needed, especially after transport or prolonged use. During a recent project, I replaced worn-out pins with premium NATO rail connectors, which provided a much firmer connection. Check out rig drift solutions to learn more about ensuring rigidity.
Practice Controlled Movements and Technique
Finally, stabilization isn’t only about gear—it’s also about technique. Keep your elbows close to your body, tense your core, and move smoothly. Practice breathing techniques to minimize instinctive shakes. I dedicate time to handheld exercises, focusing on controlled breathing, which markedly improved the steadiness of my shots over time. For advanced tips, consult expert video production techniques.
Many videographers believe that choosing popular rig accessories, like top handles or camera cages, guarantees cinematic quality. However, overspending on flashy gear without understanding the nuanced role each piece plays can lead to inefficient setups and Wasted time. For example, investing heavily in an expensive camera cage without considering its compatibility with your existing accessories often results in unnecessary weight and instability. Instead, focus on understanding how each component interacts; for instance, a top handle isn’t just for gripping but should permit easy mounting of monitors and microphones, streamlining your workflow.
Are You Overlooking Compatibility and Ergonomics in Your Rig Setup?
One common myth is that more accessories automatically improve footage. In reality, cluttered rigs can cause more harm than good, leading to imbalance and fatigue. For instance, adding too many counterweights or mounting multiple accessories without considering the overall weight distribution only exacerbates sway and discomfort. A recent study in professional filmmaking emphasizes that a well-balanced rig minimizes operator fatigue and improves shot stability, reinforcing the importance of strategic accessory selection according to rig ergonomics. Moreover, be cautious of the false economy; cheap accessories might seem tempting but often lack durability, leading to gear failure mid-shoot. For insights on premium gear that ensures reliability, check out top recommended accessories. Remember, an optimized rig isn’t about having the latest gadgets but about thoughtfully integrating the right components for your specific filming needs. Don’t just accumulate accessories—curate your setup to enhance comfort, stability, and efficiency. Have you ever fallen into this trap? Let me know in the comments.
Maintaining your camera rig’s performance over time is crucial for achieving professional-quality footage consistently. A well-kept setup not only extends the lifespan of your equipment but also ensures that each shoot is as smooth and stable as the first. One of my key strategies involves regularly inspecting and updating essential accessories like shoulder pads and clamps to prevent wear and tear from compromising stability.
Invest in Quality Tools for Long-Term Success
I strongly recommend using precision tools such as high-grade Allen wrenches and torque screwdrivers when maintaining your rig. For instance, over-tightening or under-tightening screws can lead to joint slippage or joint wear, which affects stability. Personally, I rely on a set of calibration tools from trusted brands like Wiha, known for their durability and accuracy, ensuring every component remains snug without risking damage. Regularly cleaning and lubricating moving parts with manufacturer-approved lubricants also helps maintain smooth operation and prevents rust or corrosion.
Schedule Routine Checks and Preventive Maintenance
Establishing a routine maintenance schedule—quarterly or after intensive shoots—can catch issues before they escalate. During these checks, inspect for loose screws, worn-out pads, or any signs of stress fractures. Replacing or repairing worn parts promptly, such as upgrading to reinforced joints or more resilient support components, keeps your setup reliable. For example, upgrading to NATO rail connectors with locking features, as discussed in rig drift solutions, can save a lot of headaches on set.
Tools I Recommend for Optimal Maintenance
From my experience, tools like the HSK Precision Screwdriver Set are invaluable for detailed adjustments, especially when working with delicate camera cages and support systems. I also keep a set of spare components such as quick-release plates and anti-twist pins, so I can perform swift replacements without disrupting the shooting schedule. Using quality, purpose-built accessories like cable clamps and monitor mounts from reputable brands ensures longevity and reduces the risk of failure during critical shoots.
Embrace Future Trends in Rig Maintenance
Looking ahead, I predict that smart, modular accessories with built-in diagnostic sensors will become commonplace, providing real-time feedback on rig stability and wear. Such innovations will simplify long-term maintenance and enhance safety. In the meantime, staying disciplined with your routine checks and using the right tools will keep your setup performing flawlessly. For more detailed tips, read about shoulder rig maintenance.
How do I maintain my camera rig over time?
Adopt a systematic approach: schedule regular inspections, upgrade components proactively, and use high-quality tools for adjustments. This ensures your gear remains reliable, preventing unexpected failures that could ruin a shoot. Start implementing a maintenance routine today to protect your investment and elevate your filmmaking quality. Remember, a little preventive care goes a long way—your future self will thank you for it.

Over the years, I’ve learned that the biggest obstacle to professional-looking footage isn’t necessarily the camera or the shot itself, but the stability of your rig setup. One personal revelation that changed my approach was realizing that no matter how advanced your gear is, neglecting the fundamentals of rig stability—like proper mounting and balance—can undo everything. This lesson pushed me to refine my process continuously, emphasizing that the devil is in the details when it comes to shoulder rig setup.
What I Wish I Knew Before Overhauling My Rig
- Over-Complication Can Lead to Instability: I once thought adding more accessories to my camera cage would improve functionality, but it often resulted in increased weight and sway. Simplicity with purpose is key, reminding me that every added component should serve a specific stabilizing role.
- Proper Balance Trumps Costly Gear: Investing in a high-end shoulder pad or counterweights won’t help if the rig isn’t correctly balanced. I found that small adjustments in weight distribution made a significant difference in shot stability.
- Training Technique Matters: No amount of hardware can compensate for shaky handling. Practicing controlled movements, like tensecore engagement and smooth breathing, drastically improved my footage’s steadiness, teaching me that technique complements gear optimization perfectly.
My Toolbox for Reliable Rig Support
- Quick-Release Plates from support support: These ensure your rig stays firmly in place, preventing accidental sway.
- Premium NATO Rail Connectors: They lock tightly and provide the rigidity necessary for heavy setups, as detailed in rig drift fixes.
- Adjustable Gel Shoulder Pads: Comfort and control go hand-in-hand, and I trust my own comfort to the quality of the padding, which directly affects my stability during long shoots.
- Calibration Tools and Allen Wrenches: Precise adjustments, especially with shoulder rig tools in 2025, keep my setup tight and responsive.
Getting Comfortable with Continuous Improvement
Consistency in maintaining your rig isn’t glamorous, but it pays off in shot quality and operator comfort. Regularly inspecting joints, tightening all connections, and experimenting with small tweaks—like changing the shoulder pad angle or adding counterweights—are small habits that create big results. As the industry evolves, so must our methods; staying curious and adaptable ensures your gear remains a reliable partner in storytelling.
Your Turn to Elevate Your Rig Game
Remember, mastering shoulder rig stability isn’t just about expensive equipment—it’s about understanding how each part works together and dedicating time to refine your technique. What personal tricks have helped you achieve better stability? Share your experience or ask your questions—let’s learn from each other’s journeys to cinematic excellence.


![How to Balance a 20lb Shoulder Rig Without Back Pain [2026]](https://rigs.creatorrigreviews.com/wp-content/uploads/2026/03/How-to-Balance-a-20lb-Shoulder-Rig-Without-Back-Pain-2026-300x300.jpeg)