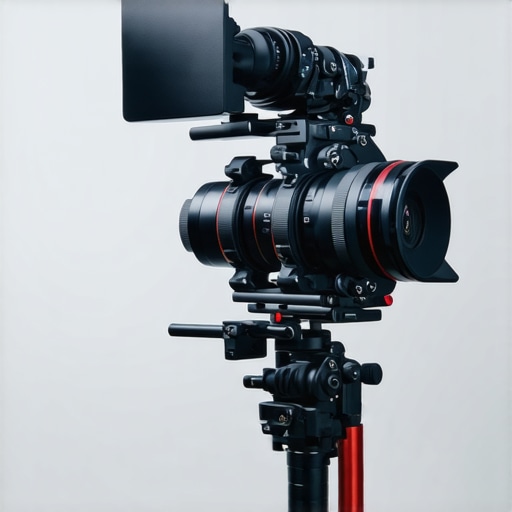
3 Pro Counterweights to Perfectly Balance Your 2026 Shoulder Rig
Have you ever been midway through a shoot when your shoulder rig suddenly feels like a ton of bricks, forcing you to stop and readjust yet again? I remember those days all too well—aching shoulders, shaky footage, and a nagging feeling that I was fighting my equipment rather than working with it. That lightbulb moment came when I realized that no matter how high-end my camera gear was, I was missing a crucial piece of the puzzle: proper counterweights. It’s astonishing how a balanced rig can transform your shooting experience and dramatically improve the stability and professionalism of your footage.
Why Proper Counterweighting Makes or Breaks Your Filming Experience
Today, I want to delve into a game-changing aspect of filmmaking gear that often goes unnoticed—**counterweights for your shoulder rig**. If you’re like me, at some point, you’ve probably struggled with rigs that tilt forward, sag, or cause fatigue after just a few minutes of use. The truth is, the 2026 models are built to handle more weight and versatility, but without the right counterweights, all that technology is underutilized. I learned this the hard way early on, making the mistake of overloading my rig without considering the balance, which led to shaky shots and back pain. A quick peek at experts [here](https://rigs.creatorrigreviews.com/shoulder-rig-counterweights-5-pro-tips-to-fix-balance-in-2026) shows that proper weight distribution is essential for achieving cinematic stability and reducing fatigue.
Is Overthinking Counterweights a Waste of Time?
Let’s clear the air—some might think investing in multiple counterweights is overkill. I once believed the same, assuming my gear’s weight was manageable and that I just needed better shoulder pads. But I quickly discovered that neglecting balance, especially with heavier setups, drastically hampers shot quality and comfort. Early on, I made the mistake of relying solely on the stock weight distribution, which caused constant adjustments and frustration. That’s why understanding the specific types of counterweights and how to utilize them is a game-changer. Trust me, investing a little time now means smoother shoots and better footage later.
In the following sections, I’ll guide you through the top pro tips for selecting and using **the three essential counterweights** for your 2026 shoulder rig. Whether you’re shooting for a documentary, a narrative, or a commercial, these insights will help you optimize your setup—and finally, shoot with confidence and comfort.
Before we get into the nuts and bolts, have you faced moments where your rig unbalanced or caused discomfort? Drop a comment or reach out—I’ve been there, and I’m here to help you avoid the same pitfalls. Ready to elevate your filmmaking game? Let’s go!
Assess Your Current Setup
Begin by examining your existing rig—remove any accessories and note how it tilts or shifts when you hold it. Use a simple plumb line or a level to identify whether the rig leans forward, backward, or to the sides. When I did this during a shoot, I noticed my rig tilted forward significantly, causing strain on my shoulder. This initial assessment pinpoints where additional counterweights are needed and helps you plan your next steps.
Select the Right Counterweights for Your Rig
Identify the types of counterweights compatible with your setup; common options include weight plates, sandbags, or specialized counterweight bags. Focus on those that can be securely attached and adjusted easily. I recommend starting with adjustable weight discs, similar to gym free weights, which offer fine-tuning for perfect balance. Remember, heavier setups require more precise counterweights, or you’ll face instability and fatigue.
Attach and Fine-Tune Your Counterweights
Secure your chosen weights at the designated points—usually the back or bottom of your rig. For example, I used a modular counterweight system onto the base of my rig’s handle, allowing me to slide in or remove weights quickly. As I added weights, I tested hold and movement, ensuring the rig no longer tilted or wobbled. Small adjustments are key—add a few ounces, then check stability; repeat until the camera feels natural and balanced.
Test the Balance with Movement
Once attached, simulate typical shooting motions—pan, tilt, walk—and observe if the rig maintains equilibrium. During my first test, I noticed the rig tended to shift forward during a walking shot before adding weights at specific points to counteract it. This step ensures your rig feels comfortable over extended periods and reduces fatigue, leading to smoother, more professional footage.
Secure Everything for Long Shoots
Verify that all weights are tightly secured—loose weights can shift or fall, risking damage or injury. Use clamps, mounting brackets, or specialized bags with fasteners to prevent movement. During a lengthy shoot, I once overlooked this detail, causing weights to shift mid-take and ruin a shot. Consistently double-check your setup before shooting to maintain stability throughout the session.
Adjust as You Go
Balance isn’t a one-time task. As you switch lenses, add accessories, or change shooting angles, revisit your counterweights. I found that after mounting a matte box and follow focus, I needed to redistribute weights slightly—small tweaks enhanced comfort and shot quality. Regular adjustments fine-tune your rig for the evolving filming demands, ensuring consistent results.
By following these concrete steps, you’ll transform your unbalanced setup into a smooth, dependable filmmaking tool. Proper counterweighting reduces fatigue, eliminates unwanted movement, and elevates your footage—from shaky clips to cinematic shots. Remember, a well-balanced rig isn’t just about comfort; it’s about creating a professional image with minimal effort and maximum stability.
While it’s common to focus on choosing the right top handle or camera cage, many filmmakers overlook nuanced pitfalls that can hinder their setup’s effectiveness. One widespread misconception is assuming that all rig accessories are universally compatible, which is far from the truth. For example, a popular NATO top handle might seem ideal, but if it doesn’t securely integrate with your specific camera cage, it introduces wobble and instability, compromising shot quality. Investing without verifying compatibility is a classic trap that can lead to frustration and wasted resources.
Are You Overlooking the Subtle Interplay Between Components?
Many seasoned professionals emphasize the importance of understanding how different accessories work together, but often understate the significance of precise fitting and weight distribution. This oversight can cause unintentional strain on your gear’s mounting points and even damage delicate parts over time. Research from cinematography experts highlights that a mismatch in accessories not only affects stability but also accelerates wear and tear, ultimately increasing your costs. To avoid this, always test your entire rig as a cohesive system before shooting and consult detailed compatibility guides here. Moreover, a common mistake stemming from the desire for quick upgrades is neglecting the importance of dynamic adjustment. Your setup should allow fine-tuning, which can be hindered by rigid or poorly designed connections. Implementing modular accessories that offer adjustability ensures longevity and performance. Remember, the goal isn’t just adding more gear but creating a balanced, adaptable system. For insights into the latest innovations, check out top camera cage innovations to see how smart accessory integration can elevate your filmmaking. Keep in mind, even the most robust setup is vulnerable if components aren’t carefully matched and fitted. Always double-check compatibility charts and, when in doubt, test with real gear to spot hidden issues. This proactive approach prevents costly mistakes and ensures your setup remains reliable under demanding conditions. Have you ever fallen into this trap? Let me know in the comments. Your experience might help others avoid these subtle but impactful errors.
Invest in Reliable Tools and Maintenance Habits for Longevity
As filmmakers, our equipment is our livelihood, which is why establishing a consistent maintenance routine is vital. I personally prefer using a microfiber cloth and compressed air to keep my camera cages and rig accessories free of dust and debris. Regularly inspecting mounting points, fasteners, and joints ensures everything stays secure and prevents costly failures during shoots. For critical components like shoulder rigs, I recommend lubricating moving parts with lightweight, high-quality grease—just enough to prevent squeaking without attracting dirt. These simple, deliberate habits extend the lifespan of your gear and maintain optimal performance, saving you time and money in the long run.
Essential Tools That Make Maintenance Easier
Over the years, I found that having a dedicated toolkit simplifies maintenance. A compact set of precision screwdrivers, especially Torx and Phillips bits, allows quick adjustments and tightening of loose screws on your rigs and cages. I also keep a set of rubber gloves on hand to avoid fingerprints and oils contaminating delicate surfaces. For more comprehensive care, I trust silicone-based lubricants for hinges and joints, which resist dust and provide smooth operation. Investing in quality tools isn’t just about convenience—it’s about ensuring your gear remains as reliable as the day you bought it.
Predicting Future Trends in Rig and Accessory Durability
Looking ahead, I believe innovations like modular, tool-less components will become standard, making maintenance and upgrades even more straightforward. There’s a trend toward smarter materials that resist corrosion and wear, extending the lifespan of rigs and accessories, especially in demanding environments. Staying updated with these advancements ensures your setup remains compatible and durable, minimizing downtime and increasing your creative output. For in-depth insights on upcoming innovations, I recommend exploring top camera cage innovations.
How do I maintain my gear and upgrades over time?
Developing a scheduled maintenance plan—such as monthly inspections and cleaning—helps catch issues early before they escalate into costly repairs. Documenting your setup with photos can also assist in troubleshooting and maintaining consistency across shoots. Additionally, keeping a close eye on the wear and tear of frequently used components allows you to replace parts proactively, preventing unexpected failures. Remember, investing time in proper maintenance not only prolongs the life of your gear but also ensures your shoots run smoothly, resulting in professional-quality footage every time.
Try incorporating a routine check of your shoulder rig’s fasteners and moving parts before each shoot. Small habits like tightening screws or lubricating joints can save you frustration later. Want to see how I organize my maintenance toolkit? Visit our contact page for personalized tips or to share your own routines. Staying proactive in gear care is a game-changer—make it a priority today for guaranteed long-term success.
The Hardest Lesson I Learned About Top Handles and Rig Accessories
After countless shoots, I realized that no matter how fancy my camera gear was, neglecting proper balance with my rig accessories led to shaky footage and fatigue. The biggest lightbulb moment was understanding that balance is more than just adding weights—it’s about precise placement and understanding your rig as a system. This lesson ultimately saved my shoulder and elevated my filmmaking quality.
Uncover the Myths That Could Be Holding You Back
I used to assume that investing in high-end gear would automatically ensure smooth shots. However, I learned that without paying attention to how accessories like top handles and support rigs interact, I was leaving performance on the table. Compatibility and proper setup matter more than price tags. Reading detailed guides and real-world reviews, like these support system tips, helped me avoid costly mistakes.
The Power of Fine-Tuning Your Support System
One thing I wish I had understood earlier is that balance isn’t static — it requires regular adjustments, especially when adding new accessories or changing shooting angles. Small tweaks can make a huge difference in stability and comfort. For example, redistributing weights after mounting a matte box prevented fatigue during long takes. This proactive approach transforms a cumbersome setup into a seamless extension of your vision.
Where to Go from Here
To elevate your rig game, I recommend exploring expert-backed resources like comprehensive support system guides, which provide practical insights into customizing your gear for stability and comfort. Investing in adjustable counterweights, modular accessories, and routine maintenance routines will help you shoot with confidence, every time.
Don’t Let Poor Balance Hold Your Creativity Back
Achieving perfect rig balance is an ongoing journey, but the payoff is worth it — steady shots, less fatigue, and a more professional look. Whether you’re shooting a quick commercial or a multi-day documentary, the right support system can make or break your results. Take the time to assess, adjust, and optimize your setup today, and watch your filmmaking reach new heights.
What has been your biggest challenge with rig balance? Share your experiences below—I’m eager to hear what’s worked (or not) for you!


![How to Balance a 20lb Shoulder Rig Without Back Pain [2026]](https://rigs.creatorrigreviews.com/wp-content/uploads/2026/03/How-to-Balance-a-20lb-Shoulder-Rig-Without-Back-Pain-2026-300x300.jpeg)