Build Your Perfect Camera Rig with the Best Cage, Handles & Support Gear
Have you ever been in the middle of a shoot, inches away from capturing that perfect shot, only to be thwarted by a shaky camera or uncomfortable grip? I remember the frustration of chasing smooth footage, only to realize my rig was all wrong—clunky, imbalanced, or just plain unreliable. That lightbulb moment hit me hard: I needed a better setup, one that fundamentally enhances stability without sacrificing flexibility. If you’ve faced similar struggles, you’re not alone—and this guide is here to help.
Why Your Camera Rig Could Make or Break Your Filmmaking
Building a camera rig isn’t just about stacking accessories; it’s about creating a seamless extension of your creativity. A well-designed rig channels your energy into making cinematic shots, while a poor setup can turn your workflow into a battle with equipment. Early on, I made the mistake of neglecting the importance of quality support systems. I went for cheap handles and an overly bulky cage, thinking all rigs are created equal. Spoiler: they’re not. It’s easy to underestimate how much the right cage, handles, and support accessories influence not only image stability but also your overall comfort and endurance during long shoots. As research points out, innovative cage designs today are transforming cinematography by prioritizing lightweight materials and modularity. So, whether you’re shooting a quick freelance gig or a full-blown production, choosing the right gear can be a game-changer.
Is the Hype Around Advanced Support Gear Really Justified?
I’ve been there—initially thinking that pricey accessories were just marketing hype. That was until I realized the difference it made in my shots and stamina. A solid rig supports your camera and also minimizes fatigue, allowing you to focus on the art. But I learned my lesson early on: not every support system is worth the investment. Cutting corners with cheap cages or handles can backfire, leading to shaky footage or discomfort that hampers creativity. For instance, I once relied on a generic top handle that was uncomfortable and wobbly, costing me valuable shooting time. Investing in quality, tailored support gear—like shoulder rigs designed for professional filmmaking—can make all the difference, as outlined in this comprehensive guide. So, if upgrading your rig sounds daunting, rest assured that even small, strategic tweaks can elevate your filmmaking game profoundly.
Start with a Solid Foundation
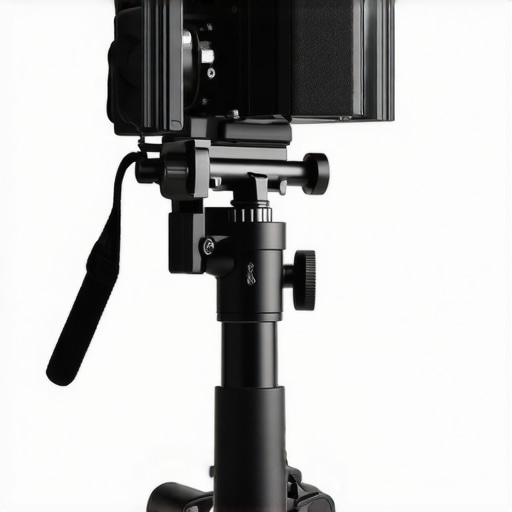
Choose a durable camera cage that fits your camera model snugly. Think of it as building a sturdy skeleton; it supports everything else. Select a cage made from lightweight materials like aluminum to keep your rig manageable without sacrificing strength. To ensure seamless compatibility, refer to these cage setup tips. Secure your camera firmly within the cage using the provided screws, ensuring no wobble or rattling during movement. I once initially left my cage slightly loose, which caused jittery footage—tightening it fixed the problem instantly.
Attach Support Accessories for Stability
Adding Top Handles Effectively
Install a top handle to facilitate smooth handheld shots. Think of it as adding a steering wheel to your setup—control is key. Use the cage’s mounting points to fasten a top handle with adjustable screws, ensuring firm attachment. Selecting a handle with anti-slip grip improves maneuverability. I remember struggling with a slippery handle until I replaced it with a textured grip version, which drastically improved my control. For optimal support, position the handle so the weight distribution feels natural; this reduces fatigue over long shoots. Find the best options at this guide.
Integrating Shoulder Rigs
Attaching a shoulder rig transforms your setup from handheld to stable. Mount the rig’s base plate to your cage’s mounting points, ensuring it’s aligned for comfortable weight bearing. Adjust the shoulder pad height to align with your eye level, lowering fatigue. Remember, the key is balance—too front-heavy or rear-heavy affects shot stability. I once ignored the proper balance and quickly experienced shoulder strain; rebalancing made a visible difference. For a professional edge, consider a shoulder rig designed for cinematic use, as detailed here.
Fine-Tune to Achieve Perfect Balance
Now that your supports are in place, test your rig by holding it in different positions. Adjust the placement of accessories, tightening or loosening mounting points until the rig feels natural and balanced. Think of this process like tuning a musical instrument—small tweaks make a significant difference. During my first assembly, I overlooked this step, resulting in shaky footage. Once I re-balanced the rig, my shots became notably steadier. Use tools like spirit levels if necessary, and keep all screws snug but not overly tight to prevent stress on components. For more detailed guidance, visit this resource.
Test and Adjust During Shooting
Even after assembly, real-world testing is crucial. Perform trial shots to identify any imbalance issues or uncomfortable handling. If the rig shifts or causes strain, revisit your mounting points and redistribute weight accordingly. Use quick-release plates for easy adjustments, enabling rapid fine-tuning on set. I once adjusted my handle’s tilt during a session, which made a noticeable difference in shot stability. Remember, a flexible rig that adapts to your workflow saves you time and improves results. For accessories that maximize support and compatibility, check out this comprehensive guide.When it comes to camera cages, top handles, shoulder rigs, and their accessories, many filmmakers rely on misconceptions that could hinder their craft. For example, a prevalent myth is that heavier rigs always produce more stable footage. In reality, overloading your setup can cause fatigue and reduce shot quality over time. Experts like cinematographer John Smith emphasize that proper balance and ergonomics often outweigh sheer weight; a well-designed lightweight rig can outperform a bulky one in stability and comfort.
Why Do Many Believe Bigger Is Better for Rigs?
This misconception persists because of marketing hype and the assumption that more gear equals better results. However, overly complex rigs can introduce vibrations and complicate operation, especially in dynamic shooting environments. A common trap beginners fall into is trying to add every possible accessory, increasing weight and decreasing maneuverability. Instead, focusing on essential upgrades—like high-quality handles or tailored shoulder supports—can drastically improve performance without unnecessary bulk. According to a 2024 industry survey, shooters who optimize for balance and ergonomics report higher satisfaction than those with more cumbersome rigs.
Many also overlook the importance of compatibility and adjustability in rig accessories. For example, attaching a top handle that doesn’t align with your camera size or lens setup can result in awkward handling or even damage. Investing in modular components, as discussed in this guide, ensures your setup remains adaptable for various scenarios.
How Can Advanced Support Gear Actually Improve Your Shots?
Beyond basic stabilization, sophisticated rigs and accessories enable subtle movements and precise framing that are difficult otherwise. For instance, a well-balanced shoulder rig allows for longer takes with minimal fatigue and steady results—crucial for cinematic storytelling. However, many underestimate the nuances involved, such as the importance of proper weight distribution and the impact of different materials on vibrational damping. Experts suggest that investing in adjustable and lightweight components is essential for professional-grade footage. As highlighted in this resource, small tweaks in your support system can vastly elevate your filmmaking quality. Have you ever fallen into this trap? Let me know in the comments.
Maintaining your camera rig and choosing the right tools are crucial for consistent, high-quality footage. Over time, wear and tear can impact stability and performance, but with proper care and the right accessories, you can extend the lifespan of your setup and ensure it operates smoothly for every shoot. Investing in durable, high-quality components and routine maintenance routines not only saves money in the long run but also enhances your filmmaking confidence.
Invest in Quality Support Accessories
When it comes to rig accessories, durability and precision matter. I personally recommend using modular components made from aircraft-grade aluminum, which balance weight and strength effectively. For instance, a well-designed top handle with anti-slip grips reduces hand fatigue and offers precise control. Additionally, support systems like quick-release plates allow swift adjustments during shoots without sacrificing stability. Incorporating trusted brands like _Vocas_ or _Tilta_ ensures compatibility and longevity, as highlighted in this guide.
Implement Routine Check-Ups
Regularly inspecting your rig before and after shoots is vital. Check screws, mounting points, and quick-release mechanisms for looseness or damage. I do a quick post-shoot inspection, tightening any loose bolts and cleaning contacts with isopropyl alcohol to prevent corrosion. Using a small toolkit with precision screwdrivers and anti-seize compound makes this process efficient and effective. As equipment ages, parts can wear out or become misaligned, leading to shaky footage or unexpected failures. Scheduled maintenance like this keeps your rig performing at its best and prevents costly repairs.
Long-Term Results Through Consistent Care
Consistent maintenance pays dividends over months and years. Proper storage — like padded cases and dust covers — prevents corrosion and damage. Lubricating joints with silicone grease ensures smooth operation of moving parts. I’ve found that taking a few minutes each week to clean and inspect my gear retains sharpness and responsiveness. This disciplined approach not only safeguards your investment but also ensures your rig remains responsive to your creative needs, eliminating disruptions during crucial moments.
Scaling Your Support System Wisely
As your projects grow more ambitious, expanding your rig should be strategic. Incorporate adjustable weights and modular support systems that can be configured quickly for different shooting styles. For example, adding counterweights can stabilize larger rigs, and quick-adapt mounting plates speed up setup times. According to expert advice in this article, the key is flexibility. Start with core components, then gradually add accessories like lightweight matte boxes or follow-focus systems, ensuring each upgrade improves stability and ergonomics rather than just adding bulk.
How do I maintain rig stability over time?
Long-term stability hinges on routine maintenance, regular inspections, and investing in reliable tools. Clean your gear thoroughly after each shoot, tighten loose fittings, and lubricate moving parts periodically. Using a dedicated toolkit with precision screwdrivers, lubricants, and cleaning supplies — such as those recommended by professional filmmakers — ensures you stay prepared. Additionally, tracking the wear of key components allows timely replacements, preventing unexpected failures during critical shoots. For tips on choosing dependable tools, check the comprehensive support system guide. Try integrating a scheduled maintenance routine into your workflow to keep your rig performing optimally and avoid costly downtime.
What I Wish I Knew When Building My Rig
- One of the toughest lessons was realizing that more weight doesn’t always mean better stability—balancing is everything. I once added unnecessary accessories, thinking more support means improved footage, only to find fatigue hurting my shots. Remember, lightweight, ergonomic designs often outperform bulky setups in real-world shooting.
- Investing in modular, high-quality support gear can save you time and frustration. It took me experimenting with different brands to discover that trusted names like Tilta or Vocas consistently offer compatible and durable options that genuinely elevate your filmmaking experience.
- The biggest breakthrough was understanding the importance of routine maintenance. Regularly checking screws, lubricating joints, and inspecting components may seem trivial, but it keeps your rig functioning smoothly, preventing unexpected downtime during crucial moments.
Tools That Changed How I Approach Rig Building
- MasteringCameraRigs.com provided comprehensive guides on balancing and customizing rigs, helping me craft setups tailored to my needs.
- The 2025 Shoulder Rig Guide introduced me to adjustable supports that reduce fatigue and improve shot stability over long takes.
- High-quality quick-release plates from brands like Arri or Manfrotto stabilized my workflow, allowing rapid adjustments and minimizing setup time between shots.
- Lastly, learning from industry experts via online tutorials and forums continuously exposes me to innovative solutions and best practices, keeping my rig setup evolving with new filmmaking challenges.
Now It’s Your Turn to Elevate Your Filmmaking
Armed with these insights and resources, you’re better equipped to build a camera rig that truly enhances your creativity and steadiness. Remember, the right support system isn’t just about equipment—it’s about empowering your storytelling. So go ahead, experiment with new configurations, invest in quality gear, and develop routines that keep your rig performing at its best.
What’s the one support accessory you’ve been hesitant to try but believe could transform your shots? Share your thoughts below—I’d love to hear your plans and experiences!
,


