Ultimate Guide to Building Your Perfect Camera Cage & Shoulder Rig in 2025
Ever spent hours fiddling with your camera rig, only to realize halfway through a shoot that your setup is causing more pain than progress? I remember the lightbulb moment when I realized my old rig was limiting my creativity, not enhancing it. It was frustrating, especially when I knew the right gear could transform my shoots. That’s when I decided to dive deep into building my own perfect camera cage and shoulder rig — and I haven’t looked back since.
Why Custom Camera Rigs Make All the Difference
In 2025, mass-produced rigs are everywhere. But the truth is, they often fall short when it comes to comfort, stability, and flexibility. I learned this the hard way early on — I bought a popular off-the-shelf rig, only to discover it was uncomfortable after just 15 minutes of filming. My mistake? Assuming one size fits all. Customization is key to unlocking your full potential as a filmmaker, and that’s exactly what I’ll show you how to do today.
Do You Really Need to Build Your Own Rig?
This is the biggest question I hear. Honestly, if you’re just starting out, a basic rig might suffice. But for serious filmmakers looking for stability, ergonomic support, and versatility, investing time in building your own setup is a game-changer. Trust me, it’s worth the effort. Plus, you can tailor every component to your shooting style. Curious? Check out some of the top accessories and innovations that can elevate your rig’s performance.
And don’t worry if you’re new to this — I’ll walk you through the essentials, common pitfalls, and expert tips to ensure your build is rock solid.
Building Your Dream Rig Starts Here
Stay tuned, because in the upcoming sections, we’ll explore how to choose the right materials, what support systems truly matter, and how to assemble a rig that’s comfortable, durable, and perfectly suited to your creative vision. Ready to stop fighting your gear and start filming like a pro? Let’s get started.
Choose Your Materials Carefully
Start by selecting lightweight, durable materials like aluminum or carbon fiber for your cage. I remember the first time I tried aluminum tubing; it was sturdy yet lightweight enough to handle all-day shoots. Avoid cheap plastics or overly heavy metals that can weigh you down. Precision is key here — measure twice, cut once. Use a high-quality saw or tube cutter to ensure clean, accurate cuts. You can find the best options in the best rig accessories for seamless video production.
Design for Ergonomics and Flexibility
Think of your rig as a custom suit — it has to fit perfectly to prevent fatigue and allow easy movement. Use adjustable support arms and modular components to tailor the rig to your height and shooting style. I once built a rig where I initially used too many fixed parts, making adjustments frustrating. Switching to adjustable support rods and quick-release clamps transformed my workflow. Focus on mounting points that allow for future upgrades, like adding external monitors or follow focus systems. Check out the ultimate guide to camera cages and rig accessories for more ideas.
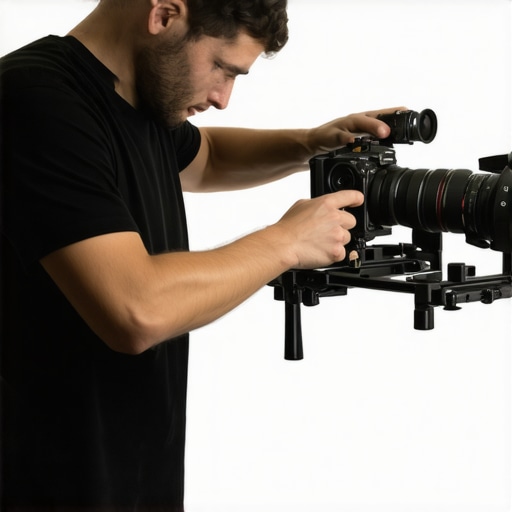
Assemble Your Rig Step-by-Step
Lay out all your chosen components on a clean workspace. Start by attaching the base plate to your camera using a quick-release system, which makes setup faster and safer. Then, connect support rods, ensuring they are securely tightened but not overtightened to avoid damaging the material. Use rubber washers if necessary to dampen vibrations. Mount the top handle and side grips for better control, referencing the top handles and rig accessories. For stabilization during handheld shots, add counterweights or a shoulder pad — I found a foam pad with a custom cutout provided significant comfort. Keep checking your setup against your shooting needs, and don’t hesitate to make small adjustments. For detailed tips, explore expert tips for perfect shots.
Refine Your Setup for Better Shots
Test your rig with your camera attached, simulating typical shots. Notice any wobbling or discomfort? Tighten loose bolts, reposition handles, or add padding where needed. I once spent an entire afternoon fine-tuning my rig until I could shoot comfortably for hours. Remember, your rig should enhance your creativity, not hinder it. Once satisfied, document your setup with photos and notes, so you can replicate or upgrade easily later. For inspiration and advanced customization techniques, review the ultimate guide to camera cage and rig accessories.
Many filmmakers believe that assembling a camera rig is just about choosing the right parts and putting them together. However, there are nuanced pitfalls that can undermine your entire setup, even if you follow the basic steps correctly. Let’s dig deeper into what most people get wrong about building their camera rigs and how to avoid these costly mistakes.
Why Overlooking Ergonomic Details Can Ruin Your Shots
One of the most common misconceptions is that a sturdy, heavy-duty rig automatically translates to better footage. In reality, ergonomics play a crucial role. A rig that isn’t comfortable or well-balanced can cause fatigue, leading to shaky shots and slower shooting times. Many filmmakers overlook the importance of proper weight distribution and support, assuming that heavier equals more stable. Advanced support systems and adjustable components are essential to prevent strain. For example, using quick-release clamps and modular support arms can make a significant difference, but only if they’re properly configured to suit your body and shooting style. For more tips on optimizing your support system, check out this expert guide.
Beware of the Myth That All Materials Are Equal
Another widespread myth is that any aluminum or plastic parts will suffice. In truth, not all materials are created equal. Using low-quality metals or plastics can lead to durability issues, vibrations, or unnecessary weight. For instance, cheap plastic support rods may seem cost-effective but are prone to flexing and breaking under stress. Conversely, high-quality aluminum or carbon fiber components offer strength without adding weight. Precision-cut parts also matter — poorly cut tubing can cause misalignment and instability. To ensure your rig’s longevity and performance, select materials carefully, referencing the best rig accessories.
Advanced Mistake: Ignoring Future Upgrades and Compatibility
Many filmmakers build their rigs with a fixed mindset, neglecting the importance of future expandability. An overly customized setup can become a limitation if it doesn’t support additional accessories like external monitors, follow focus systems, or additional handles. The mistake? Not planning for compatibility upfront. Modular designs with multiple mounting points allow for easy upgrades and adjustments, saving you from costly reworks later. For example, incorporating standardized support rods and mounting plates can facilitate seamless integration of new gear. To learn how to build a truly adaptable setup, explore this comprehensive guide.
What about the Advanced Filmmaker’s Question?
How can I balance lightweight design with maximum stability? This is a question I hear often from experienced filmmakers aiming for portability without sacrificing quality. The secret lies in selecting the right materials and support configurations—using lightweight carbon fiber supports combined with counterweights or shoulder pads can provide both mobility and stability. Additionally, fine-tuning the balance point of your rig through adjustable support arms helps optimize comfort and shot precision. For expert insights on achieving this balance, review this advanced resource.
Have you ever fallen into this trap? Let me know in the comments. Avoiding these common pitfalls will elevate your filmmaking and ensure your camera rig truly supports your creative vision rather than hindering it. Remember, a well-built rig is an investment in your craft—plan wisely and build smart!
How do I keep my camera rig performing over time?
Investing in a custom camera rig means committing to its longevity and consistent performance. To ensure your setup remains reliable, I rely on a combination of high-quality tools and regular maintenance routines. One of my go-to tools is a precision Allen wrench set, which I use to tighten bolts and support rods periodically. Over time, vibrations and regular use can loosen fasteners, leading to instability. Regularly inspecting and tightening these components prevents wobbling and maintains shot stability.
Another essential tool I recommend is a microfiber cloth and a gentle cleaning solution. Dust, fingerprints, and minor smudges can accumulate on your support plates and camera mount points, affecting image quality and component durability. I clean my rig after each shoot to keep it in pristine condition, which prolongs its lifespan.
For components that experience wear and tear, such as rubber grips or padding, I keep spare parts handy. Replacing worn pads prevents discomfort during long shoots and maintains ergonomic support. When selecting spare parts, I prefer OEM or high-quality aftermarket options, ensuring compatibility and durability. Check out the best rig accessories for seamless video production to find reliable replacements.
To protect your gear during transport and storage, investing in a padded case with custom foam inserts is invaluable. It shields your rig from shocks and environmental factors, reducing the risk of damage that could compromise its functionality. Additionally, using silica gel packs inside storage cases helps control humidity, preventing corrosion on metal parts.
Future trends in rig maintenance and tools
Looking ahead, I anticipate a rise in smart maintenance tools equipped with sensors that monitor stress points and wear in real-time. These innovations could alert you before a component fails, saving time and costly repairs. Moreover, modular components designed for easy upgrades will become more prevalent, allowing filmmakers to adapt their rigs quickly without replacing entire setups.
Finally, I encourage you to implement a routine inspection schedule—monthly checks of all fasteners, cables, and support components. This proactive approach ensures your rig remains in top shape, providing consistent results and peace of mind during critical shoots. Ready to optimize your maintenance routine? Try using a torque wrench for precise bolt tightening and see how it improves your rig’s stability and longevity.
The Hardest Lesson I Learned About Building Camera Rigs
One of the most eye-opening lessons I encountered was realizing that not all materials are created equal. Early on, I bought cheap aluminum support rods that flexed under pressure, making my shots shaky. It taught me to prioritize quality and precision, understanding that durability directly impacts stability and shot quality.
3 Myths About Camera Rig Customization That Held Me Back
- Myth 1: Heavier rigs mean better stability. In reality, ergonomics and weight distribution matter more than sheer weight.
- Myth 2: All support materials are equal. Choosing high-quality aluminum or carbon fiber transforms your setup’s performance and longevity.
- Myth 3: Fixed setups are best for future-proofing. Modular designs allow seamless upgrades and adaptability, saving time and money.
What Experts Won’t Tell You About Maintaining Your Rig
Many overlook the importance of regular maintenance routines. I learned that tightening bolts with a torque wrench and cleaning components after each shoot keeps my rig stable and reliable. Investing in spare parts and a padded case prolongs the lifespan and ensures peace of mind during critical filming days.
My Essential Toolkit for Filmmaking Support
- High-quality support rods and clamps: Durable and adjustable for perfect ergonomics.
- Top handles and shoulder pads: Enhance control and comfort during long shoots.
- Modular support systems: Allow future upgrades and accessories integration.
- Quality shoulder rigs: Balance lightweight design with stability.
Your Turn to Try
Building a custom camera rig isn’t just about gear—it’s about empowering your creative vision with tools tailored to your style. Remember, a well-crafted setup makes all the difference between shaky footage and professional-grade shots. Don’t wait—start designing your ideal rig today and watch your filmmaking elevate to new heights.
What’s the biggest challenge you’ve faced when customizing your camera support? Share your experience below—I’d love to hear your story!


![How to Balance a 20lb Shoulder Rig Without Back Pain [2026]](https://rigs.creatorrigreviews.com/wp-content/uploads/2026/03/How-to-Balance-a-20lb-Shoulder-Rig-Without-Back-Pain-2026-300x300.jpeg)