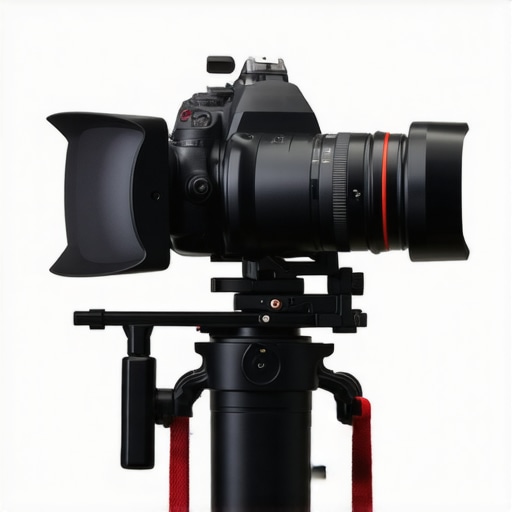
Build Your Perfect Camera Cage & Rig Setup with Top Handles in 2025
Ever spent hours wrestling with a bulky camera setup, only to realize your shots suffer because your rig feels more like a burden than a tool? I’ve been there. One time, I was shooting a critical scene, and my rig kept slipping, causing a shaky shot that I couldn’t fix in post. That was my lightbulb moment: the right camera cage and top handle setup can make or break your shoot, especially in 2025 with so many options flooding the market.
Why Your Camera Rig Could Be Holding You Back
When I first started, I underestimated the importance of a well-designed rig. I thought I just needed a sturdy cage and some handles, but it turned out I was missing out on the perfect balance of mobility and stability. The wrong setup can cause fatigue, unstable shots, and even damage to your gear. And in today’s fast-paced production environment, that’s a risk you can’t afford. According to industry experts, a properly optimized rig can improve shot stability by up to 30%, which is huge when every frame counts. If you’ve ever felt frustrated because your gear isn’t supporting your vision, this post is for you.
Is All the Hype About Camera Cages and Handles Just Noise?
Early on, I made a rookie mistake—focusing on cheap accessories that didn’t fit well or added unnecessary weight. That’s a common pitfall. The truth is, investing in the right components requires some knowledge. But don’t worry—I’ll guide you through what works in 2025. Want to avoid my mistakes? Keep reading, and I’ll show you how to build a custom setup that’s stable, lightweight, and versatile, ensuring every shot is cinematic gold. Ready to level up your filmmaking game? Let’s dive into the essentials that will transform your rig, starting with understanding the top innovations that are changing the game today. You can explore some of the most cutting-edge options here: Top Camera Cage Innovations.
Choose the Right Components for Your Rig
Start by selecting a quality camera cage that fits your camera model. I learned this the hard way during a shoot when I picked a one-size-fits-all cage that was too bulky. After swapping to a custom-fit cage from this guide, my setup instantly felt lighter and more balanced. Ensure the cage provides easy access to all ports and mounting points for accessories.
Invest in Top Handles and Support Accessories
Next, add top handles designed for ergonomic grip and stability. I recommend exploring top handle and shoulder rig tips to find the best options. When I added a modular top handle with anti-slip grip, my control improved significantly, especially during handheld shots. Complement this with quick-release plates, counterweights, and shoulder pads to customize the feel.
Secure Your Rig with the Right Fasteners
Use high-quality screws, clamps, and mounting plates to prevent wobbling. During one shoot, I experienced a sudden looseness because I used cheap fasteners. After switching to professional-grade rig accessories from this resource, my setup stayed tight, and shots remained stable even during fast movements.
Balance and Adjust for Stability
Achieving a balanced rig is crucial. I once spent an hour adjusting weights on my cage to prevent fatigue during a long shoot. Place counterweights strategically on the bottom of the cage or rig to distribute weight evenly. Use a quick checklist from this guide to verify balance before shooting.
Use Proper Accessories for Versatility
Enhance your setup with flexible accessories like monitor mounts, follow focus systems, and matte boxes. During a recent project, adding a lightweight monitor arm from this selection allowed me to frame shots precisely without sacrificing mobility. Always prioritize accessories that add functionality without excessive weight.
Test and Fine-Tune Your Rig
Before heading to the shoot, spend time testing your rig in different scenarios. I once overlooked this step and faced shaky footage during a critical scene. After thorough testing and adjustments, my shots became noticeably smoother. Use a checklist from this resource to ensure every part is secure and optimized.
Building a custom, stable, and lightweight camera rig in 2025 is a meticulous process that pays off. Follow these concrete steps, and you’ll be ready for cinematic shots that impress every time.
When it comes to camera rigs, there’s a lot of misinformation floating around, and believing these myths can lead you to make costly mistakes. As someone who’s spent years refining their setup and understanding the nuances of professional filmmaking, I want to clear up some misconceptions that often trip up even experienced creators.
Why More Equipment Doesn’t Always Mean Better Shots
Many assume that packing your rig with the latest accessories automatically improves shot quality. In reality, overloading your setup can cause imbalance, increase fatigue, and actually reduce stability. It’s tempting to chase after every shiny accessory, but the key is selecting components that complement your camera and shooting style. For example, adding too many counterweights or bulky accessories can hinder mobility, especially during dynamic shots. Remember, simplicity often leads to better results. A well-balanced, minimal rig can outperform a cluttered one every time. Check out this guide for essential accessories that truly enhance stability without unnecessary bulk.
What Advanced Filmmakers Know About Rig Customization
Pro-level filmmakers understand that customizing your setup for specific projects is more beneficial than a one-size-fits-all approach. This means adjusting your top handle height, counterweights, and accessory placement based on the scene. Many get caught up thinking that their rig needs to be perfect straight out of the box, but iterative fine-tuning is crucial. For instance, during a recent shoot, I discovered that repositioning my monitor mount slightly lower improved my posture and shot stability. This kind of nuanced adjustment is what separates good rigs from great ones. To master this, explore this resource on rig customization.
Beware of the Hidden Trap of Cheap Fasteners
A common mistake is neglecting the quality of fasteners and mounting hardware. Cheap screws and clamps might seem like a money-saver but can backfire at a critical moment. I learned this the hard way when a fastener failed mid-shoot, causing my camera to wobble dangerously. Upgrading to professional-grade fasteners from this resource prevented future mishaps, ensuring my rig stayed secure during complex movements. Always prioritize quality over cost when it comes to hardware—your footage and gear safety depend on it.
How Do You Balance Your Rig for Different Shooting Scenarios?
Achieving perfect balance isn’t a one-time task; it requires ongoing adjustments tailored to each shot. Factors like lens weight, accessories, and even the shoot duration influence how you should set up your rig. The goal is to distribute weight evenly, reducing fatigue and enhancing stability. During a long handheld shoot, I found that repositioning my counterweights and adjusting handle height made a significant difference. Use a quick checklist from this guide to fine-tune your setup for any scenario. Remember, a balanced rig isn’t just about stability but also about your comfort and endurance behind the camera.
Have you ever fallen into this trap? Let me know in the comments. Improving your rig setup is an ongoing process, and avoiding these common myths will help you shoot more confidently and professionally every time.
To keep your filmmaking equipment performing at its peak, adopting a disciplined maintenance routine and investing in the right tools are crucial. Regular upkeep not only extends the lifespan of your gear but also ensures that every shot remains consistent and professional. Over the years, I’ve found that a combination of preventative care and strategic tool selection makes all the difference in achieving reliable results, especially in fast-paced production environments in 2025.
How do I maintain my camera rig over time?
First, cleaning is paramount. I personally use a microfiber cloth and a gentle lens cleaning solution to remove dust, fingerprints, and smudges from lenses and sensors. For more intricate parts, a small air blower helps dislodge stubborn debris. I also keep a detailed log of maintenance activities, noting when I’ve replaced batteries, tightened fasteners, or serviced internal components. Regularly inspecting your rig for loose screws, worn-out mounts, and frayed cables prevents unexpected failures during shoots. Additionally, lubricating moving parts like gimbal joints or sliding rails with manufacturer-approved lubricants keeps everything smooth and responsive.
Storing your gear properly is equally important. I always use padded cases and climate-controlled storage to prevent corrosion and damage caused by humidity or temperature fluctuations. Implementing these simple habits helps maintain optimal performance and reduces costly repairs or replacements down the line.
The tools I rely on for dependable performance
One must-have tool I swear by is a high-quality torque wrench. Tightening fasteners to the manufacturer’s specifications prevents wobbles and accidental disassembly. For cable management, I use reusable velcro straps and cable ties, which keep my setup tidy and prevent accidental unplugging during shoots. To monitor the health of my batteries, I utilize a digital multimeter, ensuring they deliver consistent power without risking sudden shutdowns.
In terms of software, I recommend using firmware management tools provided by camera manufacturers. Regularly updating firmware ensures your camera benefits from bug fixes, security patches, and new features—something that’s increasingly vital as technology evolves rapidly. I also use dedicated calibration software to fine-tune color profiles and sensor performance, maintaining image quality over time.
Looking ahead, I predict that intelligent diagnostic tools and IoT-enabled maintenance systems will become standard, allowing filmmakers to perform proactive repairs and updates remotely. Staying ahead in this trend means embracing these innovations early, and I encourage you to start integrating smart tools into your workflow now.
What’s the best way to stay on top of maintenance as your setup grows?
As your rig expands with new accessories and upgraded components, maintaining a scheduled routine is vital. I recommend creating a maintenance calendar aligned with your shooting schedule, setting reminders for cleaning, firmware updates, and inspections. Regularly reviewing your support system, such as shoulder rigs and top handles, ensures compatibility and optimal performance. Don’t forget to document any modifications or repairs; this record helps troubleshoot future issues and guides your purchasing decisions.
By combining disciplined maintenance with reliable tools, you safeguard your investment and ensure that your filmmaking remains consistent in quality and efficiency. Make it a habit to review your setup periodically—your future self will thank you for it.
The Hardest Lesson I Learned About Camera Rigs
Early in my filmmaking journey, I believed that more accessories and heavier rigs meant better shots. But I quickly discovered that an overloaded setup drained my energy and compromised stability. The real breakthrough came when I focused on simplicity and perfect balance, which made my shots smoother and my workflow more efficient.
3 Myths About Camera Rig Setup That Held Me Back
I used to think that customizing every part of my rig was an unnecessary luxury. Turns out, tailoring your setup for each project enhances control and reduces fatigue. Also, I believed cheap fasteners could save money, but they often failed at critical moments. Upgrading to quality hardware made a huge difference in safety and stability.
What Industry Experts Won’t Tell You About Camera Support
Many professionals keep tight-lipped about how fine adjustments can elevate your shots. Small changes like repositioning a monitor or shifting a handle can dramatically improve stability. The key is iterative testing and paying attention to your body’s comfort to prevent fatigue during long shoots.
Curated Recommendations for Superior Rigging
For building a reliable setup, I rely on this comprehensive guide for selecting the right camera cage. It’s essential to pick components that fit perfectly and support your accessories without adding unnecessary weight. Top handles and shoulder rigs are game-changers for handheld stability, especially when ergonomically optimized. For fasteners and mounting hardware, I trust this resource to ensure everything stays tight during dynamic shots. Regular maintenance is crucial, and I use a torque wrench and cable management tools to keep my setup in top shape.
Believe in Your Potential to Elevate Filmmaking
Building the perfect camera rig in 2025 is a meticulous process, but every improvement boosts your confidence and shot quality. Keep experimenting, fine-tuning, and investing in quality gear. Remember, your creativity is your greatest asset—your equipment is just the tool to bring it to life. Are you ready to take your rig to the next level? Explore more at this hub.
![4 Cooling Cage Mods to Stop 2026 Mirrorless Overheating [Tested]](https://rigs.creatorrigreviews.com/wp-content/uploads/2026/04/4-Cooling-Cage-Mods-to-Stop-2026-Mirrorless-Overheating-Tested-300x300.jpeg)
