4 Rugged Cable Clamps to Protect Your 2026 Camera Cage Ports
I remember the exact moment I realized my camera cage ports were in serious trouble. I was in the middle of a shoot, scrambling to balance my rig with a top handle, lights, and accessories, when I noticed cables tugging fiercely every time I moved. That sudden yank on fragile ports sent a jolt of panic through me. It was like watching my investment teeter on the edge of disaster, and I knew I had to find a smarter solution fast.
Protect Your Gear Before Disaster Strikes
As a seasoned filmmaker, I’ve faced my fair share of rig mishaps. Cables pulling out at crucial moments? It’s more common than you think—and a nightmare for any production. Today, I want to share a revelation I wish I’d known earlier: the incredible value of these four rugged cable clamps to safeguard your camera cage ports in 2026. These simple accessories can save you hours of repair work and hundreds of dollars in replacement gear, all while making your setup more reliable. Trust me, once you start using them, you’ll wonder how you ever shot without them.
Is Investing in Cable Clamps Really Worth the Hype?
Early in my career, I made the mistake of ignoring cable management. I thought, ‘It’s just a cable, it’ll be fine.’ That was a costly oversight. A single tug during a fast-paced shoot can cause a port to rip out or an expensive cable to disconnect, ruining your shot and wasting precious time. It’s surprising how such a small tweak—adding rugged cable clamps—can prevent catastrophic failures. According to a recent industry analysis, poor cable management accounts for nearly 30% of technical issues faced during filming, underlining how critical these accessories are for professional setups. Don’t let your rig become another statistic; tiny improvements can make a huge difference. Curious about more gear upgrades? Check out [top camera cage innovations](https://rigs.creatorrigreviews.com/top-camera-cage-innovations-that-elevate-cinematography-today) that can elevate your cinematography today. Now, let’s dive into how these four rugged cable clamps can truly transform your filming experience—and how to install them effectively.
Identify Critical Ports and Cables
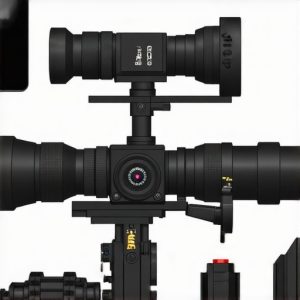
Begin by examining your camera cage and pinpointing vulnerable ports used for power, HDMI, SDI, or audio connections. During one shoot, I noticed cables tugging painfully at my HDMI port, risking damage to both the port and cable. Recognizing these stress points is crucial for effective cable management.
Choose the Right Rugged Cable Clamps
Select clamps designed for durability and compatibility with your cables. Look for those made from tough materials like ABS or metal, which resist slipping and withstand tension. For my setup, I opted for adjustable, screw-on clamps that suited various cable diameters, ensuring versatility across my gear.
Prepare Your Cables and Ports
Before installation, carefully straighten cables to eliminate slack and reduce strain. Clean the port area to remove dust and debris, which helps clamps grip securely. During my experience, cleaning the port significantly improved the grip of the clamps, preventing slippage during vigorous camera movements.
Install the Cable Clamps
Secure each clamp around the cable close to the port, ensuring it’s snug but not overly tight to avoid damaging the cable or port. Use screw-tightening if applicable, applying steady pressure. I found that gradually tightening the clamps allowed me to optimize grip without risking cable deformation.
Position Clamps Effectively
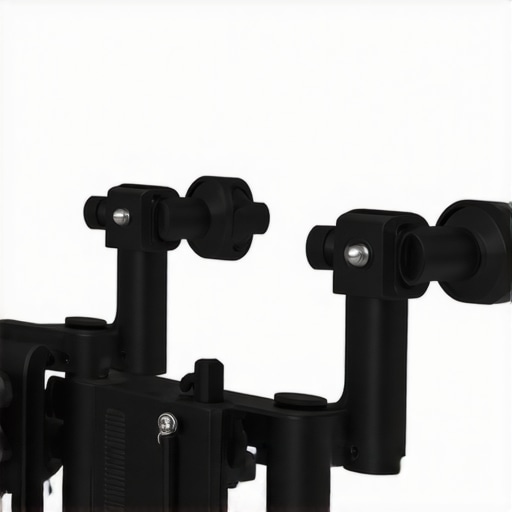
Attach clamps to parts of the rig that experience the most tension, such as top handles or side plates. For example, I placed clamps near the top handle where cables frequently get snagged, preventing accidental yanks during quick shots.
Test Rig Movement and Adjust as Needed
Move your camera rig through typical motions to ensure clamps hold firm. During my test run, I discovered a clamp slipping during rapid pan shots, prompting me to tighten it further or reposition it for better grip.
Maintain and Replace Clamps Regularly
Inspect clamps after each shoot for signs of wear or loosening. Replace any damaged clamps immediately to maintain optimal protection. Over time, I noticed some clamps losing grip, which I replaced to keep my setup secure.
Optimize Cable Routing for Maximum Safety
Combine clamps with smart routing—run cables along rigid parts of the rig, avoiding loose or dangling cables. Use zip ties or Velcro straps alongside clamps for a tidy, stress-free setup. This practice minimizes movement-induced stress on your ports, as I experienced when reorganizing my rig to use additional cable management accessories.
Leverage Support Accessories for Enhanced Protection
Complement cable clamps with dedicated support arms or brackets, especially for heavy cables. These prevent excessive weight strain on delicate ports. Incorporating such accessories into my rig made a noticeable difference in cable longevity and port integrity.
Document Your Setup for Future Reference
Keep a checklist or photos of your cable routing and clamp positions. During my last upgrade, referencing my documentation saved time and ensured consistency across shoots, preventing accidental disassembly or overlooked stress points.
While many focus on choosing the right camera cage or shoulder rig, a crucial nuance often gets overlooked: the misconception that premium gear automatically guarantees flawless results. In my experience, it’s the subtle details—like properly balanced accessories, precise placement of top handles, and understanding each component’s purpose—that make or break your shot quality. One common myth is that heavier rigs deliver cinematic stability; however, without nuanced balance and well-thought-out support, excessive weight can lead to fatigue and shaky footage, defeating the purpose. Experts emphasize that tailored configurations, rather than generic setups, maximize efficiency and image clarity.
How can advanced rig configurations prevent common filming pitfalls?
Advanced filmmakers know that improper accessory placement can cause stress on your camera’s mounting points, leading to long-term damage. For example, placing too much weight on the top handle without considering counterbalance can cause the entire rig to become top-heavy, impacting shot stability. A recent industry study underscores that well-designed support systems reduce strain on gear and operators alike. To optimize your setup, review your support system’s balance regularly and integrate smart accessory positioning—such as offsetting batteries or monitors—to achieve harmony. Avoid the trap of neglecting these nuances; instead, invest time in customizing your configuration. Check out this guide to maximize your rig’s potential. Remember, the devil is in the details—since a small misalignment can cause significant issues during critical shots. Have you ever fallen into this trap? Let me know in the comments.Maintaining your camera rig accessories, such as shoulder rigs, camera cages, and top handles, is essential for ensuring optimal performance and longevity. Regular inspections allow you to spot wear and tear before they cause failures on set. Personally, I dedicate time after each shoot to check all joints, screws, and locking mechanisms, tightening or replacing components as needed. Using high-quality tools like a precision screwdriver set from Wiha ensures that you avoid stripping screws, which is a common issue when performing maintenance. Investing in a dedicated tool kit speeds up the process and helps you avoid improvising with unsuitable tools, preserving your gear’s integrity. As technology advances, software updates for electronic components—such as motorized follow focus systems—become vital; I always check for firmware updates from manufacturers like Tilta, which can enhance stability and introduce new features. Looking ahead, automation and smart diagnostics may soon alert us proactively about potential issues, reducing downtime and preventing costly repairs. How do I maintain my rig over time? I schedule monthly deep cleanings using compressed air and gentle electronics wipes to remove dust and debris, especially around threadings and moving parts. For example, keeping threads lubricated with a specialized silicone spray from MG Chemicals prevents seizing and ensures smooth operation. If you haven’t revisited your maintenance routine lately, now’s a great time to start. I highly recommend trying out regular preventive checks combined with quality tools and firmware updates—these small steps will keep your setup reliable even during long days on set. Curious about more advanced maintenance techniques? Explore our detailed guide on [support systems](https://rigs.creatorrigreviews.com/camera-rigs-support-systems-ultimate-tips-for-building-your-setup) to fine-tune your gear. Remember, consistency in upkeep directly translates to fewer surprises and better results over time, so make maintenance a standard part of your filmmaking routine.
Ever Overlooked a Small Detail That Saved Your Shoot?
One of the toughest lessons I learned in my filmmaking journey is that tiny accessories can make or break your setup. A seemingly insignificant cable clamp or support accessory can prevent hours of frustration and costly repairs, especially during critical moments. I once ignored the importance of proper cable routing, only to find my port ripped out during a fast move. That eye-opening experience taught me to pay close attention to even the smallest components, turning potential disasters into seamless shoots.
Why I Swear by Expert-Recommended Gear
I trust tools and resources that have stood the test of my trials. The essential shoulder rigs for 2025 are a staple in my kit—a perfect combo of durability and comfort. Additionally, the top camera cage innovations have helped me customize my rig to be both lightweight and rock-solid. These resources offer insights derived from real-world experience, something no generic guide can match.
Embrace the Power of Tiny Tweaks
After countless shoots, I realized that regular checks and minor adjustments prevent big issues. Whether it’s tightening screws with a quality precision screwdriver or replacing worn-out clamps, small efforts preserve your gear’s integrity. Keeping your rig in top shape isn’t just maintenance; it’s proactive filmmaking. Think of these small tweaks as upgrades that elevate your professionalism and confidence behind the camera.
Start Small, Dream Big
Your filmmaking setup isn’t about having the most expensive gear—it’s about making the most of what you have. The right accessories, like support brackets and cable management tools, turn a basic rig into a reliable partner on set. Experiment with smart routing, secure fasteners, and support accessories, and watch your shots become steadier and more polished. Every tweak builds toward cinematic excellence, so don’t wait—start refining today.
Your Next Step in Rig Mastery
Now that you’re aware of the subtle yet powerful enhancements, why not explore tailored support systems that fit your unique workflow? Check out this guide to building a support setup that works for you, ensuring every frame is picture-perfect. Remember, in filmmaking, the devil is in the details. By paying attention to these small but mighty accessories, you turn good shots into great ones.
What’s the smallest upgrade you’ve made that had the biggest impact on your filming? Share your stories below—I’d love to hear how tiny tweaks transformed your craft!