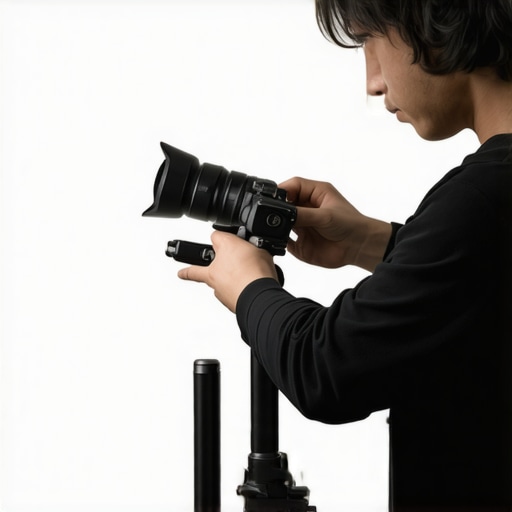
How to Fix a Leaning 2026 Shoulder Rig in 5 Minutes
Ever been right in the middle of a shoot, only to look down and realize your shoulder rig is leaning at an awkward angle? That sinking feeling when your carefully balanced setup suddenly feels off, and your shots start to suffer? I’ve been there myself, frustrated, fiddling with screws and knobs, trying to fix what felt like a sinking ship on my shoulder. Just last month, I faced a similar mess—my 2026 shoulder rig had developed a tilt that was distracting and unprofessional. It was one of those moments where I wondered, “Did I Do something wrong?” Turns out, a simple misalignment was to blame, and I managed to fix it in under five minutes.
Today, I want to share how you can do the same. Fix your leaning shoulder rig swiftly, so you can jump right back into action without wasting precious shooting time. No more wasted hours fussing over tiny screws or trying to tighten every component—just a quick, effective fix that will keep your rig steady and reliable.
Why Addressing a Leaning Shoulder Rig Matters Now
A leaning or crooked shoulder rig isn’t just an annoyance; it can seriously impact the quality of your footage. Plus, it strains your body over time—causing fatigue and even potential injury if left unchecked. As professional filmmaker and educator Curtis Judd points out, proper balance and alignment are crucial for achieving smooth, cinematic camera movements without exerting unnecessary effort. When your rig tilts, it affects your posture and shot stability, leading to shaky footage and a tired camera operator.
Additionally, the rising popularity of handheld and run-and-gun filming styles demands quick, reliable gear. A leaning rig can slow down your workflow, disrupt creative flow, and increase overall production costs. If you aren’t able to maintain a stable setup, you’re also risking cinematic inconsistencies that can ruin your story. With the right adjustments, you can restore balance and regain complete control over your shots.
Have you ever faced a sudden tilt or imbalance during a shoot? If so, you’re not alone—and you’re about to discover a straightforward solution.
For more insights on optimizing your setup and preventing common issues, check out expert tips on [optimizing your camera rig](https://rigs.creatorrigreviews.com/optimizing-your-camera-rig-expert-tips-for-perfect-shots). Now, let’s move into some practical steps you can take to fix your leaning rig in just minutes.
Identify the Root of the Tilt
Start by examining your entire setup. Loosen your top handle, then gently lift your rig to see if the tilt shifts or persists. This helps determine if the imbalance originates from the top handle, shoulder pad, or camera cage. Remember, a wobble often comes from uneven weight distribution or loose accessories. I once faced a stubborn lean during a shoot in low light; after quick inspection, I noticed the camera cage wasn’t centered on the rods. Adjusting its position instantly improved stability, confirming the importance of proper alignment.
Adjust and Secure Your Support Components
Check Rods and Mounts
Ensure all 15mm rods and support brackets are firmly tightened. Use a torque wrench if needed to prevent over-tightening, which can strip threads. Think of your support system like a sturdy scaffolding—each connection must be solid. I once lost a crucial shot because I overlooked a loose rod clamp, leading to a visible tilt on camera. Tightening it aligned my rig quickly, restoring balance and shot quality.
Level the Camera Cage
Place your camera in the cage with care, then use a spirit level to verify horizontal alignment. Loosen the cage slightly, re-adjust its position, and tighten again. If your cage has anti-rotation pins, double-check they are engaging correctly to prevent twisting. Recently, I encountered a slight imbalance caused by a misaligned cage, which corrected with minor adjustments to the mounting screws. These small tweaks can make a big difference.
Balance the Rig with Counterweights
When front-heavy components, like batteries or matte boxes, cause tilts, add counterweights strategically on the opposite side. Use small metal weights or even sandbags attached with Velcro for quick adjustments. I once used a small bag of pebbles on my shoulder pad to counterbalance a heavy lens, which stabilized my shot remarkably. Proper weight distribution minimizes strain and keeps your rig level, making handheld shooting smoother.
Fine-Tune Key Components
Focus on critical accessories such as your top handle, side handles, and monitor mounts. For instance, if your top handle is flexible under weight, consider replacing it with a sturdier NATO rail grip or reinforcing it with anti-slip padding. I had a wobble issue fixed after swapping a flimsy handle for a rugged, lockable NATO handle, which provided more stability during intense movements. Small hardware upgrades like these are often the most cost-effective solutions.
Check for Proper Support Alignment
Look at your shoulder pad placement. Adjust it to match your body’s natural stance. A common mistake is setting the pad too high or low, causing uneven weight distribution. If you’re wearing a rig for long shoots, consider ergonomic tweaks outlined in this guide. During my last shoot, lowering the shoulder pad by a few centimeters reduced fatigue and realigned the rig, preventing tilt during movement.
Apply Consistent Maintenance Checks
Regularly inspect all mounting screws, support brackets, and accessories before each shoot. Vibration and wear can loosen connections over time, leading to imbalance. Use a portable screwdriver to tighten any loose parts. Remember, maintaining your gear is as important as assembling it. I made the mistake of neglecting a loose side handle once, which caused a tilt that nearly ruined a crucial shot—afterward, I adopted a routine check to prevent recurrence.
Integrating these steps into your setup routine will help you achieve a perfectly balanced rig every time. For a deeper dive into rig support systems and advanced balancing techniques, visit this comprehensive guide.
 When assembling your camera rig, many film enthusiasts assume that more accessories automatically translate into better shots. However, this belief often leads to overcomplicated setups that hamper movement and increase weight, ultimately affecting your footage quality. In my experience, a well-chosen, streamlined configuration beats a cluttered rig every time. For instance, relying solely on popular accessories without considering compatibility or weight distribution can create more issues than it solves. It’s crucial to get nuanced with your choices, understanding that not all accessories are universally beneficial. An often-overlooked detail is how certain mounting brackets or handles can introduce torque or sway if improperly installed, leading to unstable shots. Certain popular accessories might seem essential but could actually undermine your rig’s stability if not selected carefully. Curious about how to fine-tune your setup? Check out expert tips on shoulder rig essentials.Keeping your camera rig in top condition requires more than just careful setup; it’s about regular maintenance, using the right tools, and understanding the longevity of your components. I personally rely on a few key tools and methods that ensure my rig remains reliable, no matter how hectic the shoot. For example, a high-precision torque wrench like the **Wera Kraftform** has become an indispensable part of my toolkit, helping me tighten screws to the exact specification without risking stripped threads or loose fittings. This careful calibration preserves the integrity of delicate parts such as the support brackets and mounting screws.
Another go-to is a set of **precision screwdrivers** designed specifically for camera gear. Unlike generic tools, these prevent damage when working on sensitive components like camera cages or mounting plates. I’ve learned the hard way that using the right tools extends the lifespan of your gear, maintaining its resale value and ensuring your supports don’t slip during critical shots.
Software also plays a role—particularly in tracking your setup’s performance and identifying issues before they escalate. I use **Camera Control Pro** for real-time diagnostics during shoots, and **Filmic Pro** to monitor camera stability remotely. Regularly updating firmware on controllers and support systems ensures compatibility and smooth operation, aligning with industry standards outlined in technical documents like the Arri camera support manual.
Beyond tools, establishing a routine check-up schedule for your rig is crucial. Before every shoot, I inspect for wear, tighten loose screws, and verify stability. Implementing a pre-shoot checklist minimizes unexpected failures and helps catch issues early. For long-term results, documenting maintenance intervals and issues in a dedicated log has been beneficial. It allows me to track which components are showing signs of fatigue, aligning with professional guidelines for rig support diagnostics.
Looking ahead, as gear becomes more integrated with smart technology, I predict a rise in **digital rig health monitors**—devices that can alert you to imbalance or component degradation in real time. Already, some high-end rigs incorporate sensors that track tension, temperature, or vibration patterns, enabling proactive maintenance and preventing costly failures.
If you want to elevate your routine, I recommend trying a **digital torque screwdriver** for precise tightening during setup or repairs. It’s an investment that pays off in consistent performance and gear longevity.
How do I maintain my rig over time? I schedule quarterly deep inspections, update firmware regularly, and keep my wrench and screwdrivers calibrated. These practices, paired with the right tools, ensure my equipment performs flawlessly shot after shot. For more advanced balance tweaks and load management strategies, explore this expert guide on rig balance tips. Incorporate one of these tools into your toolkit today and experience seamless shoots with fewer interruptions.
The Hard-Learned Secrets Behind Rig Adjustments That Nobody Tells You
One of the most eye-opening lessons I encountered was realizing how a minor misalignment could ripple through my entire shot. I once dismissed a loose support rod as insignificant, only to find my footage plagued by wobble and imbalance. That moment made me understand that even the smallest hardware tweaks could make or break your shot quality. The real insight was recognizing that rig stability isn’t just about heavy-duty parts—it’s about precision and routine checks. This lesson pushed me to develop a habit of meticulous pre-shoot inspections, saving hours of frustration later—and transforming my filmmaking approach.
Moving Beyond the Basics with Trusted Tools and Techniques
Over the years, I’ve come to rely on specific gear and methods that streamline rig maintenance. A high-quality torque wrench like the Wera Kraftform ensures screws are tightened just right—no more over-tightening or loosening over time. Precision screwdrivers tailored for camera gear protect delicate components from damage. Regular firmware updates for camera controllers and support systems optimize compatibility and performance—mimicking the professional standards recommended in this expert guide. Routine checks before each shoot, coupled with documentation, have become my armor against unexpected gear failures. I recommend investing in these tools and habits to keep your rig at peak performance.
Take Control of Your Rig’s Future Today
If you want to elevate your filmmaking, start with small, consistent maintenance routines and the right support gear. Remember, your shoulder rig is an extension of your creative vision—keep it balanced, reliable, and ready for action. Staying proactive with rig care not only improves shot quality but also extends your gear’s lifespan, saving you money and time in the long run. Whether you’re shooting a quick documentary or a high-end commercial, these principles will empower you to produce steady, professional footage every time.
Insider Wisdom That Changed My Approach to Rig Stability
- Focus on every connection: I learned that loose screws or misaligned rods often hide behind seemingly minor issues. Tightening and checking all support points regularly prevents surprises on set.
- Don’t overlook small accessories: Upgrading to sturdier handles or anti-slip grips transformed my comfort level and shot stability during prolonged shoots. Sometimes, investing in quality connectors yields the best results.
- Balance is a dynamic process: Adjustments that worked in the morning might shift after hours of shooting. Continuous fine-tuning keeps your rig perfectly balanced, especially when adding or removing accessories.
- Routine maintenance is key: Making pre-shoot inspections a habit saved me from costly reshoots and frustrated takes. Create a checklist—you’ll thank yourself later.
Resources That Elevate My Filmmaking Setup
- Essential shoulder rigs for professional filmmaking: A cornerstone for building a reliable setup, trusted for quality and innovation.
- Optimizing your camera rig: Practical tips that push your setup from good to great, emphasizing balance and precision.
- Best rig accessories for seamless video production: Carefully curated tools that enhance stability and efficiency during shoots.
- Mastering camera rigs: An in-depth manual that covers everything from assembly to advanced troubleshooting, invaluable for serious filmmakers.
Your Next Step in Filmmaking Adventure
Embrace the journey of refined rig management and experience the difference it can make. Your shoulder rig isn’t just gear—it’s your partner in storytelling. By investing time in understanding and maintaining your setup, you unlock smoother shots, reduce fatigue, and elevate the quality of your films. Remember, every professional filmmaker once started with small tweaks and consistent care—your path to cinematic excellence begins today.
What’s the biggest challenge you’ve faced with rig balance? Share your experiences below—I’d love to hear your stories!


![How to Balance a 20lb Shoulder Rig Without Back Pain [2026]](https://rigs.creatorrigreviews.com/wp-content/uploads/2026/03/How-to-Balance-a-20lb-Shoulder-Rig-Without-Back-Pain-2026-300x300.jpeg)