3 Anti-Slip Tactics for Heavy Camera Cage Accessories in 2026
Ever had that heart-stopping moment when you’re mid-shoot, and your heavy camera cage accessories suddenly slip, wobble, or worse, fall? I remember the first time my rig wobbled during a crucial take—my stomach dropped. The panic, the quick adjustments, and the lingering doubt about whether my setup was secure enough. That lightbulb moment made me realize: if I don’t tackle anti-slip issues head-on, my footage—and my confidence—could suffer permanently.
Why Anti-Slip Tactics Are Crucial for Your Camera Setup in 2026
Heavy camera cages and accessories have become standard gear for both pros and enthusiasts in 2026. As rigs grow more complex, the risk of slips, twists, and unintended movements increases. Not only do these issues threaten your shots, but they can also cause long-term damage to your equipment. Modern innovations, like advanced grip materials and locking mechanisms, promise stability—but only if you know how to implement them effectively. Ensuring your rig stays sturdy is no longer a luxury; it’s a necessity for professional results.
According to industry research, even minor vibrations or slips can distort footage, forcing costly reshoots and skewing storytelling. Recognizing and addressing slipping issues early helps maintain shot quality and prolongs your gear’s lifespan. Have you experienced the frustration of gear slipping right before a big shot? If so, you’re not alone. Many filmmakers overlook simple but effective tactics that can save their shoot—and sanity. Ready to learn how to keep your rig rock-solid? Let’s dive into the strategies that will elevate your camera stability.
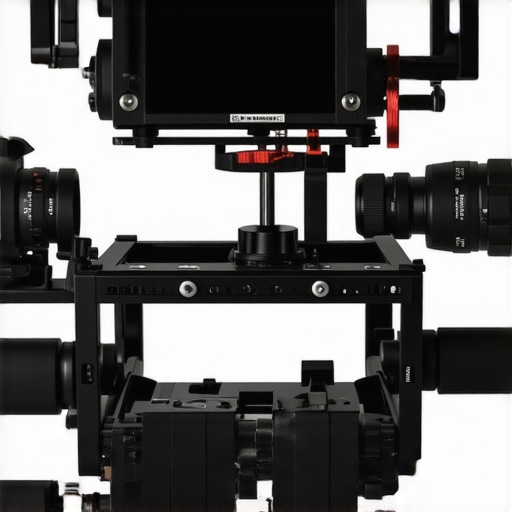
Will These Tricks Really Make a Difference?
Early in my filmmaking journey, I made the mistake of assuming all grip pads were equal. Trust me, not all anti-slip solutions are created equal. A poor choice or improper application can compound problems—so I learned the hard way. This article compiles the best practices and proven tactics I’ve come across, ensuring your setup remains steady from setup to shootout.
Now, that you know why stability matters, let’s explore practical, tested methods that can help you maintain control, even with the heaviest gear. Want your shots to be buttery smooth and your confidence unshakable? Read on.
Secure Your Top Handle Effectively
Start with a firm grip on your top handle by installing anti-slip pads or rubberized adapters. For instance, I once used rubber mats wrapped around my NATO rail to prevent hand slippage during a long shoot, resulting in smoother camera movements. Ensure fasteners are tight but not overly cranked to avoid damaging the mounting points. When attaching the top handle, tighten all locking screws securely, and consider using thread-locking compounds if you notice any play over time.
Upgrade to Anti-Slip Mounts for Cold Shoes and Rosettes
Replace standard cold shoes with models featuring textured or rubberized contact surfaces. This dramatically reduces twisting and slipping of accessories like monitors or microphones. For example, swapping out my old cold shoe for an upgraded model with a locking mechanism improved stability during rapid movements. Regularly inspect these mounts for wear and re-tighten as needed, especially after transport or extensive shooting days.

Implement anti-twist pins or screws on rosette-mounted handles to prevent rotation. This is especially vital for side handles connected via rosettes, which can loosen over time. During a project, I added anti-twist pins to my side handle assembly, and I noticed a marked decrease in play, providing consistent control throughout the shoot.
Lock Accessories with Rigid Clamps
Utilize rugged cable clamps or mounting brackets to secure loose accessories like cables, monitors, or lights. When I was working on a drone shoot, cable clamps prevented HDMI cables from jerking or disconnecting due to vibrations, saving me from re-shoots. Choose clamps rated for the weight of your gear, and fasten them tightly to sturdy points on your cage or rig. Periodically review and replace worn clamps to maintain rigidity.
Enhance Rig Stability with Proper Weight Distribution
Balance your setup by adding counterweights or redistributing accessories to achieve center of gravity. During a shoot with a heavy cinema camera, I used counterweights at the rear of my shoulder rig, which lessened fatigue and minimized wobble. Experiment with small weights until your rig feels steady without causing fatigue or discomfort. Proper balance reduces strain and prevents accidental slips caused by uneven weight distribution.
Use Grip Material and Proper Padding
Apply textured grip tapes or rubberized padding on handles and support points to increase friction. I often wrapped a grippy silicone sleeve around my top handle, which kept my grip firm even in sweaty conditions. Consider ergonomic grips that contour to your hand for added control and comfort. Regularly clean and replace worn padding to sustain effective friction.
Regular Maintenance Checks
Frequent inspection and tightening of all mounts, screws, and locks prevent gradual loosening. Set a routine before every shoot to verify each connection. I once found a loose screw on my monitor mount just before powering up, which could have caused a fall. Developing a checklist ensures you catch potential issues early, maintaining consistent stability and safety.
Implementing these practical steps transforms your rig’s stability, giving you confidence during complex shots. For more advanced setup tips, visit this comprehensive guide.
Even seasoned filmmakers sometimes fall into misconceptions about gear like top handles, camera cages, and rig accessories. One prevalent myth is that all top handles are interchangeable without affecting stability. In reality, the materials and mounting methods matter significantly; cheap aftermarket handles often lack the rigidity needed for professional shoots, leading to unwanted flexing and wobble. For advanced shooters, understanding the nuances of their top handle’s design—such as anti-twist features and locking mechanisms—is crucial for maintaining precise control. Overlooking these details can result in subtle but damaging vibrations that degrade image quality, especially in high-speed cinematography.
Many believe that heavier rigs always mean more stability. This is a trap; excessive weight without proper distribution can introduce new issues like fatigue and imbalance, which ultimately cause more movement, not less. Properly balanced rigs, with well-placed counterweights and thoughtful accessory placement, outperform simply adding mass. An insightful study from the Motion Picture Association underscores that ergonomic design and precise weight distribution improve stability more effectively than brute weight alone. Curious about balancing techniques that truly work? Check out our guide to [rig support systems](https://rigs.creatorrigreviews.com/camera-rigs-support-systems-essential-tips-to-build-your-custom-setup).
What advanced pitfalls do beginners often overlook in rig assembly and adjustment?
One critical oversight is neglecting the anti-rotation features of mounting points—especially on side handles and top handles. Without anti-twist security, handles can loosen over time, creating dangerous wobbles and potential gear drops. This seems minor but becomes a serious issue during dynamic shots or long takes. For example, adding anti-twist pins or using handle-specific mounting solutions can prevent this subtle but impactful problem. A professional tip: regularly inspect all mounting points for wear or looseness, especially after transporting your gear or before critical shoots. Neglecting these details can turn a smooth shoot into a frantic fix. To ensure your setup remains robust, review our tips on [anti-twist handle upgrades](https://rigs.creatorrigreviews.com/3-anti-twist-plate-fixes-to-stop-wobbly-2026-mirrorless-cages).
Another misconception revolves around the importance of quick-release mechanisms. Many assume that the latest quick-release mounts are universally reliable. But not all are created equal. Some low-quality mounts can add play or even accidentally detach during vigorous camera moves, risking costly damage. Investing in high-quality, tested quick-release systems with locking features can save time and money, especially in fast-paced productions. For more insights, see our in-depth review of [top quick-release cage options](https://rigs.creatorrigreviews.com/4-rigid-camera-cages-that-speed-up-2026-sets).
Have you ever fallen into this trap? Let me know in the comments. Recognizing these subtle nuances can elevate your filmmaking from good to stellar, so stay curious and keep refining your craft.
Keeping your camera rig, top handle, and accessories in optimal condition requires more than just occasional cleaning. Regular maintenance ensures durability, consistent performance, and safety during shoots. I personally swear by setting a weekly check routine that involves inspecting all mounting points, tightening screws, and cleaning contact surfaces with a soft brush and isopropyl alcohol. This proactive approach prevents unexpected failures and extends the lifespan of your gear. Moreover, investing in a dedicated toolkit—featuring precision screwdrivers, anti-static brushes, and silicone lubricant—makes maintenance both efficient and effective. As gear complexity increases, it’s crucial to stay ahead of potential issues before they escalate.
Predictably, as technology advances, we’ll see smarter tools that monitor wear and alert us to maintenance needs in real-time. Imagine a camera cage with integrated sensors that notify you via an app when screws loosen or contacts corrode. Staying current with these innovations can dramatically reduce downtime. Regularly updating your knowledge through trusted sources like expert blog posts helps you adapt your maintenance routines accordingly.
How do I maintain my rig over time? It’s about consistency and using the right tools.
For example, when installing or replacing rig accessories, I prefer high-quality locking clamps and anti-slip pads to prevent the need for frequent readjustments. Consistent lubrication of moving parts—like shoulder rig swivel joints—using dry silicone spray keeps them smooth and prevents corrosion, as outlined in technical manuals guiding rig assembly. Additionally, after lengthy shoots, a thorough check and cleaning can prevent issues like cable port corrosion or sensor failures. Remember to consult detailed guides, such as the shoulder rig maintenance tips, for tailored advice.
Investing in quality tools pays off, especially in the long term. For instance, using a precision torque screwdriver ensures screws are tightened to manufacturer specifications, avoiding overtightening that could lead to damage. Additionally, protecting your gear during transport with padded cases and avoiding exposure to moisture or extreme temperatures preserves functionality. As we move forward, I predict integration of IoT sensors within rig components will become a standard, allowing real-time diagnostics and maintenance suggestions—making upkeep seamless and more precise.
One practical step you can take today is to test your rig’s stability by lightly applying torque to all screws and mounts, ensuring everything remains firm. Implement this routine weekly, especially after transport or extensive use, to catch issues early. Want to get ahead? Consider investing in a digital torque screwdriver and set a reminder to perform these checks. Staying vigilant with maintenance not only saves money on repairs but ensures your shots are consistently sharp and reliable. For trusted gear care practices, revisit the comprehensive expert tips page.
The Hardest Lesson I Learned About top handle,camera rig,camera cage,rig accessories,shoulder rig
One of my most painful lessons was realizing that even the slightest looseness in a handle or mount can ruin a shoot. I once spent hours setting up a complex rig, only to find my side handle wobbly during a critical take, causing shaky footage and extra takes. That experience taught me the importance of meticulous tightening and anti-twist features, which can make or break shot stability.
3 Myths About top handle,camera rig,camera cage,rig accessories,shoulder rig That Held Me Back
For years, I believed heavier rigs always provided more stability. Turns out, excessive weight without proper balance can cause more wobble and fatigue. Also, I used to think all quick-release systems were equal—until I learned that inferior models can loosen during intense shoots. Busting these myths opened my eyes to smarter, more effective rig-building strategies.
What Experts Won’t Tell You About top handle,camera rig,camera cage,rig accessories,shoulder rig
Many professionals avoid discussing maintenance routines, yet regular checks on screws, mounts, and pads are vital for longevity and stability. I discovered that integrating anti-slip pads and anti-twist pins is often overlooked but essential for preventing subtle shifts that compromise footage. These insider tips can save you hours of frustration on set and preserve your gear’s integrity.
My Essential Toolkit for stabilizing top handle,camera rig,camera cage,rig accessories,shoulder rig
Over time, I’ve curated a set of go-to tools: high-quality torque screwdrivers ensure proper tightening, anti-slip grip tape enhances handling, and modular clamps keep accessories secured. Investing in a dedicated toolkit streamlines maintenance and helps catch issues early—trust me, this approach prevents costly fixes later. For trusted, durable gear, check out our recommended support systems here.
This Is Your Moment to Elevate Your Rig Game
Taking proactive steps to improve your rig stability now can transform your filmmaking experience. Don’t wait for a slip-up to teach you the hard way—implement these lessons, use the right tools, and embrace ongoing maintenance. Remember, a stable rig isn’t just about gear; it’s about confidence in your craft. Start today, experiment with new setups, and watch your shots become smoother than ever. Need more expert guidance? Visit this comprehensive resource for advanced tips.

![4 Cooling Cage Mods to Stop 2026 Mirrorless Overheating [Tested]](https://rigs.creatorrigreviews.com/wp-content/uploads/2026/04/4-Cooling-Cage-Mods-to-Stop-2026-Mirrorless-Overheating-Tested-300x300.jpeg)

Reading through this post really hits close to home—I’ve had moments where my gear slipped during critical shots, and it’s a stomach-dropping experience for sure. What stood out to me is the emphasis on simple yet effective solutions like anti-slip pads and balancing weight distribution; these are often overlooked but make a huge difference in real-world scenarios. Personally, I’ve found that investing in quality mounting hardware with locking features has paid off in avoiding those sudden slips, especially when shooting in dynamic environments. One challenge I still face is maintaining perfect balance with an ever-growing list of accessories—has anyone found particularly effective ways to streamline weight distribution without sacrificing functionality? I’d love to hear tips on managing complex rigs while keeping everything tight and stable—sometimes the more gear I add, the trickier it gets to keep everything from wobbling. Overall, this article is a great reminder that solid rigging isn’t just about premium gear but also about meticulous setup and regular maintenance. Any recommendations on quick routine checks to perform before shoots to prevent surprises?