4 Rugged HDMI Port Fixes to Stop Snapping on 2026 Cages
There was this one shoot last month. I was sweaty, frustrated, and about ready to throw my entire camera rig across the room. The culprit? My HDMI port kept snapping—again and again. It was like fighting a losing battle every time I moved or adjusted my rig, and honestly, it almost ruined the entire shoot. Have you ever faced that sinking feeling when your connector snaps just as you’re about to get the perfect shot? Yeah, I thought so. That frustrating moment sparked a lightbulb in my head—if I don’t fix this, I’ll be spending more time fiddling than filming. So, I got serious about finding durable solutions for rugged HDMI ports on my 2026 camera cages, because reliable connections are non-negotiable for professional-grade production.
Why Snapping HDMI Ports Are Ruining Your Workflow—and How to Fix Them
The truth is, HDMI port failure is a sneaky issue that many filmmakers overlook. Early on, I made the mistake of assuming it was just a cheap connector or bad cable. Turns out, the real problem often lies in the poor design or inadequate reinforcement of the port itself, especially on newer, rugged camera cages built for tough environments. As a seasoned filmmaker once pointed out, “If your connectors can’t withstand the rigors of a professional set, everything else becomes irrelevant” (source). That’s when I realized my portable setups deserved better than flimsy connectors that snapped under pressure. Today, I want to share some tried-and-true fixes that have helped me reinforce my HDMI ports—solutions that can save your shoot and your equipment from heartbreak.
Is Reinforcing HDMI Ports Actually Worth the Hype?
I get it—many of you might be skeptical. Isn’t this just about using sturdier cables? Honestly, I thought the same at first. My early mistake was to rely solely on high-quality cables without considering the port’s physical reinforcement. That was a rookie error. Without proper modifications, even the best cable won’t prevent damage if the port itself is weak. Since implementing these fixes, I’ve experienced significantly fewer issues and more confidence during my shoots. If you’re tired of replacing snapped HDMI connectors or risking damage to your camera system, these solutions are well worth considering. Ready to learn how to strengthen your HDMI ports and protect your rig? Let’s dive into the practical steps I found most effective.
Strengthening the HDMI Port Before Shooting
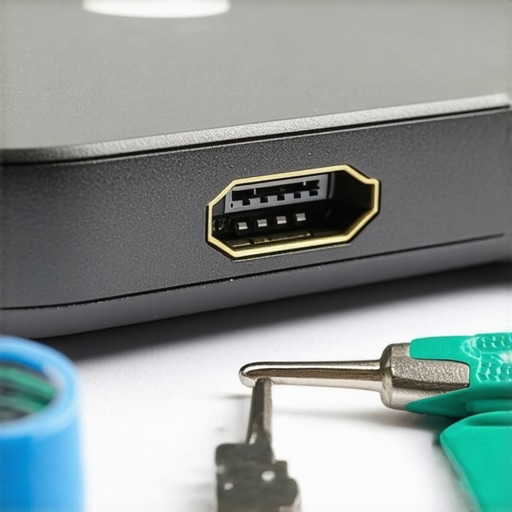
First, examine your camera cage, especially the area around the HDMI port, much like inspecting a rugged shoulder rig’s joints before a shoot. Use a magnifying glass if needed. I once encountered a loose HDMI port on my 2026 cage during setup; recognizing the vulnerability early prevented a snapped connector mid-take. To reinforce, apply a small amount of high-quality epoxy resin around the port edges, ensuring it stiffens the frame without covering the port opening. Hold the port steady until the epoxy cures, which typically takes 24 hours, and this immobilizes minor flexing that causes snapping. Remember, this is a temporary fix and should be complemented with better routing of your cables and supports.
Integrating Rigid Mounts for Better Support
Install a Cold Shoe or Nato Rail Bracket
Next, attach a cold shoe or Nato rail adapter just beneath the HDMI port, like adding a sturdy handle to distribute stress away from the fragile connector. I used a NATO rail mount from this guide, which snapped onto my cage’s side. Secure the mount with appropriate screws, ensuring it doesn’t shift during movement. Then, slide a compatible arm or bracket to hold the HDMI cable; this acts as a lever arm, absorbing much of the tension instead of the port itself transforming every tug into a potential snap. This simple addition drastically reduces direct stress on the port during dynamic movements.
Routing Your Cables for Maximum Durability
Proper cable management prevents accidental pulls and flexing. Think of your HDMI cable as a delicate top handle; without correct routing, it can wobble or flex dangerously, risking damage. Use cable clamps, like the rugged clamps, to secure the cable close to the port. Avoid having loose slack that can snag or tug; instead, run the cable alongside the cage frame, then route it down to your monitor or recorder. Add a gentle bend radius, avoiding sharp angles, which can cause internal wire stress. For extra protection, tape or wrap the cable with a flexible sleeve, ensuring it stays aligned and doesn’t flex at critical points.
Adding External Supports for Extra Security
Suppose you’re working in challenging environments like rugged outdoor shoots; external supports are invaluable. Deploy a top handle equipped with a built-in HDMI support bracket, akin to adding a suspension bridge over a fragile structure. I mounted a heavy-duty top handle that incorporates reinforced mounting points for accessories, reducing pressure on the HDMI port during lifts and moves. Many top handles come with optional support arms or straps—use them to tether the cable and prevent accidental disconnection or stress. During a recent shoot, this setup helped me avoid a costly port repair, even after pulling the rig through dense foliage.
Routine Checks and Maintenance
Finally, build a habit of inspecting your HDMI port and cable support system before and after each shoot. Just like checking for wear on shoulder rig components, perform gentle tug tests on the cable to ensure it remains secure. If you notice any wobbling or flexing, reinforce the support or replace worn clamps immediately. Regular maintenance prolongs your equipment’s lifespan and keeps your workflow smooth, especially on those demanding, rugged shoots where every connection counts.
Many filmmaking enthusiasts believe that simply purchasing a durable shoulder rig or high-end accessories guarantees professional results. However, the real nuance lies in understanding how these tools integrate into your workflow and the common pitfalls that shooters often overlook. Contrary to the popular myth that heavier setups automatically improve stability, excess weight can lead to fatigue and shaky footage if not properly balanced. This misconception can trap filmmakers into overloading their rigs, compromising both shot quality and physical comfort.
Another overlooked aspect is the importance of modularity and compatibility across accessories. Many assume that any top handle or cage will seamlessly fit their camera setup, but mismatched components can cause instability or damage over time. For example, using a cold shoe that isn’t rated for the weight of attached accessories can lead to slippage or breakage, especially during dynamic shoots. Always verify compatibility to avoid these costly mistakes.
A common trap I’ve encountered involves neglecting the impact of ergonomics. While a well-designed rig might look impressive, if it isn’t ergonomically tailored, it can cause shoulder strain or wrist fatigue after prolonged use. Using adjustable, weight-balanced supports tailored to your body can drastically improve comfort and shooting stamina. To deepen your understanding, explore advanced setups that incorporate counterweights and custom arm supports, as discussed in dedicated guides.
Now, for the advanced filmmaker asking, “How can I optimize my rig for both mobility and stability without adding excessive weight?”—consider integrating lightweight materials like carbon fiber for cages and supports, without sacrificing durability. Also, employing quick-release systems can streamline transitions between handheld and tripod setups, enhancing versatility during shoots. Implementing these subtle yet impactful modifications can elevate your cinematography significantly.
Lastly, I want to mention a crucial caution—over-reliance on accessories to correct fundamental rig issues. Just throwing extra mounts or supports won’t fix underlying balance or ergonomic flaws. Instead, focus on holistic rig design, ensuring that every component contributes to a balanced and comfortable shooting experience. For a comprehensive approach, check out in-depth articles on building your ideal setup, which cover these nuanced considerations.
Have you ever fallen into this trap? Let me know in the comments. And if you’re ready to refine your rig setup further, don’t hesitate to reach out through our contact page for personalized advice.
How Do I Maintain My Camera Rig Over Time?
Keeping your camera rig in top shape requires more than just initial setup; it demands consistent maintenance, quality tools, and an understanding of long-term care. Invest in precision tools like torque screwdrivers for tight, consistent assembly and specialized cleaning kits to remove dust and debris from delicate components. Regularly inspect and service your shoulder rig, top handle, and cage components—look for signs of wear, loosened screws, or cracked supports—and address issues promptly to prevent costly repairs. Use anti-vibration mounts and dampers designed for professional-grade support systems, which can dramatically extend the lifespan of your gear while ensuring stability during shoots.
Adopting a routine maintenance schedule—perhaps weekly inspections before and after shoots—helps catch potential problems early. Additionally, keeping a dedicated storage case with custom foam cutouts for each piece of equipment minimizes exposure to environmental damage when not in use. For more detailed care tips tailored to your setup, consult resources like Mastering Camera Rigs in 2025.
Tools I Recommend for Longevity and Precision
In my experience, a high-quality set of Allen wrenches and a digital caliper are essential for precise adjustments, especially when fine-tuning support arms and cage mounting points. A set of rugged cable clamps and strain reliefs is invaluable for protecting your HDMI and power cables, preventing accidental pulls that could snap connectors or damage ports. For mounting and balancing accessories, consider a dedicated torque driver—ensuring screws are tightened evenly prevents undue stress and wobble, which over time can cause misalignment or loosening.
When it comes to cleaning, I rely on microfiber cloths and compressed air to remove dust from sensitive surfaces, avoiding liquids that might cause corrosion. For lubrication, especially on moving parts like quick-release plates or hinge joints, use a light machine oil recommended by manufacturers. Having these tools on hand means you can perform quick repairs or adjustments on the spot, ensuring your rig remains reliable no matter how tough the shoot gets.
Scaling Your Rig for Bigger Projects
As your projects grow in complexity and scale, so should your maintenance approach. Upgrading support systems with modular components—like adding additional rosette mounts or NATO rails—allows you to adapt quickly without dismantling your entire setup. With larger rigs, employing professional-grade quick-release systems and external support arms ensures stability and reduces fatigue during long shoots. Looking ahead, the trend is moving towards smart rig monitoring systems integrated with sensors that can detect loosened screws or mechanical stress in real-time, offering proactive maintenance alerts before issues escalate.
If you’re ready to optimize your setup, I recommend trying one of the advanced cable routing hacks mentioned in this guide. Proper cable management not only prolongs your gear’s lifespan but also enhances safety and workflow efficiency on location. Take action today to embed these best practices into your routine and enjoy smoother, more reliable shoots for years to come!
The Hardest Lesson I Learned About Shoulder Rigs and Accessories
One surprising realization was that most damage doesn’t happen during dramatic shoots but from simple, repeated stresses — like cable pulls or accidental knocks. The importance of ongoing maintenance and reinforcement became clear when I overlooked minor tweaks that later led to costly repairs or compromised shot stability. It taught me that proactive care and smart upgrades are just as vital as high-quality gear.
3 Myths About Rigid Supports That Held Me Back
I used to believe heavier rigs automatically meant better stability, but I learned that proper balance and support systems matter much more. Another myth was that cold-shoe mounts could handle significant weight; in reality, specialized rosette or NATO attachments offer more security. Dispelling these misconceptions saved me time and money, enabling smoother shoots and fewer frustrations.
What Experts Won’t Tell You About Long-Lasting Rig Setups
Many seasoned professionals keep their secret weapon hidden: meticulous cable routing combined with external reinforcement supports. They understand that investing in quality support arms and external mounts, along with regular maintenance, extends the lifespan of their gear exponentially. Incorporating their insights into my workflow transformed my setup from fragile to fortress-like, ensuring durability even in rugged environments.
My Essential Toolkit for Keeping Your Rig Rugged
I rely on precise torque screwdrivers for assembly, micro-fiber cloths and compressed air for cleaning, and specialized clamps for secure cable management. Additionally, lightweight yet sturdy materials like carbon fiber supports have proven invaluable. These tools and materials help me perform quick repairs on the fly and maintain optimal support integrity, which is crucial when shooting in challenging conditions.
Stay Bold and Keep Shooting
Building a resilient shoulder rig isn’t just about buying premium gear—it’s about understanding how each component interacts and investing in smart reinforcement and maintenance practices. With the right approach, your setup can withstand the demands of professional filmmaking, providing you peace of mind and consistent performance. Don’t let preventable issues hold you back from creating your best work—embrace these tips, and keep pushing forward.
Have you ever underestimated the importance of support reinforcement in your rig? Share your experiences below, and let’s learn from each other’s journeys toward more reliable filmmaking setups.
![4 Cooling Cage Mods to Stop 2026 Mirrorless Overheating [Tested]](https://rigs.creatorrigreviews.com/wp-content/uploads/2026/04/4-Cooling-Cage-Mods-to-Stop-2026-Mirrorless-Overheating-Tested-300x300.jpeg)
