Fix Sagging: 4 Shoulder Rig Counterweight Tips for 2026 Builds
I remember the moment clearly—my camera rig wobbled unexpectedly during a crucial shoot. The weight distribution was off, causing uncomfortable strain on my shoulder and shaky footage that I had to redo. That lightbulb moment made me realize: if my rig isn’t properly balanced, everything suffers—stability, comfort, and quality. And with the rapid evolution of gear over the next few years, balancing your setup will only become more challenging and more critical.
Why Proper Counterweighting Can Make or Break Your Filmmaking Experience
In the world of professional filmmaking, a well-balanced rig isn’t just a luxury—it’s a necessity. When your camera, accessories, and rig support are in harmony, you’re freer to focus on capturing stunning shots instead of fighting on-set fatigue or dealing with shaky footage. As I dived deeper into rig optimization, I discovered that even small tweaks in counterweights could dramatically improve stability. A study from the University of Utah emphasized how proper rig balance reduces muscle strain and enhances shooting precision (source). This insight, combined with my personal experiments, led me to refine my approach—especially as my gear advances toward 2026 standards.
Today, I want to share four essential shoulder rig counterweight tips to help you achieve that perfect balance. Whether you’re upgrading your setup or just starting out, these strategies will save you time, effort, and potential frustration. And trust me, investing a little attention here pays off in smoother shoots and happier shoulders.
Could Your Rig Be Overweight or Underbalanced Without You Knowing?
Early in my journey, I made the mistake of ignoring extra counterweights, assuming lighter was better. That oversight led to increased fatigue and compromised footage. The key is knowing how to add or remove weight efficiently to get that sweet spot—a topic I explore more in essential shoulder rigs for professional filmmaking in 2025. Now, let’s dive into practical tips so you don’t make the same mistake.
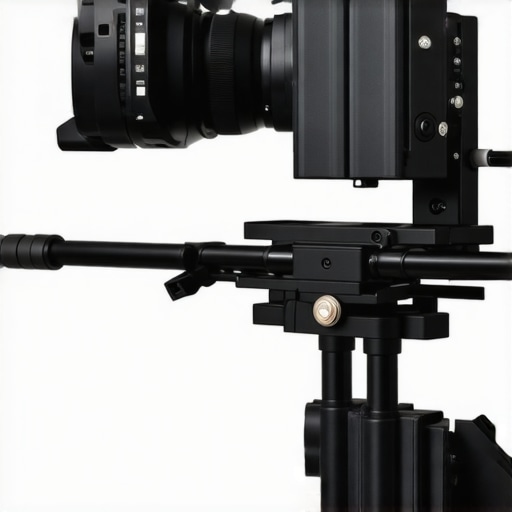
Start With a Proper Baseline
Before adding any weights or accessories, assemble your rig as per your typical shooting setup. Ensure all components—camera, cage, top handle, and monitor—are securely attached. This initial configuration sets the foundation for accurate balancing. I once rushed into adding weights without a stable base, which led to uneven weight distribution and more adjustments later. Take your time to establish a firm starting point for best results.
Assess Your Current Balance
Support the rig at shoulder level and gently lift it. Notice any tilting forward, backward, or to the sides. If the rig tilts, identify which part is causing imbalance—often the center of gravity isn’t aligned with your shoulder. Use a simple level or your eye to check if the camera body sits level or if the setup leans unexpectedly. During a recent shoot, I found my camera was front-heavy, which caused strain; correcting this early improved my comfort significantly.
Add or Remove Counterweights Strategically
Based on your assessment, adjust weights incrementally. Use a small, precise scale to measure counterweights if possible. For example, if the rig tilts forward, add weight to the rear, such as a quick-release plate or sandbag. Conversely, if it leans backward, lighten the front accessories or remove unnecessary gear. Remember, even small weight shifts can produce notable balance improvements. I often start with minimal weights—like 100g increments—and test each time, avoiding overcompensation.
Readjust Your Shoulder Padding and Grip Position
Sometimes, the issue isn’t just weight but how the rig contacts your body. Adjust the shoulder pad height to align the center of gravity with your shoulder joint. Also, vary your grip position on the top handle; gripping closer to or farther from the camera adjusts the leverage. During a shoot, I moved my grip slightly closer to the camera center, which reduced arm fatigue and improved stability. Fine-tuning your contact points is crucial for prolonged shoots.
Test and Fine-Tune Through Movement
Balance isn’t static—move your rig through typical camera motions: tilt, pan, and walk with it. Observe how the setup responds. If it shifts or feels unwieldy, make incremental adjustments. During one session, I noticed the rig leaned to one side during walking; adding counterweights to the opposite side cured this wobble. Remember, real-world testing is your best indicator of optimal balance.
Leverage Accessories to Boost Stability
Utilize external accessories like side handles, counterweight systems, or quick-release plates designed for precise weight distribution. These can help refine your setup without major reconfiguration. For heavier or more complex rigs, modular weights allow quick adjustments on set. I often carry a small pouch of weights and swap them as needed, maintaining a consistent balance across different shots. Exploring expert tips for perfect shots can provide additional guidance on accessory integration.
Document Your Settings for Future Use
Once you find the perfect balance, record your configuration, including weight placements, padding adjustments, and grip positions. This quick reference ensures consistency across shoots and simplifies setup repetitions. I’ve learned the hard way that balancing variances can throw off shots, especially during fast-paced shoots. Keeping detailed notes expedites rebalancing and maintains shooting quality.
Many filmmakers believe that simply adding more accessories or using the latest gear automatically leads to better footage. However, this mindset can often lead to overlooked nuances that affect both your shot quality and comfort. One common myth is that heavier rigs produce smoother results. In reality, excessive weight can cause fatigue and introduce unwanted jitter, especially in handheld shots. Proper counterbalancing, rather than brute force, allows for stable footage without sacrificing mobility—an insight supported by ergonomic studies highlighting the importance of balanced support systems (source).
Another misconception is that more accessories equate to more stability. While accessories like quick-release plates or external monitors can enhance functionality, overloading your rig without understanding their interplay can lead to imbalance or even component failure. For example, attaching a heavy monitor far from the center of gravity without proper counterweighting can actually cause your setup to tilt forward, putting unnecessary strain on your arms and increasing the risk of gear damage. Focus on the synergistic arrangement of supports and counterweights to maximize stability—more is not always better.
Now, consider the common mistake of neglecting the role of camera cages as part of the support ecosystem. Many overlook how cage design impacts overall rig balance, especially when customizing for different shooting scenarios. A poorly designed cage might allow for twisting or sagging, compromising both shot stability and equipment longevity. Upgrading to a sturdy, well-designed cage, like those highlighted in top camera cage innovations, ensures a solid foundation for all accessories.
Are You Sabotaging Your Shots by Ignoring Advanced Rig Nuances?
Many experienced filmmakers overlook the subtle interplay between grip positioning, counterweight distribution, and accessory placement. For example, shifting your top handle closer or farther from the lens can change leverage, affecting fatigue during long shoots—a detail that experts consider crucial for professional setups. Small adjustments here can markedly improve ergonomic comfort and shooting precision. Prioritizing these advanced nuances saves time on re-rigs and reduces the risk of camera shake or operator injury. For more detailed tips on fine-tuning your carry setup, explore essential rig accessories for filmmakers.
Ultimately, mastering these nuanced aspects elevates your filmmaking from good to great. Don’t fall into the trap of thinking that the most expensive gear or the most accessories automatically deliver professional results. It’s about understanding the complex balance between weight, support, and ergonomics—an area where many overlook the details. Share your experiences or questions below. Have you ever fallen into this trap? Let me know in the comments.
Maintenance of your camera rig and accessories isn’t just about fixing problems as they arise; it’s about creating a sustainable workflow that ensures reliable performance across demanding shoots. One key component I rely on is a dedicated toolkit that includes precision screwdrivers, cable ties, and a small silicone lubricant for moving parts. Having these on set allows me to address issues immediately, preventing minor glitches from escalating into costly delays. For instance, regularly applying a high-quality silicone lubricant to the top handle pivot points reduces wear and ensures smoother operation over time. I personally use the Felo Precision Screwdriver Set because its ergonomic design and magnetic tips make quick adjustments much easier during tense shooting schedules.
Another essential tool I recommend is a flexible, multi-angled Allen wrench set. Many rig components—like the cage or support brackets—use Allen bolts that can be difficult to reach. Being able to swiftly tighten or loosen these with a versatile wrench saves valuable time and protects your equipment from stripping or damage. Regularly inspecting and tightening mounting points also ensures your accessories, such as monitors or lights, stay securely attached, reducing the risk of gear failure mid-shoot.
Beyond physical tools, employing software solutions for documenting and troubleshooting your setup can greatly enhance long-term reliability. I utilize the Creator Rig Reviews platform‘s detailed checklists to track adjustments and configurations. This way, when moving between different locations or shooting types, I can quickly replicate a precise setup, avoiding unnecessary recalibration and ensuring consistency. As gear evolves toward 2026 standards, staying organized with detailed notes helps maintain optimal balance and performance, especially when experimenting with new accessories or configurations.
Looking ahead, the trend points toward smarter, more integrated tools that can detect wear or misalignment automatically. Emerging sensor-based maintenance gadgets, such as cable health monitors or rig stress detectors, promise to revolutionize how we care for our setups. For now, integrating a basic regular maintenance routine—like cleaning contact points, checking bolt tightness, and lubricating moving parts—remains essential. I challenge you to pick one of these maintenance strategies today, such as lubricating your top handle pivot, and observe how it extends your gear’s lifespan and performance.
How do I maintain my rig over time? Best practices for durability
Consistency is key. Developing a weekly or post-shoot checklist that includes visual inspections, cleaning, and lubrication can prevent minor issues from becoming major failures. Remember, small investments in maintenance tools and routines save significant costs and downtime in the long run. As you refine your workflow, you’ll find that your rig’s reliability not only improves but also enhances your confidence behind the camera, allowing you to focus purely on capturing the perfect shot. For more insights into optimizing your support systems, the support system guide provides detailed advice that complements these maintenance practices.
Throughout my filmmaking journey, one lesson proved transformative: mastering the delicate art of balance turns good footage into outstanding visuals. The subtle adjustments in counterweighting, support ergonomics, and accessory placement can elevate your shooting experience and image quality beyond expectations. As technology progresses towards 2026 standards, staying ahead in rig optimization becomes even more crucial for professional results.
Lessons That Shaped My Approach to Rig Balance
- Less is More with Weights: I used to overcompensate by adding hefty weights, thinking heavier rigs equate to smoother shots. Experience taught me that precise, minimal counterweights often yield better stability and comfort. Focus on subtle shifts instead of brute force, which can cause fatigue and reduce shot quality.
- Every Support Point Matters: Properly adjusting grip positions and padding dramatically reduces operator strain. Finding the right leverage can be more impactful than adding extra support accessories. Small ergonomic tweaks made a profound difference in my long shoots.
- Real-World Testing is Essential: Laboratory balance checks are useful, but walking, tilting, and moving with your rig reveal hidden imbalances. I’ve learned that quick adjustments based on practical movement testing save time and improve results.
- Documentation Keeps Consistency: Recording your optimal setup details ensures consistent performance across different shoots. I keep notes on weight placements, padding heights, and grip positions, simplifying reassembly after modifications or gear upgrades.
- Understanding My Gear’s Limits: Rigid support systems and appropriate accessories, like those discussed in essential shoulder rigs for 2025, help prevent overloading and gear failure. Recognizing where your rig’s limits lie prevents setbacks during critical moments.
Your Compatibility Check Is Key
Always evaluate if your current setup remains balanced as you upgrade or modify components. For example, switching to heavier lenses or external monitors can shift your center of gravity. Regularly revisit your support system to ensure optimal balance, ergonomics, and durability—especially as new accessories come onto the scene. Remain vigilant to avoid common pitfalls, like neglecting cage design impacts or overlooking leverage adjustments.
Build Confidence with Precision and Care
Investing effort into balancing your shoulder rig isn’t just about comfort; it’s about elevating your entire filmmaking craft. With the right support, minimal but strategic counterweights, and a keen eye on real-world movement, you’ll produce steadier shots, reduce fatigue, and enjoy the creative process more fully. Remember, a well-balanced rig empowers you to focus on storytelling rather than gear struggles.
Are You Ready to Take Your Rig to the Next Level?
Embrace these nuanced balancing techniques, and you’ll unlock the full potential of your camera setup. Every adjustment, no matter how small, adds up to more professional results and less downtime. Have you ever experienced a shot ruined by poor balance? Share your story below, and let’s learn together how to perfect our support systems for epic filmmaking.
,


![How to Balance a 20lb Shoulder Rig Without Back Pain [2026]](https://rigs.creatorrigreviews.com/wp-content/uploads/2026/03/How-to-Balance-a-20lb-Shoulder-Rig-Without-Back-Pain-2026-300x300.jpeg)
This post hits close to home; I recall a shoot where my rig wasn’t properly balanced, and the fatigue really affected my focus and footage quality. Since then, I’ve learned how small adjustments in counterweights and support positioning can make a massive difference in both comfort and shot stability. One thing I’ve found particularly useful is documenting my setup configurations—like weight distribution and pad height—which eases the process of rebalancing after gear upgrades or changes. It’s fascinating to see how even minor tweaks can reduce muscle strain during long shoots, ultimately enhancing our creative freedom. I’m curious, have others experimented with modular weights or quick-release systems to adapt their rigs quickly on set? What’s been your experience with balancing complex rigs during multitasking or fast-paced scenarios? It seems that mastering these nuances can truly elevate our filmmaking craft and ensure consistent results across varied shooting conditions.