5 Reasons to Switch to a NATO Rail Top Handle in 2026
I remember the first time I felt my wrist strain after hours of filming—little aches turning into persistent pain. It hit me then: my rig setup was crying out for an upgrade, but I didn’t know where to start. Later, I discovered that the top handle, especially one with a NATO rail, could dramatically improve my workflow and reduce fatigue. That moment was a lightbulb, sparking my journey into the world of rig enhancements. If you’ve ever felt your grip slipping or your shots shaky because of equipment discomfort, you’re not alone. The good news is, there’s a simple yet powerful upgrade waiting for you.
Why a NATO Rail Top Handle Could Be Your 2026 Game-Changer
As creators, we often push our gear to the limit, and sometimes, our rigs just aren’t designed with long hours or heavy-duty shoots in mind. The NATO rail system has been gaining popularity among seasoned filmmakers because it offers versatility, durability, and quick adjustments—all crucial during demanding shoot days. Switching to a NATO rail top handle isn’t just about aesthetics; it’s about enhancing your control, ergonomics, and overall shot stability. I’ve personally experienced the difference, and connecting with other pros confirms this is a trend worth embracing.
But is it really worth the hype? Many skeptics worry about the cost, compatibility, or just adding unnecessary complexity. That’s a fair concern—until you face the frustration of tools slipping or parts loosening at critical moments. Making a mistake early in your rig setup, such as ignoring the benefits of NATO rail mounts (which are designed for quick, secure swaps), can lead to shaky footage or even damaged gear. I learned this the hard way early on, and now I always advocate for investing in modular, reliable components that save time and improve results.
Is the NATO Rail Top Handle Truly Worth It?
Considering all the options, I understand why some might hesitate. The key is recognizing how a high-quality handle with NATO compatibility can streamline your workflow—especially when managing multiple accessories or switching configurations on the fly. For an in-depth look at how to optimize your setup, check out [this comprehensive guide](https://rigs.creatorrigreviews.com/optimizing-your-camera-rig-expert-tips-for-perfect-shots). It covers how to build a support system that minimizes fatigue and maximizes control, making your shoots more efficient and enjoyable.
If you’ve faced the challenge of unstable shots or sore hands after long shoots, know that upgrading your top handle can be a real difference-maker. Now, let’s explore what makes a NATO rail top handle a smart investment and how to choose the right one for your needs—this could be the step that elevates your filmmaking in 2026 and beyond.
Identify Your Rig’s Weak Points
Begin by assessing your current setup—check for loose screws, uneven weight distribution, or uncomfortable grips. I once noticed my top handle wobbling during a shoot, causing shaky footage. To fix this, I tightened all mounting points, focusing on the NATO rail connections that often loosen over time. This initial inspection clarifies where improvements are needed, such as grip ergonomics or component stability.
Prioritize Compatibility and Modularity
Choose accessories that integrate seamlessly; for example, a NATO rail top handle easily attaches and detaches without tools. I recommend reviewing [this guide](https://rigs.creatorrigreviews.com/ultimate-guide-to-camera-cages-rig-accessories-for-custom-filmmaking-success) to understand compatibility, ensuring your upgrades won’t limit future configuration options. A modular system allows quick swaps, which is crucial on fast-paced shoots.
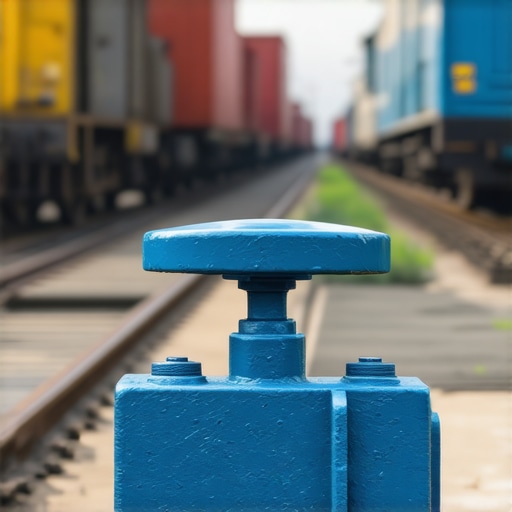
Replace or Add a NATO Rail Top Handle
Invest in a high-quality NATO rail top handle with adjustable grips for ergonomic comfort. During my upgrade, I mounted such a handle, which drastically improved handling and minimized wrist strain. Secure all mounting points tightly, paying attention to the quick-release locks for stability. When screwing the handle onto the NATO rail, ensure it’s snug but not overtightened to avoid damaging the threads.
Secure Accessories with Proper Clamping
Use dedicated clamps or quick-release locks to hold accessories like monitors, microphones, or lights. I once relied solely on basic screws, but securing them with NATO-compatible clamps prevented accidental drops and shifted accessories, maintaining shot stability. Check [this article](https://rigs.creatorrigreviews.com/4-rigid-monitor-mounts-that-wont-sag-on-your-2026-camera-cage) for mounting options that prevent sag.
Adjust Your Rig for Balance and Comfort
Balance your setup by using counterweights if needed. I added small weight plates to my shoulder pad after noticing back fatigue from front-heavy rigs. Test your rig by holding it in typical shooting positions; adjust straps or add weight until it feels natural. Proper balancing reduces fatigue and enhances shot stability.
Test Your Changes in Real Conditions
Before the next shoot, simulate actual filming conditions. Reassemble your rig, move around, and record short clips; review for stability, comfort, and power cable security. During one test, I discovered a loose cable clamp that caused wires to tug, risking disconnections. Fixing this before the shoot saved time and frustration.
Document Your Configuration
Keep a detailed record of your setup—list the components, adjustment points, and preferences. This habit helps in troubleshooting and future upgrades. After several iterations, I developed a setup checklist that made reassembling a breeze, saving valuable setup time on set.
Many filmmakers assume that assembling a camera cage or rig is simply about stacking parts for stability, but in reality, there’s a nuanced art to it that often gets overlooked. One widespread misconception is that more accessories automatically lead to better shots. In truth, cluttered rigs can cause imbalance, increase fatigue, and even introduce vibrations that compromise image quality. The secret lies in selective, purpose-driven customization rather than maximum component count. A frequent mistake is neglecting the importance of proper weight distribution, especially when adding top handles or shoulder supports. Improper balance not only causes back and shoulder strain but can also make camera movements twitchy and less professional-looking, even for experienced shooters. For example, many get tempted to mount every accessory for convenience, but this can create a top-heavy setup that destabilizes the entire rig. Instead, focusing on a balanced setup with carefully chosen accessories enhances both comfort and shot stability.
Why do so many rig setups fall apart during critical shoots, and how can you prevent that?
This often stems from overlooking high-quality mounting solutions or underestimating the importance of secure, compatible accessories. Using inferior clamps or incompatible threads might save a few dollars upfront but can lead to slipping or, worse, gear falls that ruin a shot or damage expensive components. Always prioritize quality attachments like NATO rails with locking mechanisms—they are specifically designed to lock accessories securely, especially under heavy use. External expert sources, such as industry leader Paul Wheeler, emphasize that modularity and secure mounting are vital to avoiding ‘rig creep’ and maintaining shot integrity. Make sure you’re investing in robust hardware and adopting practices like regular torque checks to maintain rig integrity throughout demanding shoots.
Do you think adding more accessories improves your production quality or hampers it? Here’s the truth.
The reality is that over-accessorizing distracts from actual filmmaking and can introduce issues like increased weight, imbalance, and cable clutter. I recommend reviewing [this comprehensive guide](https://rigs.creatorrigreviews.com/optimizing-your-camera-rig-expert-tips-for-perfect-shots) to learn how to optimize your setup effectively. Remember, a streamlined, balanced rig designed for your specific needs produces better results and reduces fatigue—crucial for long shooting days. Before your next shoot, evaluate your current rig for excessive weight or imbalance, and consider one key upgrade: a well-designed top handle with NATO compatibility. This small change can dramatically improve ergonomics and control, especially when shooting handheld or on a gimbal. Proper grip placement and accessory positioning are often underestimated but are critical for steady footage. For the advanced filmmaker, attention to these subtle details separates average results from outstanding cinematography. Have you ever fallen into this trap? Let me know in the comments and share your experiences with rig customization!
Just like any professional tool, your camera rig requires regular upkeep to ensure reliable performance and longevity. From tightening mounting screws to inspecting cables, attentive maintenance can prevent unexpected gear failures during crucial shoots. Personally, I schedule monthly check-ins for my setups, focusing on key components like NATO rail connections and quick-release mechanisms to catch wear and tear early. Using high-quality tools such as precision Allen wrenches, I ensure every element remains snug, avoiding loose parts that could cause instability or equipment damage. Additionally, maintaining the cleanliness of moving parts and hinges prevents dirt buildup that can impair smooth operation. In the long run, consistent care reduces downtime and costly repairs, saving you time and money while preserving your investment.
Predicting the future, I believe advancements in modular rig components and smart maintenance sensors could revolutionize our workflows—think of connectors integrated with diagnostic features that alert you when loosening or fatigue occurs, much like the innovations discussed in this article. Staying ahead means adopting proactive practices today, such as routine inspections and using durable, corrosion-resistant hardware.
How do I keep my rig functioning flawlessly over time?
Begin by developing a routine inspection schedule, at least once a month, to check all mounts, clamps, and cables. Replace any worn-out parts immediately and keep a set of essential tools—like the ones recommended in our guides—on hand. It’s also vital to store your gear in a clean, dry environment, protected from dust and moisture, which can accelerate wear. For connectors and quick-release plates, apply a light coating of contact cleaner periodically to prevent oxidation and ensure smooth operation. Establishing these habits ensures your rig remains sturdy and reliable, ready to perform when it counts most.
When upgrading, consider integrating modular accessories that are easy to maintain. For example, high-quality NATO rail handles not only improve ergonomics but also simplify disassembly for cleaning or replacement—check out this guide for tips on securing your handle and accessories effectively. Remember, the key to a durable rig is consistent maintenance combined with the right tools. I recommend trying out a detailed inspection and cleaning routine this week—you’ll be surprised at how much smoother your shoots become when your gear is in top shape. Don’t forget, a well-maintained rig not only performs better but also extends the lifespan of your investment, ensuring your creativity isn’t interrupted by avoidable issues.
Throughout my journey, I’ve learned that the nuances of rig assembly and maintenance are what truly transform a good shot into a great one. One of the most pivotal lessons was realizing that choosing the right modular components, like a NATO rail top handle, doesn’t just improve ergonomics but can also drastically cut down setup time and fatigue during long shoots. It’s tempting to add accessories endlessly, but I’ve found that strategic selection and balance are the real game-changers. Regularly inspecting and fine-tuning my rig has prevented countless issues, proving that proactive care is an investment in quality and longevity. Remember, your gear isn’t just equipment—it’s an extension of your creative vision, and caring for it reflects in the sharpness and stability of your final footage.


