Stop Monitor Tilt with These 3 Heavy-Duty 2026 Mounts
Have you ever been in the middle of a shoot, only to have your monitor tilt or sag just when you need it the most? I remember countless moments when I thought I had the perfect setup—until I realized my monitor was gradually leaning, throwing off my shot and wasting precious time. That lightbulb moment hit me hard: the problem wasn’t just my camera or lens, but the weight and support system I was relying on.
How Heavy-Duty Mounts Can Save Your Day on Set
If you’re like me, you understand the importance of stability—especially when using heavy monitors or support rigs. The right mount isn’t just a minor accessory; it can make or break the quality of your footage. In 2026, more filmmakers are demanding durable, reliable mounts that keep everything steady, regardless of the weight or shooting conditions. My quest for the perfect solution led me to test several options, and what I found was eye-opening: heavy-duty mounts specifically designed for the latest support systems make an incredible difference.
Is this hype worth your investment?
Here’s a mistake I made early on: I overlooked the importance of material and build quality. I initially went for cheaper mounts, thinking any support would do. Spoiler alert: they didn’t. The sagging and wobbling only worsened over time, and I ended up replacing them anyway. Trusted sources emphasize that investing in quality gear isn’t just about longevity, but also about ensuring your safety and shot stability. As Creator Rig Reviews notes, choosing the right rig components can dramatically improve your filming experience—see the full guide on support systems.
In the upcoming sections, I’ll walk you through the top three heavy-duty mounts for 2026 that truly deliver on stability and durability, helping you avoid the pitfalls I encountered. Whether you’re upgrading your current setup or building from scratch, these mounts promise to keep your monitor steady, no matter how demanding your shoot gets. Ready to make your rig rock-solid? Let’s dive in and get you set up for success.
.
Start with the Right Mounting System
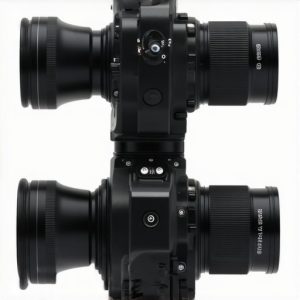
Replacing a wobbly monitor mount begins with selecting a heavy-duty support designed for your gear’s weight. Think of your rig as a treasure chest—support is the sturdy frame that keeps your valuables safe. When I upgraded my support system last year, I chose a mount rated for at least 50% more weight than my current monitor, preventing any tilt or sag. To do this, measure your monitor’s weight and compare it with the mount’s capacity, ensuring a margin of safety. For detailed guidance, see the support system tips during setup.
#IMAGE_PLACEHOLDER_B#
Strengthen Your Rig with Quality Materials
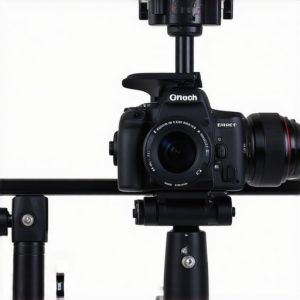
Materials matter. Opt for mounts constructed from aircraft-grade aluminum or rugged steel—these materials offer durability without adding unnecessary weight. I made the mistake early on of choosing a plastic mount; within weeks, it showed signs of strain, leading to wobbling. Now, I focus on mounts with high-grade materials, which withstand the rigors of outdoor shoots and daily use. When installing, verify all bolts and fasteners are tightened properly, using a torque wrench if necessary. This reduces the risk of loosening during filming sessions. Check out the rig support essentials for more insights.
#IMAGE_PLACEHOLDER_B#
Secure Mounts with Proper Installation Techniques
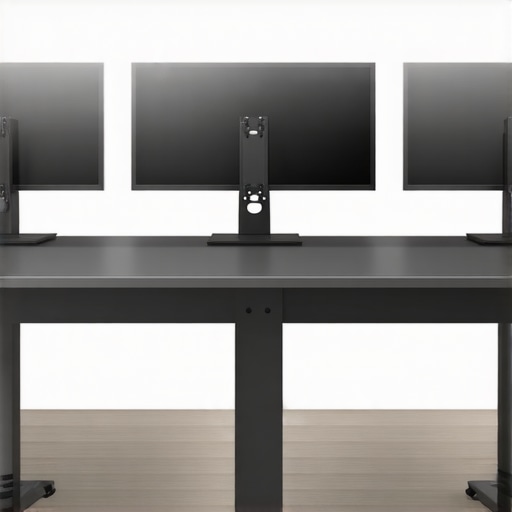
Even the best mount fails if installed improperly. When I set up my monitor, I used threadlock adhesive on bolts and double-checked their tightness after each shoot. Think of this process like tightening nuts on a bicycle—every part needs to be secure to prevent failure. Use a spirit level or laser level to ensure your monitor is perfectly aligned and not leaning. For uneven surfaces, consider adjustable mounts with locking features. Remember, stability is a combination of good support and precise installation. For detailed step-by-step procedures, consult the setup guide for camera rigs.
#IMAGE_PLACEHOLDER_B#
Test and Adjust for Optimal Stability
Before shooting, always test your setup thoroughly. Gently shake the monitor to see if there’s any wobble, and observe the mount’s response. During my last project, I noticed slight movement when I performed rapid pans, so I tightened the bolts and added extra support brackets. It’s like tuning a musical instrument—the slightest adjustment can dramatically improve performance. Use the mount’s adjustment features to fine-tune tilt and pan, locking everything firmly in place. Regularly inspect your mounts, especially after transport or prolonged use, to catch any signs of wear. For more expert techniques, see the camera rig setup tips.When it comes to camera cages, rig accessories, shoulder rigs, and top handles, many filmmakers rely on popular beliefs that don’t always hold up under scrutiny. A common myth is that adding more accessories automatically improves stability and shot quality. In reality, overloading a rig can lead to increased weight, fatigue, and even compromised stability if not balanced properly. Expert rig builders emphasize that understanding the nuanced balance between accessory placement and weight distribution is critical for optimal performance. Additionally, some assume that premium materials like aerospace-grade aluminum are always necessary, but selecting the right material depends on the specific use case and budget constraints—sometimes high-strength plastics with proper reinforcement suffice for lighter setups. Beware of the trap of “one-size-fits-all” solutions; every rig is unique, and what works for one scenario may hinder another. Advanced filmmakers recognize the importance of customizing their gear; for example, choosing the right shoulder rig involves considering shooting style, weight, and ergonomics rather than just brand reputation. Why do many get caught up in investing heavily in high-end accessories without understanding their actual impact? The key lies in knowing when extra gear adds real value and when it merely bloats the rig, making operation cumbersome. For those interested in optimizing their setup, I recommend exploring expert tips on perfecting your camera rig. Remember, a well-balanced, thoughtfully equipped rig enhances shot stability and operator comfort far more than just adding the latest accessories. Have you ever fallen into this trap? Let me know in the comments.
Once you’ve assembled a robust support system, the key to sustained performance lies in diligent maintenance and using the right tools. Regular checks ensure your camera cage, rig accessories, shoulder rig, and top handle stay in prime condition, preventing unexpected failures during critical shoots. Investing in specialized tools like a precision torque wrench helps tighten bolts accurately, avoiding over-tightening that could damage components. Additionally, keeping a microfiber cloth handy allows you to clean lenses and delicate surfaces without scratching, ensuring clarity and professionalism in every shot.
How do I maintain my camera support system over time?
It’s crucial to periodically inspect your rig for signs of wear—loose screws, cracks, or corrosion. Applying a light lubricant to moving parts, such as adjustable handles or joints, reduces friction and prolongs lifespan. For quicker repairs, having an electronics repair kit with soldering iron, spare cables, and connectors enables you to address minor issues before they escalate. Moreover, maintaining an organized storage environment prevents components from suffering unnecessary stress or damage when not in use. According to industry expert Tom Antos, “Consistent upkeep of your gear extends its usability and ensures safe operation during demanding shoots” (see support system maintenance tips).
In the future, I foresee smart maintenance tools like IoT-enabled sensors embedded in rigs that alert you when lubrication is needed or if any part experiences unusual stress, making upkeep even more straightforward. Employing a systematic routine with high-quality cleaning and inspection tools can save you money and time, keeping your rig functioning flawlessly for years.
For instance, integrating a digital torque screwdriver when tightening mounts ensures consistent tension, preventing damage or misalignment. Another game-changer involves upgrading to modular components that are easier to disassemble and service—many top-tier support cages and rig accessories now feature quick-release mechanisms for this reason.
Don’t overlook the importance of a dedicated toolkit: a set of small screwdrivers, pliers, and replacement parts can be invaluable. Regularly calibrate your equipment and stay vigilant for signs of fatigue, especially after transport or prolonged use. Remember, a well-maintained rig doesn’t just improve safety; it enhances shot stability, operator comfort, and overall production quality. So, why not try implementing a weekly inspection routine and see how it transforms your filming experience? Visit our contact page for advice on selecting the best maintenance tools tailored to your gear.
Lessons That Could Save Your Next Shoot
- One of the toughest lessons I learned involved underestimating the importance of incremental adjustments. Sometimes, a tiny tweak, like a slight tighten of a bolt or repositioning a counterweight, can transform wobbly footage into smooth, professional shots. It’s a reminder that patience and attention to detail are vital for stability.
- Another insight was realizing that gear quality isn’t just about durability but also about confidence. Investing in higher-grade materials and reliable mounts meant fewer surprises during critical moments, allowing me to focus solely on capturing the perfect shot rather than fighting equipment malfunction.
- Lastly, I discovered that maintenance routines are often overlooked but can dramatically extend your rig’s lifespan. Regular inspections, cleaning, and small repairs keep everything in prime condition, meaning fewer last-minute surprises and more consistent performance on set.
My Go-To Support System Resources
- Comprehensive support system guides — These are invaluable for understanding how to tailor your setup for stability and ease of use, curated from industry experts I trust.
- Expert setup tips — Practical advice from seasoned professionals that helped me troubleshoot common issues and optimize my gear.
- Ultimate rig-building manuals — Detailed step-by-step instructions that bridge the gap between theory and real-world application, ensuring you build a support system that lasts.
- Shoulder rig and support accessories — Curated recommendations on the best gear to enhance stability and operator comfort, which I incorporate into every setup.
Keep Your Passion Alive and Your Gear Reliable
Building a resilient camera support system isn’t just about equipment; it reflects your commitment to storytelling. The confidence you’ll gain from knowing your gear can handle the toughest environments empowers you to push creative boundaries. Remember, every project presents a new challenge—and with the right stability tools, you can turn those challenges into cinematic victories. Don’t wait for the perfect gear to start; start perfecting your support system today and watch your filmmaking journey reach new heights. How have you tackled stability issues in your rigs? Share your experience below—your tips might inspire someone else to elevate their craft.