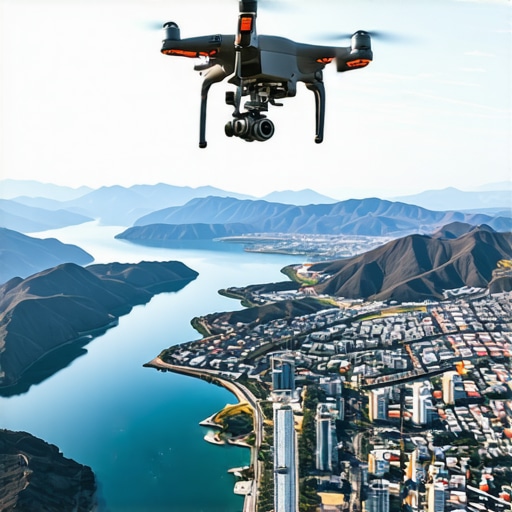
Top 10 Drone Photography Tricks to Elevate Your Shots in 2025
One afternoon, I was perched on a hillside, drone in hand, ready to capture the perfect shot of the sunset. As I lifted off, a sudden gust of wind knocked my rig off balance, causing a shaky, jittery footage that missed the magic I envisioned. That lightbulb moment hit me hard—no matter how advanced my drone was, my accessories and setup were just as crucial for crisp, stunning shots.
This experience made me realize that in 2025, drone photography isn’t just about the flying machine—it’s about mastering the whole support system. A stable, well-balanced rig can make the difference between amateurish blur and breathtaking visuals. And trust me, the landscape is getting more competitive—everyone’s vying for those TikTok or Instagram highlights.
Why Proper Rig Support Can Transform Your Drone Footage Overnight
Imagine this: your drone captures an incredible aerial vista, but then shaky footage ruins the shot. Or worse, a poorly balanced rig leads to discomfort and fatigue during extended shoots, limiting your creative reach. No wonder that many professionals now prioritize the quality of their camera rigs, accessories, and support gear to ensure stability and smooth operation. According to a recent report from Fstoppers, improper support gear remains one of the top reasons for footage distortion among drone photographers.
So, are you still relying solely on your drone’s inherent stabilization without considering your rig setup? If yes, you’re leaving a lot on the table—and risking unstable shots and missed opportunities. Let’s explore some practical tricks that will help elevate your drone photography in 2025, ensuring every shot is sharp, smooth, and truly professional-looking.
Is Overloading Your Support System Worth the Hassle?
Early on, I made the mistake of cluttering my rig with unnecessary accessories, thinking more gear meant better shots. Turns out, overloading can cause more harm than good—extra weight reduces flight time and makes handling cumbersome. Instead, focusing on critical, well-chosen accessories, like a sturdy camera cage or a reliable shoulder rig, can significantly improve stability. Want to learn which support gear is essential for drone photographers? Check out this guide on essential accessories designed for optimal support.
Ready to upgrade your rig support system and prevent common pitfalls? Stay tuned—next, we’ll dive into the top tricks that will help you achieve cinematic-quality shots effortlessly. And if you’re unsure which accessories best fit your style, don’t hesitate to reach out—I’m here to help!
,
Step Up Your Support System with the Right Equipment
Begin by selecting a sturdy camera cage that fits your drone’s payload. Think of the cage as the backbone—it stabilizes your camera and offers multiple attachment points for accessories. For example, I once swapped out a flimsy cage for a top-of-the-line model, which immediately reduced vibration and enhanced image clarity. Visit this guide to understand the best options.
Secure Your Top Handle Properly
Attach a top handle to your cage using the mounting points, ensuring it’s tight and balanced. This handle provides a natural angle for gripping and allows for smooth maneuvers. During my shoot last summer, I realized my handle was slightly loose—causing jerky movements. Tighten every screw and test the grip with quick shakes. For versatility, choose handles with multiple attachment points, as recommended here.
Add Essential Support Accessories
Gear like shoulder rigs or counterweights can dramatically improve stability. Imagine balancing a broomstick on your fingertip—adding counterweights is like shifting your palm to keep the stick level. I once used a lightweight shoulder rig during a windy outdoor shoot, which kept my camera steady and reduced fatigue. To customize your setup, explore this resource.
Optimize Your Configuration for Better Shots
Arrange your accessories logically, placing heavier items lower to maintain center of gravity. Adjust your grip ergonomically, so your hands naturally support the rig without strain. I spent time fine-tuning my rig height and handle placement—this eliminated shaky footage and enabled me to capture smooth, cinematic aerials. For detailed setup techniques, review this tutorial.
Test and Tweak Before Each Flight
Always perform a quick shake test to check rigidity and comfort. Loosened screws or poorly balanced components can compromise footage. Once, I overlooked a loose support arm, and midway through my shot, I experienced a wobble that blurred my footage. After tightening everything, I achieved the steady shots I envisioned. Regular maintenance and adjustments are key to consistent results. Learn more about maintenance at this guide.
Many enthusiasts believe that assembling a camera rig is simply about stacking the heaviest parts for stability, but in reality, this is a misconception that can hinder your filmmaking. One common myth is that more accessories automatically equate to better shots, but overloading your support system not only adds unnecessary weight, reducing flight time and maneuverability, but also introduces instability. Instead, focus on selecting purpose-built components that complement each other for optimal balance and ease of handling. For example, using a well-designed camera cage with a sturdy top handle and minimal but high-quality support accessories can dramatically enhance your shot quality, especially in complex environments.
Another nuance often overlooked is the importance of proper configuration rather than just equipment quality. Improper placement of support accessories can shift your center of gravity, making your setup top-heavy and difficult to control, which often leads to shaky footage. The key lies in strategic arrangement—placing heavier components lower and closer to the rig’s core ensures stability, enabling smoother camera movements. For advanced users, integrating quick-release mechanisms can also save time during setup and adjustments, ensuring your gear remains precisely calibrated before each shot.
But even seasoned filmmakers fall into the trap of neglecting regular maintenance and testing of their support gear. Loosened screws or misaligned components might seem trivial but can cause significant instability during critical moments. A simple but often ignored step is performing a thorough shake test to confirm rigidity and balance after every rig configuration change. This proactive approach prevents costly mistakes mid-shoot and guarantees your footage remains crisp and professional.
For those pushing the boundaries of their craft, understanding the subtle interplay of rig components is crucial. Balancing your camera cage, shoulder rig, and accessories isn’t just about equipment choice—it’s about mastering the physics of your setup to maximize stability and control. Advanced filmmakers frequently customize their support systems, experimenting with counterweights, damping mounts, and ergonomic adjustments. Such meticulous fine-tuning can be the difference between ordinary footage and cinematic excellence.
Curious about the latest innovations in camera cages or how to optimize your support system for maximal steadiness? Check out this comprehensive guide on advanced rig configurations. Remember, the devil is in the details—neglecting these nuances can lead to subpar footage and missed creative opportunities. Have you ever fallen into this trap? Let me know in the comments.Maintaining your camera rig and accessories is crucial to ensuring consistent, professional-quality footage. Investing in the right tools and developing a regular upkeep routine can greatly extend the lifespan of your equipment and keep your setup performing at its peak. A well-maintained rig not only prevents unexpected failures during shoots but also improves stability and handling, making your filming sessions smoother and more predictable.
One of my go-to tools is a precision screwdriver set. I personally use the Wiha Precision Screwdriver Set, which offers the right torque without stripping delicate screws found in camera cages and support accessories. Regularly tightening screws and verifying that all mounts remain secure prevent wobble-induced footage artifacts. For cleaning, a compressed air canister, like the Dust-off compressed air, is invaluable for removing dirt and debris from hard-to-reach areas, especially around mounting points and adjustment knobs.
To ensure ongoing performance, I recommend developing a maintenance checklist tailored to your gear. This includes inspecting support arms, counterweights, and quick-release clamps for signs of wear or corrosion. Lubricating moving parts with a dry silicone spray helps keep mechanisms smooth, especially in varying temperature environments. For example, I’ve found that applying a small amount of lubricant to the sliding components of shoulder rigs avoids jerky movements over time.
Keeping detailed records of your maintenance schedule and issues can also help you identify recurring problems or weak points. If you notice screws loosening frequently, consider upgrading to locking versions or using thread-locking adhesive like Loctite, which is specifically designed for many camera support components. Regular calibration of accessories like top handles or counterweights with precision tools ensures stability, especially before major shoots.
In the future, I believe smart maintenance will integrate with IoT-enabled support gear, alerting you when components need servicing, much like how modern drones monitor battery health. Until then, establishing a routine with reliable tools remains your best bet. For comprehensive guides on camera rig maintenance, check out this detailed resource and consider trying out a multi-task toolkit to make ongoing upkeep easier. Want to streamline your maintenance routine? Start by integrating a quality set of precision screwdrivers into your toolkit today.
Remember, Focus is Sometimes the Hidden Support
One revelation I had was that paying close attention to even minor details like screw tightness or balance can drastically improve shot stability. It’s the small adjustments—like ensuring your support arm doesn’t wobble—that often separate amateur footage from professional-grade visuals. Recognizing this kept me vigilant and constantly refining my setup for dependable performance every time I shoot.
Which Support Tricks Will Elevate Your Filmmaking Game?
From adding counterweights to ergonomic handle placement, adapting your support gear can unlock smoother motion and reduce fatigue. Experimenting with quick-release systems not only saves time but ensures consistent setups. These nuanced tweaks are what give you that cinematic edge—so don’t overlook the potential of meticulously customizing your rig for optimal results.
My Go-To Resources for Camera Rig Mastery
- Essential Shoulder Rigs for 2025: This comprehensive guide has transformed the way I approach support gear, emphasizing modularity and comfort.
- Top Camera Cages That Improve Stability: Their design innovations help reduce vibrations, enhancing image clarity—an absolute must-have for crisp shots.
- Expert Tips on Rig Accessories: Regularly updated, this resource offers insights into balancing weight and accessibility for various filming scenarios.
- Support Systems Navigation: The page provides step-by-step advice on building your support system, tailored to your unique shooting style.
Take Action to Elevate Your Filmmaking Today
Investing time and thought into your camera support system isn’t just about equipment—it’s about empowering your creative vision and telling stories with clarity and stability. Every upgrade or tweak you make today is an investment in movies you’ll be proud of tomorrow. Are you ready to refine your support setup and unlock new levels of cinematic excellence? Share your experiences or questions below; I’m eager to hear about your journey toward support mastery.