Build Your Perfect Camera Cage & Rig Setup: Best Accessories & Tips for 2025
I remember the first time I tried to build my own camera rig. I was excited but quickly overwhelmed. The endless options, the confusing jargon, and the nagging fear that I’d spend hundreds of dollars on gear that wouldn’t deliver the stability I craved. It felt like I was assembling a Frankenstein monster, not a professional setup. It wasn’t until I made a crucial mistake—purchasing cheap, incompatible accessories—that I realized how much I was risking the quality of my shots. That lesson was a game-changer.
Why Getting Your Camera Rig Right Matters More Than Ever
In 2025, the demand for high-quality video content is sky-high. Whether you’re a seasoned filmmaker or an aspiring creator, your equipment’s stability and flexibility can make or break your project. A well-built rig doesn’t just improve image stability; it also boosts your confidence behind the camera, allowing you to focus on your shot instead of fighting with your gear. But with so many accessories and options out there, where do you even start? That’s what I’ll help you with today—cutting through the noise and finding the best setup tailored for your needs.
Have You Faced the Frustration of a Wobbly Shot?
If you’ve ever had to redo a shot because your rig wobbled or your camera slipped, you’re not alone. I’ve been there. Early on, I overlooked the importance of sturdy support systems and ended up with shaky footage that was unusable. Trust me, investing in quality support accessories, like a top-tier shoulder rig or the right support system, can save you hours of post-production work. For a comprehensive guide on how to optimize your setup, check out this expert advice.
So, if you’re tired of unstable shots and want to elevate your filmmaking game, stick around. We’ll explore the key accessories and tips that will help you build a reliable, flexible, and professional-grade camera rig—without breaking the bank. Ready to transform your shooting experience? Let’s dive in!
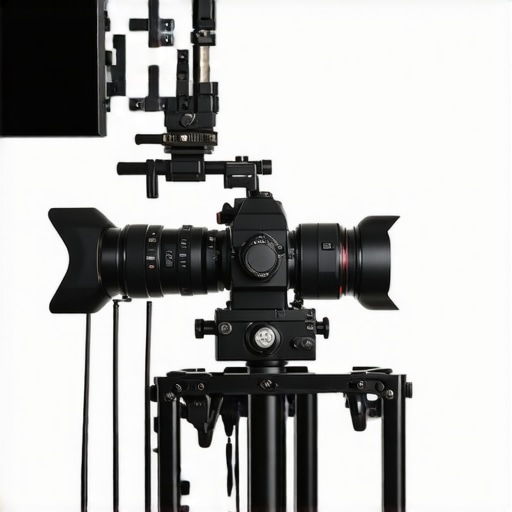
Secure Your Support System First
Start by selecting a sturdy support system, such as a professional-grade shoulder rig or a versatile support cage. When I built my first rig, I initially chose a cheap handle that wobbled under pressure. After upgrading to a high-quality shoulder rig from this guide, my shots instantly became more stable and confident.
Choose the Right Support Accessories
Invest in top handle grips, quick-release plates, and counterweights that match your camera’s weight. Think of your support system as the spine of your setup—without a solid backbone, your footage will suffer. For example, I added a top handle from this collection, which allowed me to switch between handheld and tripod shots seamlessly.
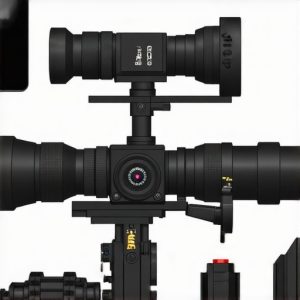
Optimize Your Camera Cage for Flexibility
The next step is customizing your camera cage with essential accessories. I recommend starting with a modular cage that offers multiple mounting points. I once struggled with balancing my camera and accessories until I installed a quick-release plate and a matte box, which improved my workflow significantly. Check out this resource for detailed ideas.
Focus on Key Attachments
Attach follow focus systems, external monitors, and microphone mounts strategically. Remember, the goal is to make your rig adaptable without adding unnecessary weight. I learned this the hard way when I overloaded my rig with too many accessories, leading to shaky shots. Prioritize what enhances your shot quality and comfort.
Enhance Stability with the Best Accessories
Stability is everything. Use counterweights, grip stabilizers, and vibration dampers. I once used a cheap tripod that caused jittery footage; upgrading to a fluid head from this list transformed my results. Remember, accessories like rubberized mounts absorb shocks that can ruin a shot.
Refine Your Setup with Expert Tips
Regularly revisit your configuration, adjusting for different scenarios. I once spent a day tweaking my rig for a low-angle shot, adding a flexible arm and a lightweight support grip. These small adjustments made a big difference. For more advanced techniques, explore this guide.
Finally, test your entire setup in real shooting conditions. Record test footage, review for stability, and iterate. Building the perfect rig is an ongoing process, but with these steps, you’ll be well on your way to professional-quality shots in 2025.
Many filmmakers and content creators believe that assembling a camera rig is simply about stacking the right gear together. However, this misconception can lead to overlooked nuances that significantly impact your shot quality. One of the most persistent myths is that heavier rigs automatically translate to better stability. In reality, overloading your setup with unnecessary accessories can compromise balance and increase fatigue, leading to shaky footage. Instead, focusing on weight distribution and choosing lightweight, high-quality components can dramatically improve your results.
Another frequent mistake is neglecting the importance of compatibility between accessories. It’s tempting to buy popular or flashy gear without checking if it fits your camera or support system. This oversight often results in loose fittings or the need for adapters, which can introduce unwanted vibrations or instability. Always double-check specifications and opt for modular systems designed to work seamlessly together. For instance, a well-chosen rig accessory can make your setup more adaptable and secure, saving you headaches during shoots.
Why do some rigs feel unstable even with premium gear?
This is a question I see a lot among advanced users. The answer often lies in improper weight distribution and lacking fine-tuning. Even the best support system won’t perform optimally if your camera isn’t balanced correctly. Small adjustments, such as repositioning counterweights or tightening support straps, can make a substantial difference. Consulting detailed guides like this expert advice can help you master these subtleties and elevate your filming quality.
Furthermore, many get caught in the trap of over-customization—adding too many accessories without considering their actual benefit. This leads to cluttered rigs that are cumbersome and difficult to handle. Prioritize essential components that improve stability and ease of use, and only add accessories that serve a specific purpose. For example, a lightweight follow focus or an external monitor can significantly enhance your control and framing, whereas redundant mounts can hinder mobility.
In summary, the key to building an effective camera rig isn’t just about acquiring the latest gear but understanding the nuances of balance, compatibility, and purposeful customization. By avoiding these common pitfalls, you’ll be able to create a setup that’s both efficient and reliable—perfect for capturing those professional-grade shots. Have you ever fallen into this trap? Let me know in the comments, and share your experiences or questions!
Maintaining your camera rig over time is crucial to ensure consistent performance and to extend the lifespan of your investment. One of my go-to strategies is regularly cleaning and lubricating moving parts like support joints, quick-release mechanisms, and gimbals. I personally use a high-quality silicone-based lubricant from WD-40 for smooth operation, which prevents corrosion and minimizes wear. Additionally, replacing worn-out rubber mounts and vibration dampers annually helps maintain stability and reduces unwanted noise during shoots.
Investing in durable storage solutions such as soft cases with foam padding or weather-resistant hard cases is equally important. Proper storage prevents accidental damage, dust accumulation, and corrosion. I prefer cases with custom foam inserts tailored to my setup, which makes transport safer and setup quicker on location.
Tools like precision screwdrivers, Allen wrenches, and anti-static brushes are invaluable for routine maintenance. I keep a dedicated maintenance kit with these essentials, making it easy to tighten loose screws or clean electronic contacts. Regular inspection of cables and connectors also avoids sudden malfunctions during critical shoots. For instance, I check my HDMI and power cables for fraying or corrosion before every major project.
Software updates are often overlooked but equally important. Firmware updates for support systems like motorized sliders or gimbals can improve stability algorithms and add new features. I set a quarterly reminder to check the manufacturer’s site for updates, ensuring my equipment benefits from the latest improvements and security patches.
Looking ahead, I believe the trend towards modular, easily serviceable rigs will continue to grow. Manufacturers are now designing components that can be swapped out or upgraded without professional tools, making maintenance more straightforward for creators at every level. Embracing these innovations, along with routine care, will help your setup perform reliably over years of demanding shoots.
How do I maintain my camera rig over time? The key lies in consistent cleaning, timely replacement of worn parts, and staying updated with firmware. It’s a proactive approach that prevents minor issues from becoming costly repairs or project delays. For detailed advice on supporting your rig’s longevity, I recommend exploring this expert guide.
Finally, don’t forget to test your entire setup regularly by recording test footage and reviewing it critically. This habit helps you catch stability issues early and provides an opportunity to fine-tune your support system. Remember, a well-maintained rig not only saves money but also boosts your confidence behind the camera. So, make maintenance a routine part of your filmmaking process and enjoy smooth, professional results every time.
The Hardest Lesson I Learned About Camera Rig Mastery
One of my biggest lightbulb moments came when I realized that overloading my rig with accessories was actually a step backward. The more I added without considering weight distribution, the more shaky my footage became. It taught me that simplicity and strategic placement of equipment trump sheer quantity. This lesson forced me to prioritize quality over quantity, and to always test my rig in real conditions before any shoot.
My Top Picks for Elevating Your Filmmaking Setup
After years of trial and error, I trust this guide on shoulder rigs for durability and smooth operation, innovative camera cages that offer flexibility, and accessories for seamless production that save time and effort. These resources have transformed my workflow and can do the same for you.
Take Action and Elevate Your Filmmaking
Building a reliable camera rig isn’t just about gear; it’s about understanding your needs and continuously refining your setup. Don’t be afraid to experiment, learn from each shoot, and stay curious. Your next level of filmmaking begins with the right support and a commitment to mastery. Ready to start? Your perfect camera rig awaits—dive in and make it your own!

Reading through this post really resonated with my early experiences in building a camera rig. I can’t count how many times I bought cheap accessories only to realize later they didn’t fit well or caused instability during shoots. It’s a lesson in patience and prioritizing quality over quantity. One specific tip I found useful was investing in a good support cage from the start—especially one with multiple mounting points. It made adding accessories much easier and kept everything more balanced. What’s interesting is how small adjustments, like repositioning counterweights or tightening support straps, have a big impact on shot stability. Has anyone experimented with lightweight materials for support systems? I’d love to hear how that worked for you and what setups you’ve found most reliable for different filming scenarios.