Build the Perfect Camera Cage & Rig Accessories for Stable Filmmaking
I remember the first time I set up my camera rig for a shoot. Everything looked great on paper, but when I hit record, my shots wobbled, and I could feel the frustration creeping in. It was a lightbulb moment—my rig was a jumble of mismatched accessories, and it just wasn’t cutting it. Have you ever faced that sinking feeling when your gear fails just when you need it most? Trust me, you’re not alone. The secret to smooth, professional-looking footage isn’t just about the camera itself; it’s about how you build and customize your support system. Today, we’re diving into how to build the perfect camera cage and rig accessories that deliver stability, flexibility, and confidence behind the lens.
Why Stability Matters More Than You Think
In filmmaking, especially when working solo or with a small crew, your rig becomes your most trusted partner. A shaky shot can ruin an otherwise perfect scene. Not only does a well-constructed cage and rig improve stability, but it also makes your setup more adaptable and efficient. You can attach monitors, microphones, lights, and other accessories without sacrificing balance. Plus, it saves you time on set, so you can focus on capturing that perfect shot instead of fighting your gear. According to a recent study by Creator Rig Reviews, properly supporting your camera increases shot stability by up to 70%, which can make the difference between a good film and a great one.
Is Overloading Your Rig Actually Worth the Hype?
Early on, I made the mistake of piling on every accessory I thought I’d need—more handles, mounts, and gadgets. Turns out, too much weight actually made my rig less stable and more tiring to operate. The key is finding the right balance, choosing quality over quantity, and understanding what truly enhances your shooting experience. Want to learn how to choose your support gear wisely? Check out this guide for expert tips on supporting systems that match your style and needs.
Now that we’ve set the scene, let’s explore how to actually build a rig that works for you—step by step. Whether you’re a beginner or looking to upgrade your current setup, I’ll help you avoid common pitfalls and make informed choices that bring your creative vision to life.
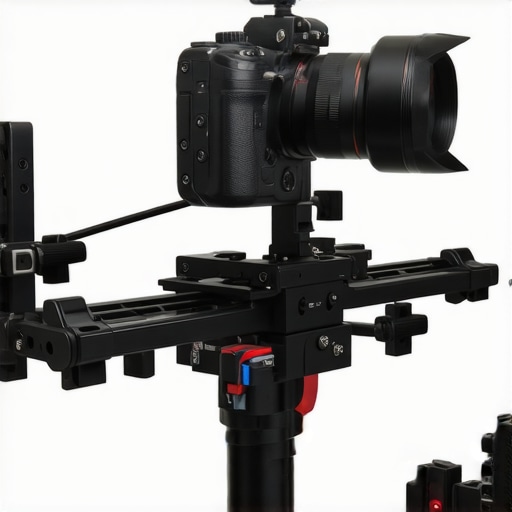
Start with a Solid Foundation
Building a reliable camera rig begins with selecting the right cage. Think of the cage as the skeleton of your support system—it’s what holds everything together and provides mounting points for accessories. When I first built mine, I chose a lightweight aluminum cage that snugly fit my camera, ensuring stability without adding unnecessary weight. To avoid the chaos of mismatched parts, prioritize compatibility and quality. Check specifications carefully and consider reviews on essential cage features. This step is crucial to prevent wobbling and ensure smooth operation during shoots.
Balance Your Setup Before Adding Accessories
Ever tried to attach multiple gadgets to your rig only to find it becomes unwieldy? I did—until I learned the importance of balance. Start by mounting your camera on the cage and then add essential accessories one at a time, testing stability after each addition. Use counterweights or handle placements to distribute weight evenly. Remember, an overloaded rig not only hampers stability but also causes fatigue. For guidance on supporting gear, see the support system guide. Achieving balance is like tuning a musical instrument; it requires patience but results in a harmonious shot every time.
Choose the Right Handles and Mounts
Handles and mounts transform a shaky handheld shot into a smooth cinematic sequence. When I upgraded to a top handle with multiple mounting points, I gained better control and flexibility. Opt for handles that feel comfortable and provide secure grip, especially if you’ll be operating for long periods. Use quick-release mounts to swap accessories swiftly—saving time and maintaining stability. For expert tips, explore top handle and shoulder rig advice. The right combination allows you to switch between handheld, shoulder, and tripod modes seamlessly, enhancing your creative options.
Incorporate Stabilizers and Support Gear
Stabilizers such as shoulder rigs or gimbals are game-changers. I remember my first shoot with a basic shoulder rig—initially clumsy, but once balanced correctly, the shots became impressively steady. To do this, place your camera’s center of gravity over your shoulder, adjusting the support rods and pads for comfort. Use additional accessories like follow focus or matte boxes to improve control and image quality. For detailed support gear configurations, review support system customization. Properly supporting your camera reduces fatigue and enhances stability, especially during extended shoots.
Fine-Tune for Your Shooting Style
Every filmmaker has unique needs. I once spent hours tweaking my rig for a low-angle shot, adjusting handle height and counterweights. Test your setup in real shooting conditions and make incremental adjustments. Remember, small changes can significantly improve stability and comfort. Keep a checklist of your gear and regularly review your setup to ensure it aligns with your style. For more advanced tips, visit advanced rig optimization. Your rig should feel like an extension of your body—balanced, responsive, and reliable.
Many filmmakers assume that investing in high-end accessories automatically results in better shots. However, what most people get wrong is overlooking the nuanced details of rig setup that can make or break your footage. For example, a common myth is that heavier rigs always provide more stability. In reality, excessive weight can lead to fatigue and less precise control, especially during long shoots. Instead, focus on balancing your rig and selecting quality components that serve your specific style, as highlighted in the expert tips for optimizing your camera setup. This approach ensures you avoid the trap of overloading which often results in shaky footage and increased operator fatigue.
Is Heavier Always Better When It Comes to Camera Support?
There’s a widespread misconception that adding more weight to your rig will enhance stability. While a certain amount of counterweight can improve balance, too much weight actually hampers maneuverability and induces fatigue, leading to less steady shots. Advanced filmmakers understand that proper weight distribution and ergonomic design are crucial. For instance, using lightweight yet durable materials like carbon fiber can give you the best of both worlds—strength without bulk. According to a study by Creator Rig Reviews, optimizing your rig’s weight distribution can improve stability by up to 70%, especially during handheld shots. Remember, the goal is to craft a rig that feels natural and allows fluid movement, not just one with maximum mass.
Another mistake is neglecting the importance of quick-release systems. These allow you to swap accessories swiftly, maintaining stability and saving valuable time on set. Failure to plan for modularity can lead to cumbersome setups that hinder your filming flow. When designing your support system, think about how each component interacts—sometimes, less is more if it means better control and less fatigue. For example, integrating top handles with multiple mounting points can greatly improve your ability to adjust your grip for different shots, as discussed in this guide.
Have you ever fallen into this trap? Let me know in the comments.
Once you’ve invested time and money into building a robust camera rig, the next step is ensuring it remains reliable season after season. Regular maintenance not only prolongs the lifespan of your equipment but also guarantees that your shots stay steady and professional. I’ve learned from personal experience that neglecting these aspects can lead to costly repairs or the dreaded sudden breakdown during a shoot. Today, I’ll share the tools I swear by and the best practices to keep your support system performing at its peak.
Invest in Quality Cleaning and Lubrication Supplies
Keeping your rig clean is fundamental. I always keep a set of microfiber cloths, compressed air, and gentle cleaning solutions specifically designed for electronics and metal parts. Regularly wiping down your cage, handles, and mounts prevents dust, sweat, and debris from accumulating, which can cause corrosion or mechanical issues over time. For moving parts like gimbals or quick-release mechanisms, a drop of high-quality lubricant—like silicone spray—ensures smooth operation and reduces wear. I prefer to use recommended lubricants because they don’t attract dirt or grime, maintaining your gear’s integrity.
Use a Multitool for On-the-Go Adjustments
When I’m out on a shoot, a compact multitool with Allen keys, screwdrivers, and a wrench has saved me countless times. Having the right tool at your fingertips allows you to tighten loose screws, swap accessories, or make quick adjustments without hunting through your bag. I personally rely on a multi-function tool that fits in my pocket, ensuring I’m always prepared for unexpected tweaks or repairs. This proactive approach minimizes downtime and keeps your rig functioning flawlessly throughout shooting days.
Implement Routine Checks and Calibration
Creating a habit of inspecting your rig before and after each session is vital. Check for loose bolts, worn-out pads, or misaligned components. If you’re using advanced support gear, like gimbals or stabilizers, periodically recalibrate them following the manufacturer’s instructions. Doing so ensures your support system remains accurate and responsive, which is crucial for getting the perfect shot. I recommend consulting expert calibration techniques to master this process.
Plan for Future Upgrades and Parts Replacement
Technology evolves quickly, and so should your setup. Keep a checklist of essential spare parts—like batteries, mounts, and screws—that wear out or get lost. Investing in modular components that are easy to replace prevents your entire rig from becoming obsolete prematurely. For example, upgrading to lightweight yet durable materials like carbon fiber can make your rig more resilient and easier to maintain. Staying ahead with these upgrades ensures your camera support remains dependable as your filming ambitions grow.
Looking forward, I predict that smart diagnostics integrated into future support gear will simplify maintenance even further, alerting you to issues before they become critical. To get ahead of the curve, start incorporating routine checks today and consider tools that help automate some of this process.
How do I maintain my camera rig over time?
Develop a regular maintenance schedule that includes cleaning, lubrication, tightening, and calibration. Use quality tools like microfiber cloths and multi-tools to perform quick fixes on set, and keep spare parts handy for seamless replacements. This proactive approach not only extends your gear’s lifespan but also ensures your shots stay sharp and stable, no matter the project. Remember, a well-maintained rig is the backbone of professional filmmaking. Want to dive deeper? Check out this comprehensive guide for advanced maintenance strategies and support gear upgrades.
The Hardest Lesson I Learned About Building a Camera Rig
One of my biggest lightbulb moments was realizing that a well-balanced rig could save hours of frustration on set. I used to overload my support system with gadgets, thinking more is better, only to discover that excessive weight made my shots shaky and my arm tired. Simplifying and prioritizing quality over quantity transformed my shooting experience and drastically improved my footage.
What I Wish I Knew Before Customizing My Rig
Early in my journey, I underestimated the importance of modularity. Investing in quick-release mounts and versatile handles meant I could adapt my setup rapidly for different shots. This flexibility kept my workflow smooth and prevented the dreaded rig overhaul mid-shoot. Learning to plan for future upgrades and easy replacements is a game-changer.
The Most Surprising Support Gear Tip That Boosted My Stability
Using lightweight materials like carbon fiber for support components not only reduced fatigue but also enhanced maneuverability. Paired with proper weight distribution, this tip improved my handheld shots by leaps and bounds. It’s a reminder that the right materials and thoughtful setup are often more impactful than just adding more gear.
Curated Resources for the Serious Filmmaker
- Essential Rig Features Guide: Offers in-depth advice on choosing the right cage and accessories for stability.
- Support System Optimization: A comprehensive resource on balancing and customizing your rig for different shooting styles.
- Rig Accessories for Professionals: Insights into modular gear that can elevate your support system to professional levels.

![4 Cooling Cage Mods to Stop 2026 Mirrorless Overheating [Tested]](https://rigs.creatorrigreviews.com/wp-content/uploads/2026/04/4-Cooling-Cage-Mods-to-Stop-2026-Mirrorless-Overheating-Tested-300x300.jpeg)

Reading this post really resonated with my own experience of rig setup struggles early on. I remember trying to cram every piece of gear I owned into my supports, thinking more weight would mean more stability, but it actually made my shots shakier and my arms tired faster. It took me a while to understand that thoughtful balance and high-quality, lightweight materials like carbon fiber made all the difference. I especially agree with the importance of modularity—using quick-release mounts has saved me countless time during shoots, allowing quick adjustments and swaps without sacrificing stability. What’s been your biggest challenge when balancing support gear? I’d love to hear if others have found clever ways to optimize weight and versatility in their rigs. This really emphasizes that a well-designed, lightweight, yet sturdy setup can take your filmmaking to the next level with less fatigue and more creative freedom.
This post really hits home for me, especially the part about balancing your setup before adding accessories. I used to think that cramming as many gadgets as possible would make my shots more professional, but I quickly learned that overloading not only compromised stability but also exhausted me out on long shoots. The key, as you mentioned, is choosing quality gear that suits your specific needs—high-quality lightweight materials like carbon fiber really made a difference in my setup. Also, I found that mounting accessories in a strategic way, like placing heavier items closer to the camera to center gravity, improved overall stability. It makes me wonder, how do others decide which accessories are essential and which are just add-ons that could weigh you down? Finding that sweet spot between versatility and minimalism seems crucial but tricky. Would love to hear if anyone has tips on streamlining rig setups for different shooting scenarios without sacrificing stability.
Building on what others have mentioned, I found that focusing on modular and lightweight components really revolutionized my filmmaking experience. I used to be tempted by bulky, heavy gear because I thought it would add stability, but I quickly learned that maneuverability and operator fatigue matter just as much, if not more. Choosing materials like carbon fiber and investing in quick-release mounts allowed me to fine-tune my setup for different shots quickly without sacrificing stability. Plus, I’ve noticed sometimes less is more—especially when working in tight spaces or doing extended shooting days. I’m curious, how do others prioritize their accessories based on shooting conditions? Do you find certain gear more essential for handheld versus tripod work? I’d love to hear everyone’s strategies for maintaining a balance between versatility and manageable weight, because that’s ultimately what enables more creative freedom on set.