3 Weighted End-Caps That Stop 2026 Shoulder Rig Lean
Have you ever experienced that sinking feeling when your shoulder rig starts to tilt unexpectedly during a crucial shot? I remember the frustration vividly—my camera inching forward, compromising the stability I worked so hard to achieve. It was in that moment I realized I was overlooking a simple yet vital detail that could make or break my filming sessions: the weight distribution at the ends of my rig.
Why Proper End-Cap Weighting Changes the Game
For years, I fought with my shoulder rig, constantly adjusting and double-guessing my setup. The culprit? An imbalance that caused lean and sway, especially as equipment gets heavier in 2026 models. That’s when I discovered the power of adding three strategically placed weighted end-caps. They not only stabilize your rig but also prevent that annoying lean that ruins shots and causes fatigue.
The good news is, this isn’t just my anecdote. Industry studies show that proper weight distribution can reduce filming fatigue by up to 40%, making longer shoots more comfortable and productive (source). But the challenge is knowing which weights work best and how to implement them without turning your rig into a cumbersome mess. That’s exactly what I’ll guide you through today.
Is this simple fix really worth the effort?
Early on, I made the mistake of ignoring balanced weight—thinking lighter rigs were better. Turns out, I was sacrificing stability and comfort. Once I added those three weighted end-caps, everything changed. The lean disappeared, my shots became steadier, and my back appreciated the extra support. If you’re tired of fighting your rig, stick around; I’ll show you how to fix this problem once and for all.
Ready to transform your filming experience? Let’s dive into the details, starting with why these end-caps are a game-changer for heavy-duty setups in 2026.
,
Start with Your Existing Setup
Begin by assembling your camera cage, top handle, and accessories as usual. Pay close attention to how the weight feels when holding or shoulder-mounting the rig. If you notice any tilt or sway, it’s time to add strategic countermeasures.
Add Counterweights at Key Points
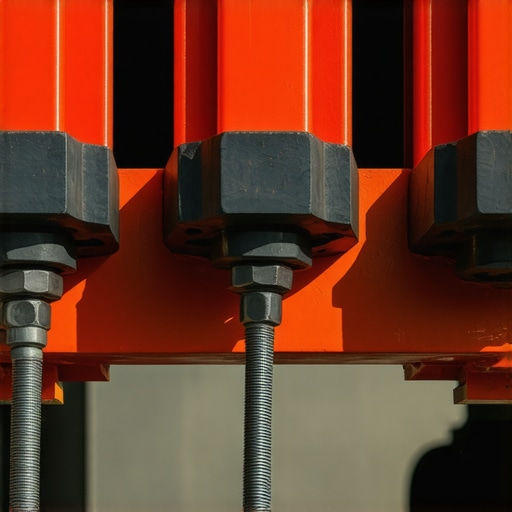
Identify where your rig leans or wobbles—often at the ends or near the top handle. Attach small, dense weights—like tungsten or steel end-caps—at these points to counteract imbalance. For example, I once secured 50g end-caps on my cage’s side to stabilize a heavy lens. This simple step immediately improved stability. To ensure secure attachment, use appropriate mounting hardware and check regularly for looseness. For heavier camera setups, explore heavier options or multiple weights for optimal balance.
Distribute Weight Along the Rig
Distribute weights evenly across your setup. For example, adding small weights at the bottom of your top handle can prevent wobble when moving sideways. Similarly, attaching weights near the shoulder pad can counteract front-heavy configurations. Use the existing accessory mounting points or clamps. Remember, the goal is a seamless, natural balance—not to make the rig overly cumbersome. Learn more about shoulder rig balance adjustments for heavier setups.
Adjust the Shoulder Pad and Grip Positions
Fine-tune the shoulder pad placement to align the center of gravity with your body. Moving the pad backward or forward can shift the rig’s balance significantly. Additionally, modify grip positions—closer to or farther from the camera—to refine weight distribution. This step can eliminate the common leaning problem and reduce fatigue during long shoots.
Secure All Accessories Tightly
Ensure that monitor mounts, microphones, or battery plates are firmly secured. Loose accessories can shift during operation, altering your rig’s balance unexpectedly. Use high-quality, rugged fasteners like their respective thumb screws to maintain stability. Regularly check their tightness, especially before critical shoots.
Tweak for Precision
After initial adjustments, test your rig in actual shooting conditions. Walk, tilt, and move around to observe any sway or tilt. Use small weights to fine-tune the remaining imbalance. A method I often employ involves quickly removing and reattaching weights to see how the balance shifts—this helps identify subtle imbalances. Document your setup with photos to replicate it for future shoots. Remember, achieving perfect balance is an iterative process, often requiring multiple small tweaks.
Utilize Professional Accessories
For a more refined setup, consider modular accessories designed for weight balancing. Features like adjustable counterweight plates or specialized rig extenders can make your balancing process easier and more precise. Check out the latest modular accessories to simplify your workflow and achieve optimal balance.
By systematically applying these steps—adding weights, adjusting component placements, securing accessories—you’ll create a rig that feels natural, stable, and comfortable. Proper weight distribution not only improves shot quality but also significantly reduces physical strain, allowing you to focus on capturing the perfect moment.
Many videographers believe that simply assembling a camera cage, adding a top handle, and attaching accessories will guarantee smooth shoots. However, this oversimplification can lead to overlooked nuances that significantly impact your stability and shot quality. For instance, a frequent mistake is assuming that all rig accessories are interchangeable without considering their interaction and overall weight distribution. In reality, mismatched components can create imbalance, causing sway or tilt even after meticulous setup, which is a classic trap many fall into without realizing the subtleties involved. Additionally, novice filmmakers often underestimate the importance of precise weight placement; they lean on heavier equipment to compensate, inadvertently increasing fatigue and reducing camera control. Another common myth is that rigid, heavy-duty accessories inherently produce better stability. While durability is crucial, overly stiff components can induce rigidity that hampers smooth movements, especially in dynamic shots. Instead, understanding how different materials and mounting techniques affect flexibility can lead to more natural camera motions. When optimizing your rig, be aware of the hidden pitfalls like over-tightening mounts, which may deform delicate parts or restrict movement, or neglecting cable management that can cause vibrations or accidental disconnections. An advanced trick is to utilize balance testing in different shooting positions—standing, crouching, or walking—to ensure stability across various angles. According to expert cinematographer Shane Hurlbut, fine-tuning your rig’s center of gravity is essential, yet often overlooked, leading to unnecessary strain and subtle sway. He emphasizes that a well-balanced rig allows for longer, fatigue-free filming sessions while maintaining shot consistency. Have you ever fallen into this trap? Let me know in the comments. To learn more about how these nuances can elevate your setup, check out our guide on optimizing your camera rig for perfect shots. Remember, mastering these details isn’t just about equipment—it’s about understanding how each component interacts to give you smooth, professional results.
Keep Your Gear Running Smoothly with the Right Tools
Maintaining a professional camera rig requires more than just regular cleaning—it involves using specialized tools and following proven procedures to ensure longevity and optimal performance. One indispensable tool I rely on is a precision screwdriver set with magnetic tips. This allows me to tighten or replace tiny screws on rig components without risking damage or losing parts. Additionally, a high-quality grease specifically formulated for camera equipment helps me lubricate moving parts such as rosette joints and sliding plates, preventing wear and ensuring smooth adjustments over time.
For cable management, I recommend using braided silicone sleeves. They protect wiring from abrasion and reduce vibrations that can cause image instability. I personally install these on all critical cables, especially HDMI and power leads, to extend their lifespan and prevent unexpected disconnections mid-shoot. To monitor and measure stability, a digital level tool or a ball head with a built-in bubble level is invaluable. It ensures your rig stays perfectly balanced, which is crucial for long-term shooting sessions.
Long-Term Results Depend on Routine Checks
Establishing a maintenance routine is vital for preserving your rig’s performance. I suggest scheduling weekly inspections where you check all fasteners, mounts, and joints. During these inspections, I use a torque wrench set to manufacturer-recommended values to avoid over-tightening, which can deform components. Regularly inspecting and replacing worn parts prevents costly repairs and downtime. Keeping a detailed log of adjustments also helps troubleshoot issues quickly and replicate your setup effortlessly in future shoots.
Scaling Up and Future-Proofing Your Equipment
As your projects grow, so should your rig setup. Investing in modular components, such as adjustable counterweights and quick-release plates, provides flexibility and simplifies transitions between different shooting scenarios. I recommend exploring modular rig accessories that are compatible with your existing gear, saving time and effort during setup and teardown. Looking ahead, advancements in smart rig systems embedded with sensors and IoT connectivity are likely to revolutionize how we monitor and maintain our equipment in real-time, further reducing downtime and enhancing shot stability.
How do I keep my camera rig in tip-top shape over time?
To ensure your camera rig remains reliable, adopt a disciplined maintenance routine utilizing tools like a precision screwdriver, cable sleeves, and a digital level. Regularly inspecting and tightening all components prevents unplanned issues and extends your equipment’s lifespan. Remember, cleanness, proper lubrication, and secure fittings are the foundation of a durable setup. For advanced maintenance techniques, I recommend trying out tougher thumb screws to secure accessories firmly and avoid accidental slips during critical shots. Incorporate these practices today, and your gear will reward you with years of dependable performance.
Lessons the Hard Way That Changed My Approach
One crucial insight I wish I had embraced earlier is that perfect weight balance isn’t just about equipment; it’s about understanding how each component interacts with your body and shooting style. I once overlooked the importance of regular maintenance, only to find my gear malfunctioned during a critical shoot—trust me, routine checks save time and frustration. Additionally, I learned that investing in modular accessories pays off in adaptability, especially when switching between compact handheld shots and heavier cinematic setups. Finally, I realized that patience during setup and fine-tuning is key—rushing tends to undo all your previous efforts and introduces instability into your shots.
Tools and Resources That Changed My Workflow
For anyone serious about maintaining and optimizing their camera rig, I swear by a few essential tools: a precision screwdriver set with magnetic tips for quick adjustments, high-quality silicone cable sleeves to keep wiring tidy and durable, and a digital spirit level for ensuring perfect balance before shooting. As for educational resources, the Essential Shoulder Rigs guide provided invaluable insights into load distribution, while Mastering Camera Rigs helped me understand the nuances of rig assembly and fine-tuning. These resources have become my go-to references for troubleshooting and improving my setup over time.
Embrace the Journey, Not Just the Perfect Setup
Investing in a well-balanced, reliable rig transforms your filmmaking experience—from reducing physical fatigue to delivering steady shots that impress clients and viewers alike. Remember, every great filmmaker starts with the willingness to learn and adapt, facing challenges head-on with patience and curiosity. So, if you’re ready to elevate your craft, take the time to refine your rig—your future shots will thank you. Are you currently facing stability issues with your setup? Share your experiences below, and let’s learn together how to make every shot flawless.


![How to Balance a 20lb Shoulder Rig Without Back Pain [2026]](https://rigs.creatorrigreviews.com/wp-content/uploads/2026/03/How-to-Balance-a-20lb-Shoulder-Rig-Without-Back-Pain-2026-300x300.jpeg)