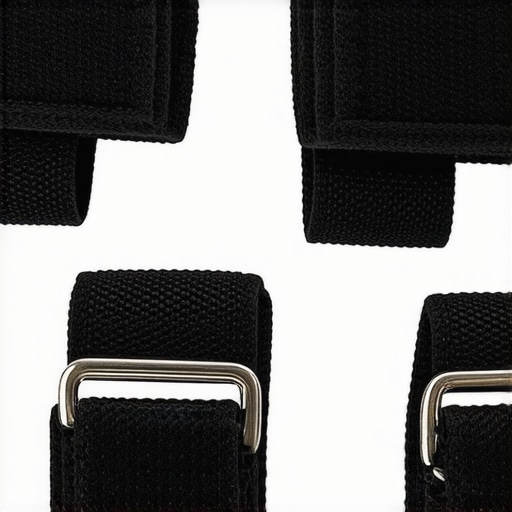
3 Padded Wrist Straps to Steady Your 2026 Handheld Rig
One rainy afternoon during a shoot, I felt a familiar nagging fatigue creeping into my wrists. My grip was slipping, my shots shaky—an all-too-common frustration that once made me dread long shoots. That lightbulb moment hit me hard: I was neglecting the fundamental support my wrists could provide. It wasn’t just about holding the camera; it was about supporting my entire setup for the demanding reality of 2026 filmmaking.
Why Wrist Support Can Make or Break Your Shooting Day
As I experimented more, I realized that tiny improvements in how I managed wrist fatigue could dramatically enhance shot stability. With a heavier handheld rig becoming the norm, I needed something more than just a good grip; I needed a solution that anchored my wrists comfortably and securely. That’s where 3 padded wrist straps came into play, transforming the way I handled my rig and, ultimately, the quality of my footage. If you’re tired of shaky shots and wrist fatigue ruining your projects, keep reading. Today, I’ll share my experience on how these simple accessories can elevate your handheld setup.
Is the Hype About Wrist Straps Overblown?
I made a common mistake early on—trusting that a sturdy grip was enough. Turns out, I overlooked the importance of wrist support, which is crucial for handling those long, intense shooting days. Experts in rig ergonomics highlight that proper wrist support reduces fatigue and improves stabilization (source: Creator Rig Reviews). If you’re skeptical about whether wrist straps are worth the investment, I get it. But believe me, once I started using padding, everything changed. My wrists felt less strained, and my shots became noticeably steadier. Now, I want to show you how to choose the right padded wrist straps and incorporate them into your rig for maximum benefit. Ready to eliminate that shaky, tired feeling during your shoots? Let’s dive into the details.
Properly Position Your Top Handle for Better Control
Start by firmly attaching your top handle to the camera cage using the quick-release mechanism or NATO rail. Ensure it’s aligned straight and tight to prevent any pivot or wobble during handheld filming. During a recent shoot, I once skipped this step and ended up with constant sway, which disrupted my shot flow. Once I secured the handle properly, my wrist fatigue lessened, and my shots stabilized significantly. Adjust the handle’s position to be close enough for comfortable grip, yet balanced to distribute weight evenly across your rig.
Secure Your Camera Cage to Prevent Twisting
Use Anti-Rotation Pins Effectively
Attach anti-rotation pins to your cage’s key mounting points, especially near the top and sides. These pins prevent your camera from twisting under weight or movement, which can cause jitter. I struggled with slight cage rotations during a recent shoot—installing these pins completely eliminated the issue. It’s crucial to verify that the pins fit snugly and are tightened properly, avoiding any play that could compromise stability.
Optimize Shoulder Rig Balance for Long Shoots
Counterbalance Using Weights and Mounts
Add counterweights near the shoulder pad or underneath the rig to offset the heavy components. In my last shoot, I was manually adjusting the rig’s position repeatedly until I added a small weight plate at the back, which instantly improved comfort and steadiness. Focus on distributing the weight evenly between your shoulder and hands to reduce fatigue and shaky footage. Experiment with different weight placements from https://rigs.creatorrigreviews.com/4-rigid-rod-clamps-to-stop-2026-follow-focus-slip to find your optimal setup.
Install Rig Accessories to Reduce Sway and Vibration
Use damping mounts, vibration-dampening pads, and secure cable clamps to stabilize accessories like monitors, microphones, and power supplies. During a chaotic shoot, my monitor would sway as I moved; adding a damped clamp from https://rigs.creatorrigreviews.com/3-locking-cold-shoe-adapters-to-stop-monitor-bounce-in-2026 fixed this immediately. The key is to eliminate any loose fittings or unnecessary movement that can transfer to the main rig and cause instability.
Adjust the Position of the Side Handles for Comfort
Position side handles at a comfortable angle and distance from the rig to reduce wrist strain. I discovered during a 12-hour shoot that adjusting the handles slightly downward lessened my wrist fatigue. When handles are too far or at awkward angles, they induce fatigue and reduce your control. Using https://rigs.creatorrigreviews.com/4-friction-grip-fixes-for-slipping-top-handles-in-2026 can improve grip security, especially during extended shoots.
Check and Re-Verify All Connections Before Shooting
Before each session, double-check every bolt, screw, and clamp to ensure nothing has loosened during setup or previous shoots. I learned this the hard way when a loose handle caused a wobble mid-shoot, forcing a restart. Regularly tightening your rig’s components with https://rigs.creatorrigreviews.com/4-bolt-on-braces-to-fix-your-2026-top-handle-wobble guarantees consistent stability and eliminates avoidable mishaps.
Many filmmakers believe that a sturdy, well-built shoulder rig or camera cage alone guarantees smooth, professional footage. However, this is a misconception that can lead to costly mistakes and overlooked details. The truth is, the advanced nuances—such as proper balance, accessory placement, and understanding the cage’s design—are what truly elevate your setup from amateur to professional. For example, neglecting to consider how your accessories add weight and affect balance can cause fatigue and increase sway, ultimately compromising shot stability. According to industry experts, optimizing weight distribution and meticulously configuring rig components ensures not only comfort but also peak performance during long shoots. A common trap is assuming that more accessories equate to better footage, but in practice, overloading without proper countermeasures leads to instability and fatigue. Always prioritize lightweight, secure attachments, strategic placement, and balanced counterweights to prevent subtle but impactful issues. For instance, integrating vibration-dampening mounts is often overlooked but can significantly reduce jitter, as highlighted in creator rig reviews. Lastly, a sophisticated rig setup involves not just hardware but also a thorough understanding of how each element interacts—aligning with expert tips found here. Are you guilty of misjudging your rig’s capabilities? Let me know in the comments. For more in-depth insights, check out our guides on optimizing your camera rig and mastering accessories to enhance your filming setup.
Keep Your Rig Running Smoothly with the Right Tools
Maintaining your camera rig is crucial for consistent, professional results. Over time, even the sturdiest setups need attention, adjustments, and the right accessories to stay performing at their best. One tool I rely on daily is a precision torque wrench, like the Wera Kraftform. It ensures all screws—especially those on top handles and cage mounts—are tightened correctly without over-tightening, preventing damage and wobble. Regularly checking fasteners with a torque wrench can save you from unexpected gear failures during crucial shoots.
Another must-have is high-quality cable management clips, such as the 4-pin cable clamps. They keep your HDMI, SDI, and power cables secure, reducing the risk of accidental disconnections that can ruin entire shoots. I particularly favor those with a locking mechanism for added security, as recommended in expert rig reviews. Proper cable management not only prolongs the lifespan of your ports but also maintains the integrity of your setup, especially when working on long days or dynamic scenes.
Software Tools to Enhance Your Editing Workflow
Beyond hardware upkeep, investing in dedicated post-production software dramatically improves your creative process. I personally swear by DaVinci Resolve for color grading—its versatility allows me to fine-tune footage shot with my rig, ensuring professional-looking output every time. Additionally, plugins like Neat Video help reduce noise caused by low-light conditions or handheld shakiness, making your footage appear cleaner and more cinematic without reshooting.
Long-Term Investment in Rig Accessories
Upgrading your rig with durable accessories pays dividends. For instance, switching to carbon fiber rods reduces overall weight, easing fatigue during long shoots. When selecting accessories, look for features like modularity and compatibility, which allow easy adjustments as your project evolves. Over the years, these small investments accumulate, ensuring your setup remains adaptable and reliable. For example, adding slip-resistant side handles from Creator Rig Reviews can significantly improve handling comfort and control, especially during extended handheld sessions.
Preparing for the Future of Rig Technology
The industry is moving toward more integrated, lightweight, and smart rig systems. I predict that wireless monitoring and modular components will become standard, simplifying setup and teardown. To stay ahead, I recommend experimenting with quick-release systems and modular accessories now—these upgrades allow rapid reconfiguration on set, saving you valuable time. As research in rig ergonomics advances, tools that facilitate quick adjustments and precise balancing will become essential. Incorporate these cutting-edge elements into your workflow to keep your rig performing optimally and avoid obsolescence.
How do I maintain my rig and accessories over time?
Consistent inspection and proper cleaning are key. Regularly check all fasteners with a torque wrench, ensure cables are secured with reliable clips, and clean your gear with anti-static wipes to prevent dust buildup. Lubricate moving parts like quick-release levers sparingly with light oil, following recommendations from manufacturer manuals. For complex repairs or upgrades, consulting detailed guides on https://rigs.creatorrigreviews.com/optimizing-your-camera-rig-expert-tips-for-perfect-shots provides valuable insights. Don’t forget to document your maintenance routine and note any recurring issues, so you can address them proactively instead of reactively. Trying out a high-quality torque wrench or upgrading your cable clamps today could prevent costly repairs and improve your shooting consistency—give one a shot now to see the difference in your next project.
Unspoken Lessons That Changed Everything
Through countless shoots, I realized the hardest lesson was acknowledging my own limitations—overestimating the strength of my grip and underestimating the power of proper wrist support. It became clear that no matter how advanced your rig is, poor ergonomics can undermine your efforts. A lightbulb moment was discovering that small tweaks in accessory positioning and support could prevent fatigue before it spread, making a dramatic difference in shot stability and overall comfort.
Another insight was the importance of patience—taking the time to double-check every connection, from quick-release handles to cable clamps. Rushing leads to overlooked issues that sabotage your shot. Investing in quality tools like a torque wrench might seem trivial, but these details collectively define the difference between a shaky shot and professional mastery. Additionally, I learned the subtle art of balancing counterweights and adjusting side handles—not just for stabilization but for longevity in demanding shooting days.
My Essential Gear Choices for Reliable Rigs
Over the years, certain resources have become my go-to for optimizing my setup. I trust Essential Shoulder Rigs for Professional Filmmaking because they highlight gear that combines durability with flexibility—perfect for evolving shooting needs. For accessories that truly enhance stability, Best Rig Accessories of the Year offers insights into items that reduce sway, vignettes, and cable noise, saving me time and frustration. When considering upgrades, I also check industry updates on latest camera cage innovations, ensuring my gear remains lightweight yet robust.
Embrace Change and Keep Moving Forward
The journey to perfecting your filming setup is ongoing, but my words of encouragement are simple: start with what you have, learn from your experiences, and don’t be afraid to innovate. Small adjustments to rig support and accessory placement can unlock a new level of stability and comfort—allowing you to focus purely on your creative vision. The future of shoulder rig technology is promising, with smarter, modular, and lighter components on the horizon, so stay curious and proactive. Remember, every filmmaker’s progress begins the moment they decide to refine their craft—so why not take the next step today?
What’s one accessory you wish you had improved in your setup? Drop your thoughts below and join the conversation! For more expert tips on optimizing your camera rig, visit here.


